How to create surveys
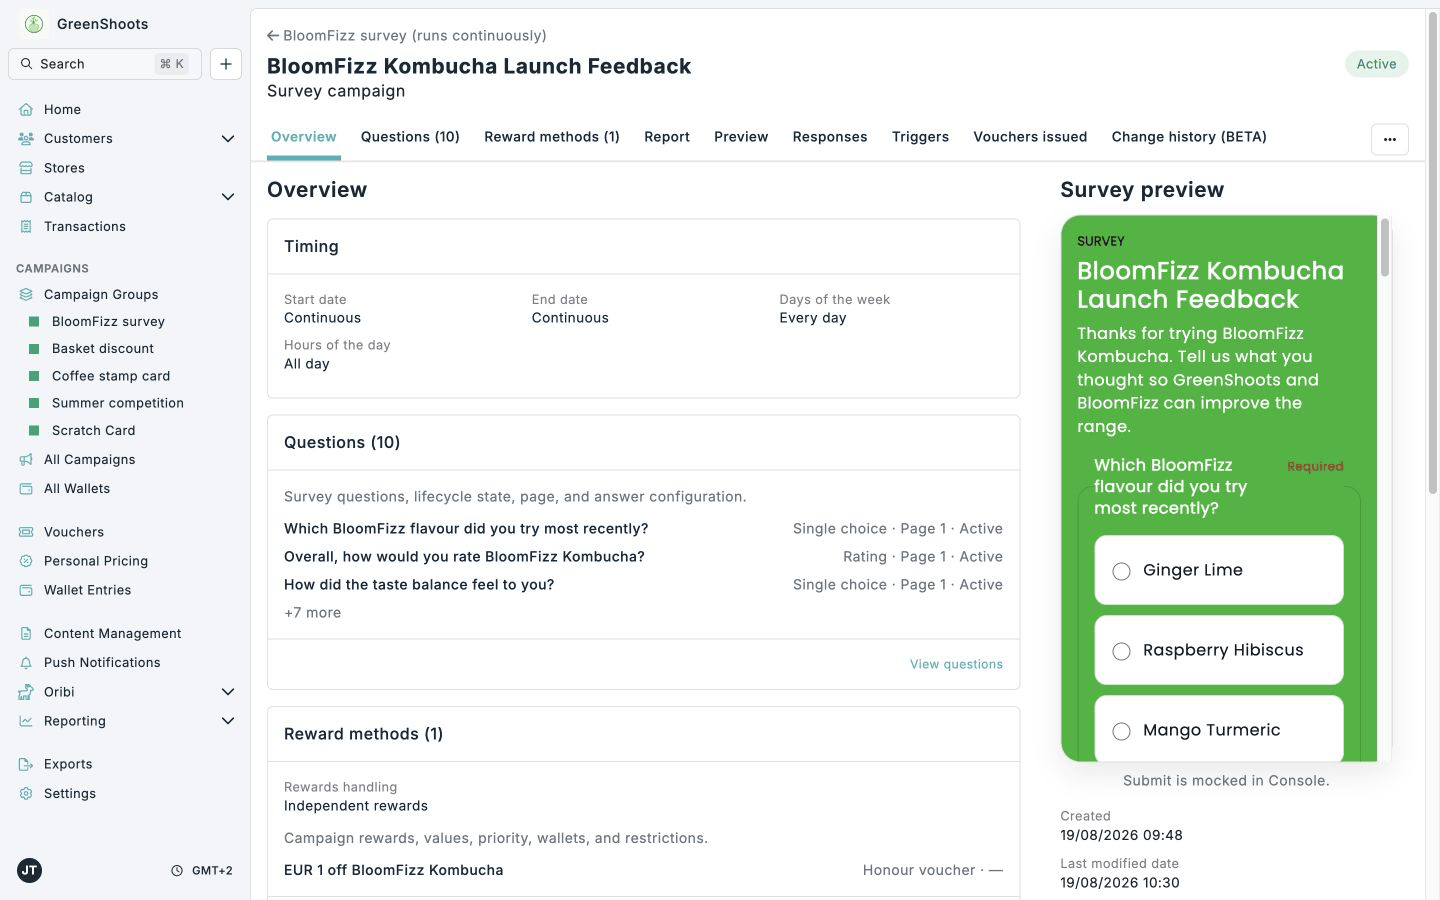
Surveys are created from the campaign group flow. In Spaaza Console, the survey campaign defines the questions customers answer, the reward issued after completion, and the reporting surfaces used to review results.
Expected result
- You create a survey campaign with customer-facing questions and answer options.
- Customers can complete the survey through the connected mobile or web experience.
- Spaaza issues the configured reward after completion.
- Console users can review the survey Questions, Reward methods, Report, Preview, and Responses tabs on the campaign.
Prerequisites
- You can access Campaign groups and campaign forms in Spaaza Console.
- You know the questions, answer types, and answer options you want customers to see.
- You know what reward should be issued when a customer completes the survey.
- If the survey should only be available to a specific audience, create that audience first in Customer Segments.
- Your mobile app, mobile web journey, or integration is ready to fetch and submit survey answers using the survey endpoints.
Build this solution in Console
Step 1: Create or open the campaign group
- Open the Campaign groups page.
- Click Create a group if this survey should live in a new group, or open the campaign group that already represents the promotion or programme.
- Set the group timing if the survey should only run during a fixed period.
- Save the group and open it.
Step 2: Start a Survey campaign
- In the campaign group, click Add campaign.
- Select Reward.
- In Create a campaign, choose Survey.
- Confirm the form opens with Survey campaign in the header and a Survey section in the form.
Step 3: Add the survey questions
- In Basics, set the campaign Title. Use wording that helps your team recognise the survey later in reports.
- In Survey, edit the first question.
- Set Prompt to the exact question customers should see.
- Choose the Type that matches the answer you need. Available options include Single choice, Multiple choice, Rating, NPS, Short text, Long text, and Consent.
- Keep Required selected when the customer must answer before completing the survey.
- For choice questions, edit Option 1, Option 2, and any additional options you need. Click Add option when the question needs more than two choices.
- Click Add question for each additional question.
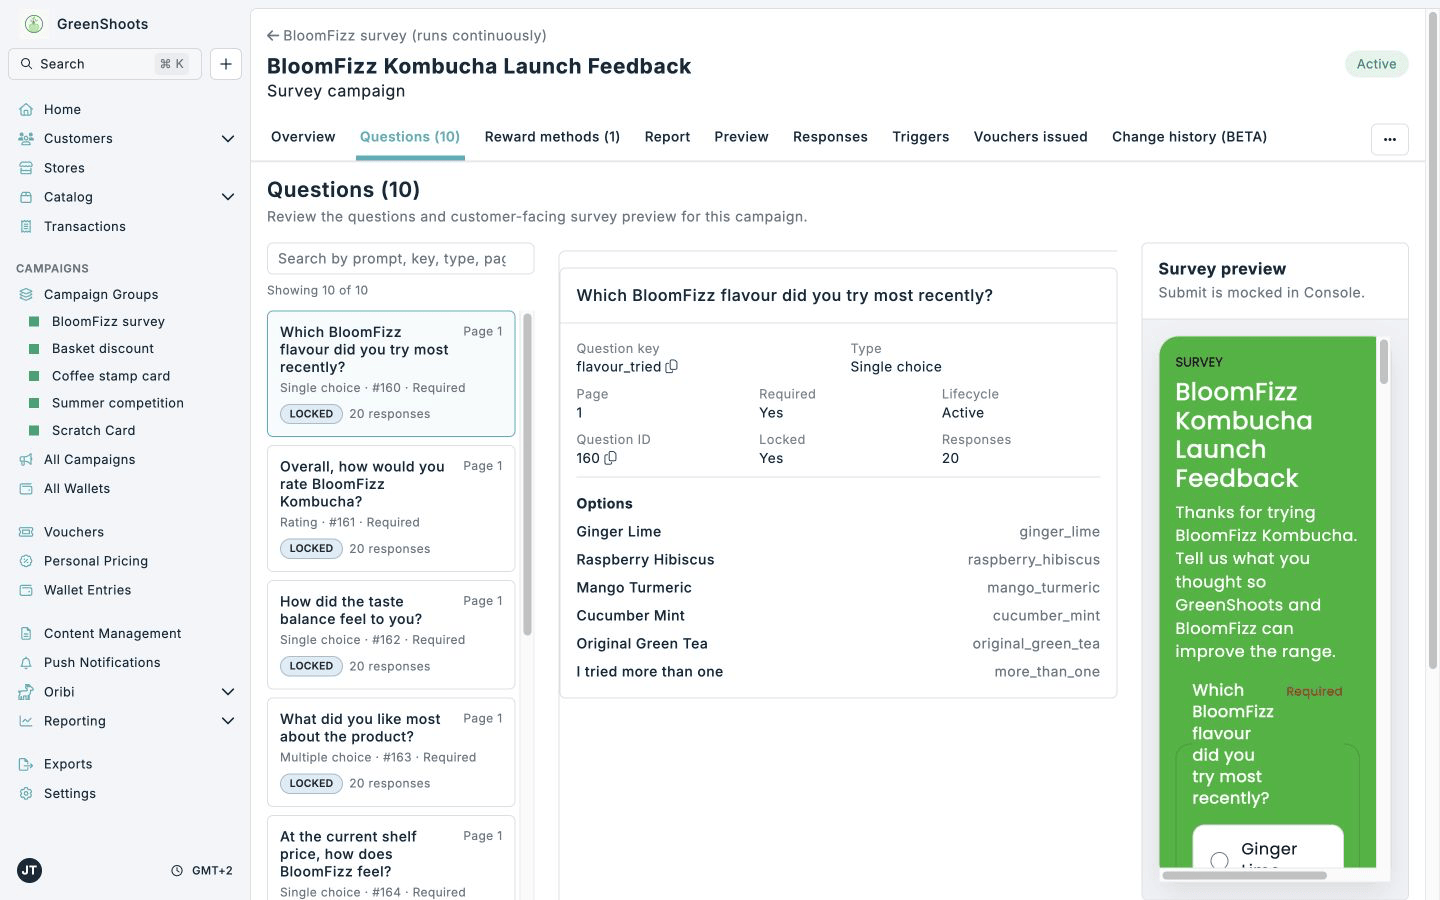
- When the survey has more than one question, use the linked Questions (n) summary on Campaign to open the question workspace. Search the summary cards and select one question at a time to edit it while checking the live preview.
- For a longer question set, click Import from CSV and follow Importing survey questions from CSV.
- Use Advanced question settings only when you need to control the API Key or split the survey across pages with Survey page.
On mobile and tablet screens, Tips & guidance appears above the single-column question workspace. The inline survey preview is hidden at these widths; use the campaign Preview tab when you need to inspect the customer experience on a smaller screen.
Step 4: Configure the completion reward
- Scroll to Reward methods. When there is more than one reward, use the linked Reward methods (n) summary on Campaign to open the reward workspace.
- In Rewards handling, choose whether every qualifying reward should issue independently or one eligible reward should be selected by a random draw.
- Click Add reward.
- Choose the reward method that should be issued after completion, such as a voucher, discount, or wallet contribution.
- Configure the reward amount, voucher text, wallet destination, image, and other reward details required by the selected reward method.
- Set the reward method's Usage limit to cap how many times that reward can be issued. Survey reward methods do not use Budget, Reward limit, or Win chance restrictions. Campaign-level targeting and eligibility, such as Segments, is separate and still applies.
- If the survey is audience-specific, add the same audience logic in the campaign restrictions before saving.
Step 5: Save and activate the survey
- Review the activation hints on the right side of the form.
- Turn on Enable Campaign when the survey questions and reward setup are ready.
- Click Create Campaign.
- Open the campaign overview and confirm the context is shown as
survey.
Step 6: Review the survey experience
- Open Overview and use View questions or View reward methods in the summary cards to open the corresponding campaign tab.
- Open Questions (n) to search the saved questions, inspect their configuration, and compare them with the survey preview.
- Open Reward methods (n) to inspect reward values, priority, wallets, and restrictions.
- Open the campaign's Preview tab to inspect the survey structure as it will be rendered by the survey element.
Step 7: Analyse aggregate survey results
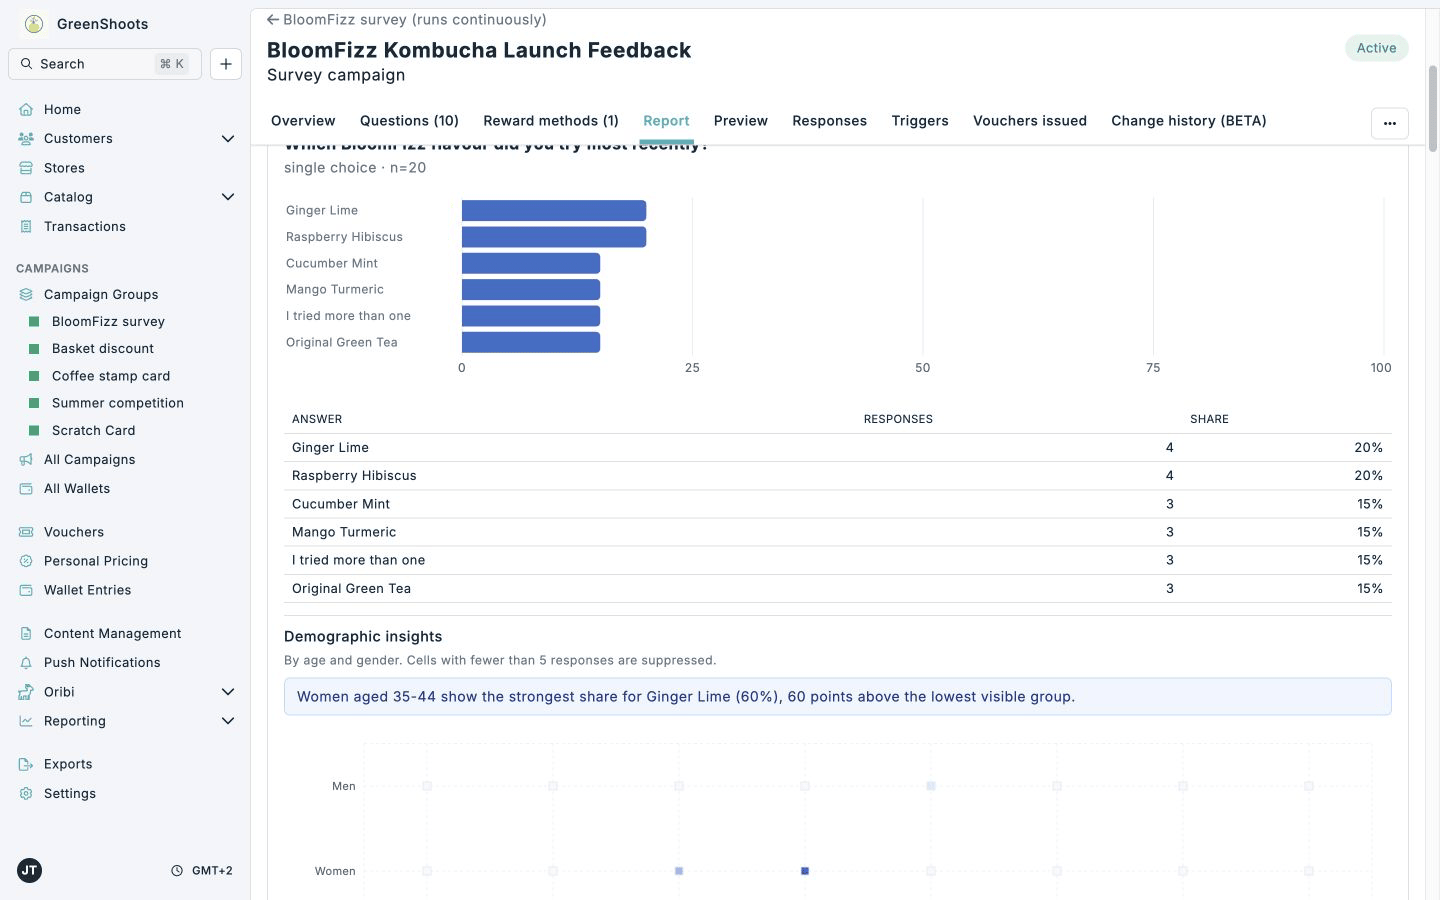
- Open the campaign and select Report.
- Use the summary at the top of the report to check how many responses were completed and how rewards were handled.
- Scroll through the question sections to compare answer counts and shares. Rating and NPS questions show their relevant averages or scores rather than choice shares.
- Review Demographic insights where they are available. Groups with too few responses are suppressed, so a sparse survey may not show every age and gender combination.
- For short-text and long-text questions, switch to Responses or export the data; free-text answers are not aggregated into report charts.
Step 8: Review and export individual responses
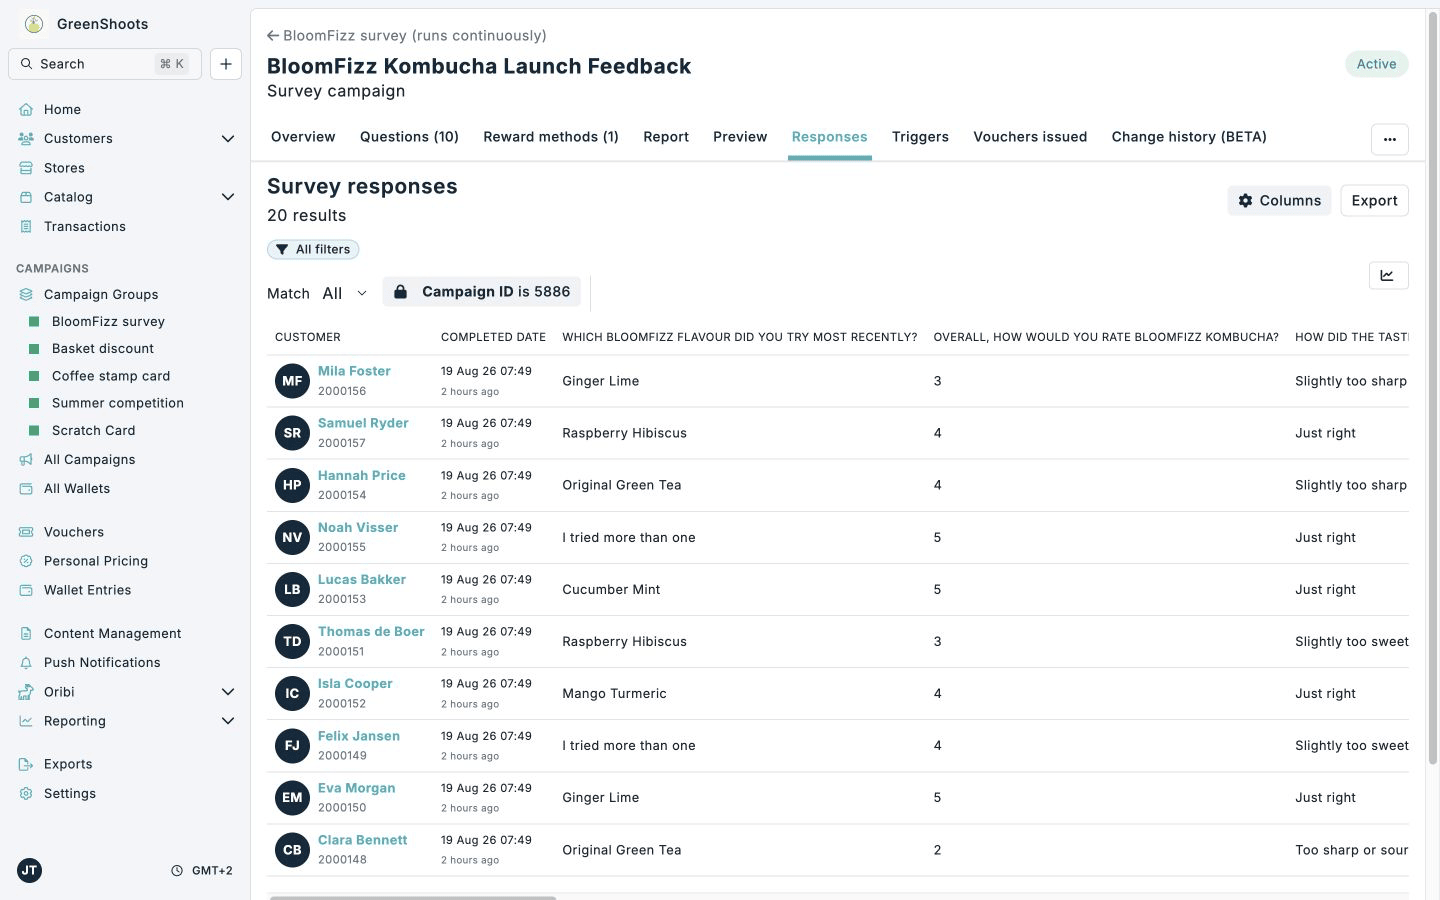
- Open the campaign and select Responses.
- Use All filters to narrow the response list. The campaign filter is already set to the campaign you opened.
- Click Columns to choose which survey answers and response fields are visible in the table.
- Review the customer, completion date, and answer values for each response.
- Click Export when you need a CSV for deeper analysis or sharing outside Console.
Connect the customer experience
The customer-facing survey is submitted through the survey API. Use the Composable campaign API reference for the survey definition and response endpoints, and make sure the app or web journey handles already-completed responses, required questions, and reward status clearly.
If something looks different
- If Survey is not available in Create a campaign, confirm you opened the Reward campaign flow from a campaign group.
- If Create Campaign is unavailable, review the activation hints and complete any missing survey question text, choice options, or reward method setup.
- If responses are missing from Report or Responses, confirm the customer experience is submitting answers for the same campaign ID.
- If text answers do not appear in the report charts, use Responses or CSV export; text answers are reviewed as response records rather than aggregated charts.