Managing content
In this section, we highlight the most important aspects of managing content. Managing content happens in the "Content management" section under "Apps" in the main menu of the Spaaza Console. Content configured here is displayed across both the mobile app and Embed Elements.
- Preview in Console
- Adding Campaigns
- Managing Pages
- Zone content setup
- Managing Unpublished Changes
- Styling Configuration
Previews in Console
The Content Management page has two viewing modes, controlled by the "Preview" toggle in the top-right corner:
- Preview off (default): Shows the Zone configuration on the left, with a compact preview of each Zone's Items on the right. The configuration column provides relevant information about each Item (Campaign) such as Audience, Timing, and Stores assigned. You can also see if a Campaign is Scheduled, Draft, or Active, and select several Items at once with the checkboxes.
- Preview on: Shows a full preview of how the Items are expected to show to the end user. Survey Items use the same interactive survey preview shown on the campaign's Preview tab. This is useful for verifying the visual layout before publishing.
When Preview is enabled, the preview toolbar provides the same viewport controls used by campaign previews:
- Desktop, Laptop, and Mobile: Select a common viewport width using the device buttons above the preview.
- Resizable preview edge: Hover over the dotted right border until the resize cursor appears, then drag the border left or right to adjust the viewport width.
Mobile App
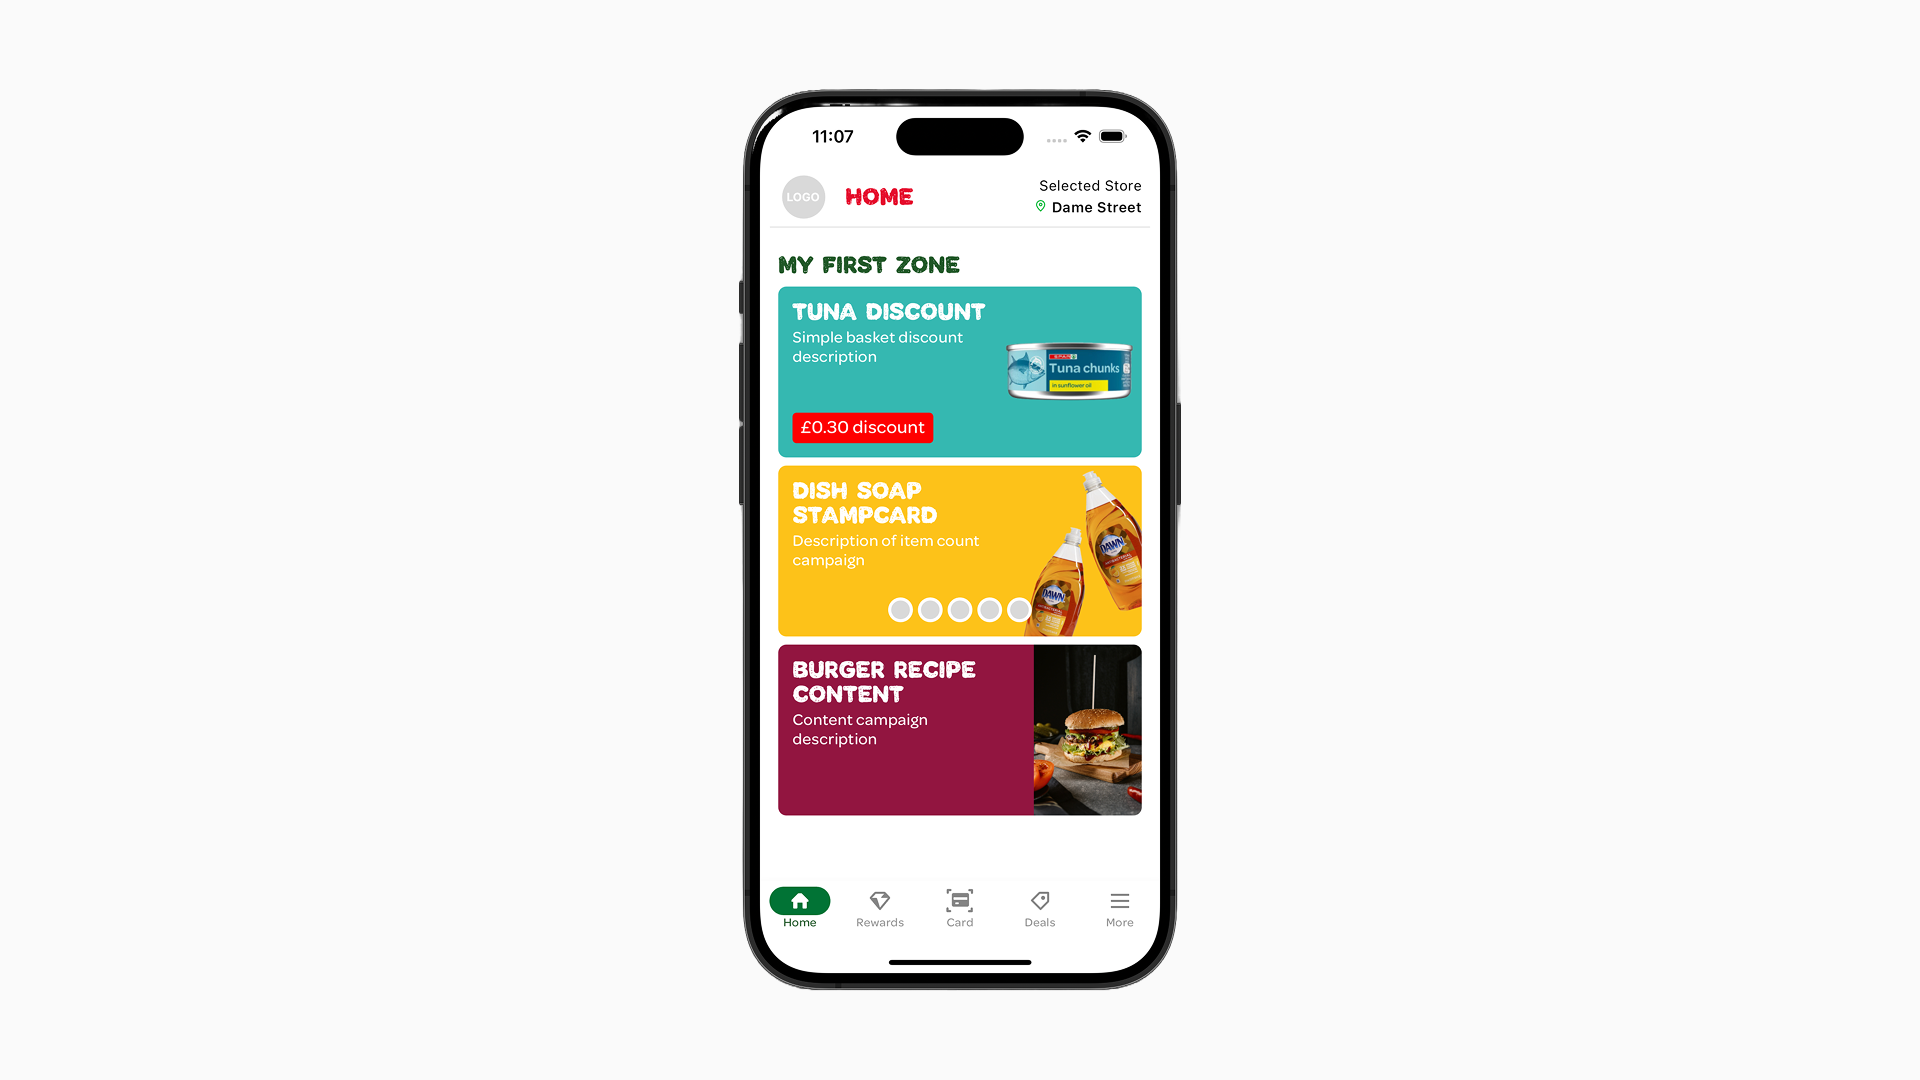
The mobile app and the content management system are continuously evolving, so the preview can differ from what is actually shown in the app. It is always advised to use the staging app to verify how a Content Item actually looks on the device.
By clicking on the three dots ("..."), you can view the Campaign (wrapped within the Item), edit the Campaign, or remove the current content Item from the Zone.
IMPORTANT
- Rest assured, deleting an Item does NOT delete the Campaign itself, as Zone Items and the actual Campaign are managed separately.
- Campaign Items with a status OTHER than "active" are NOT visible to end users.
Content and full preview:
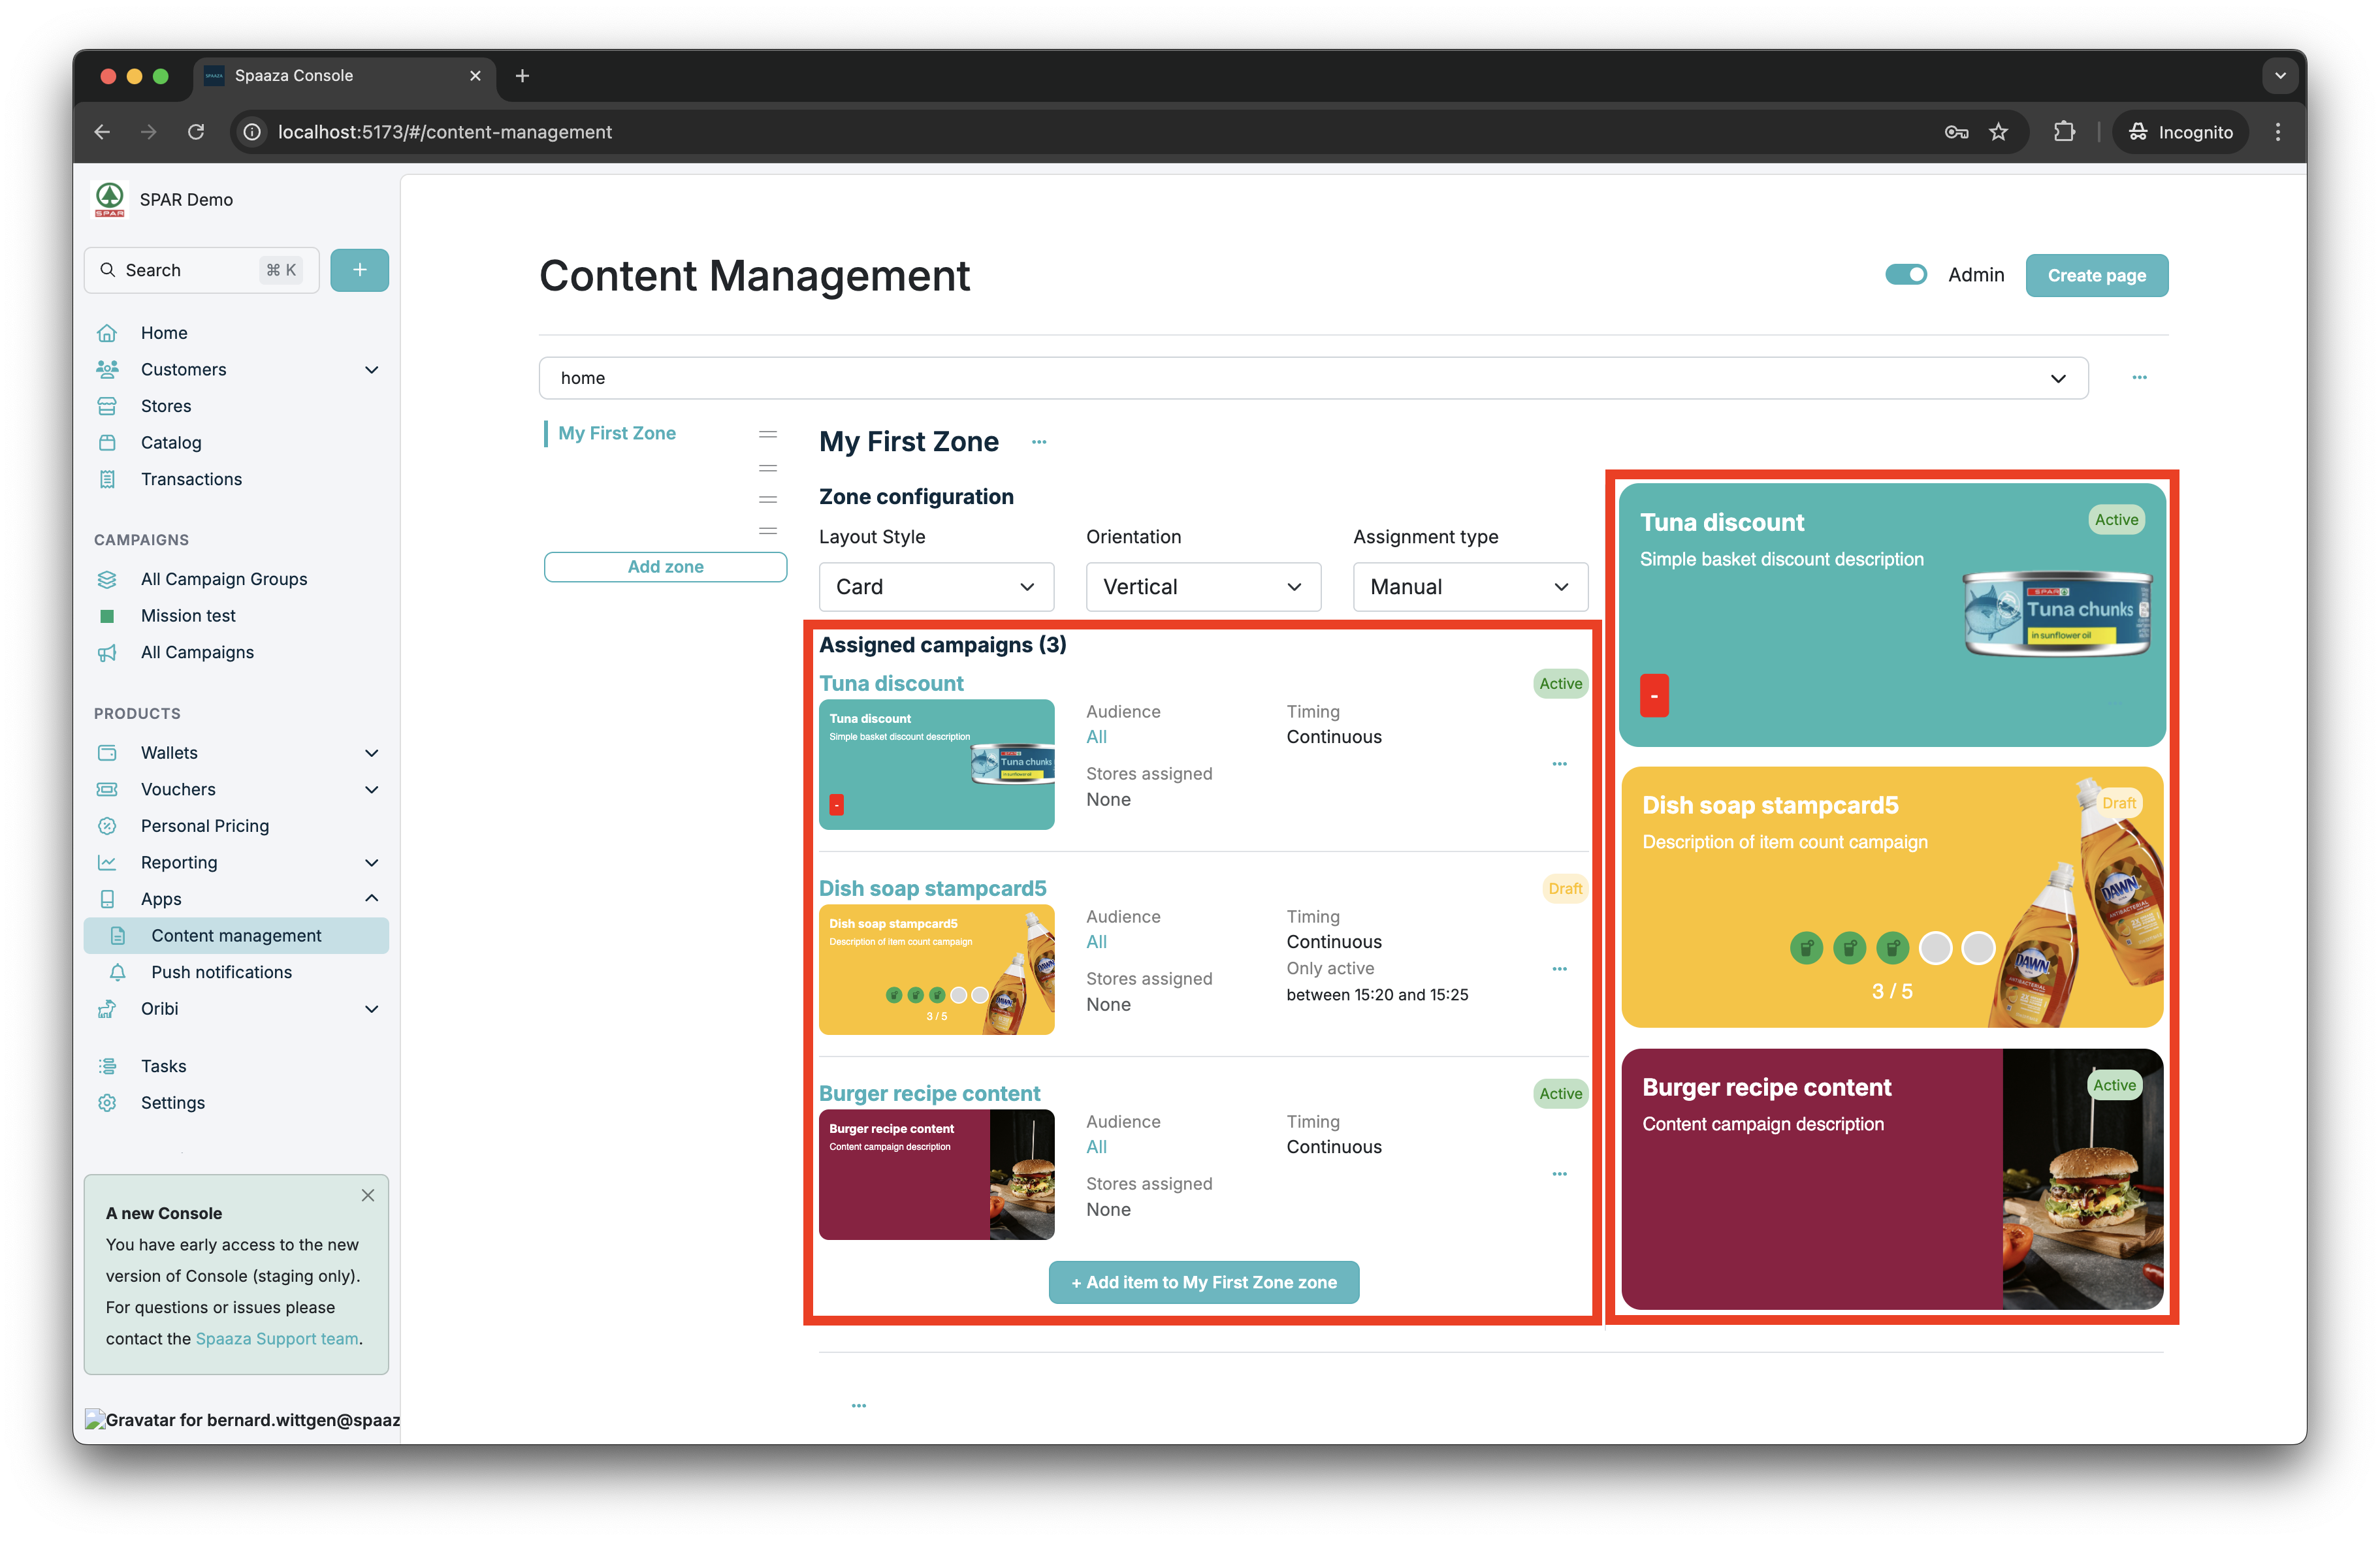
Zone configuration view (Preview off):
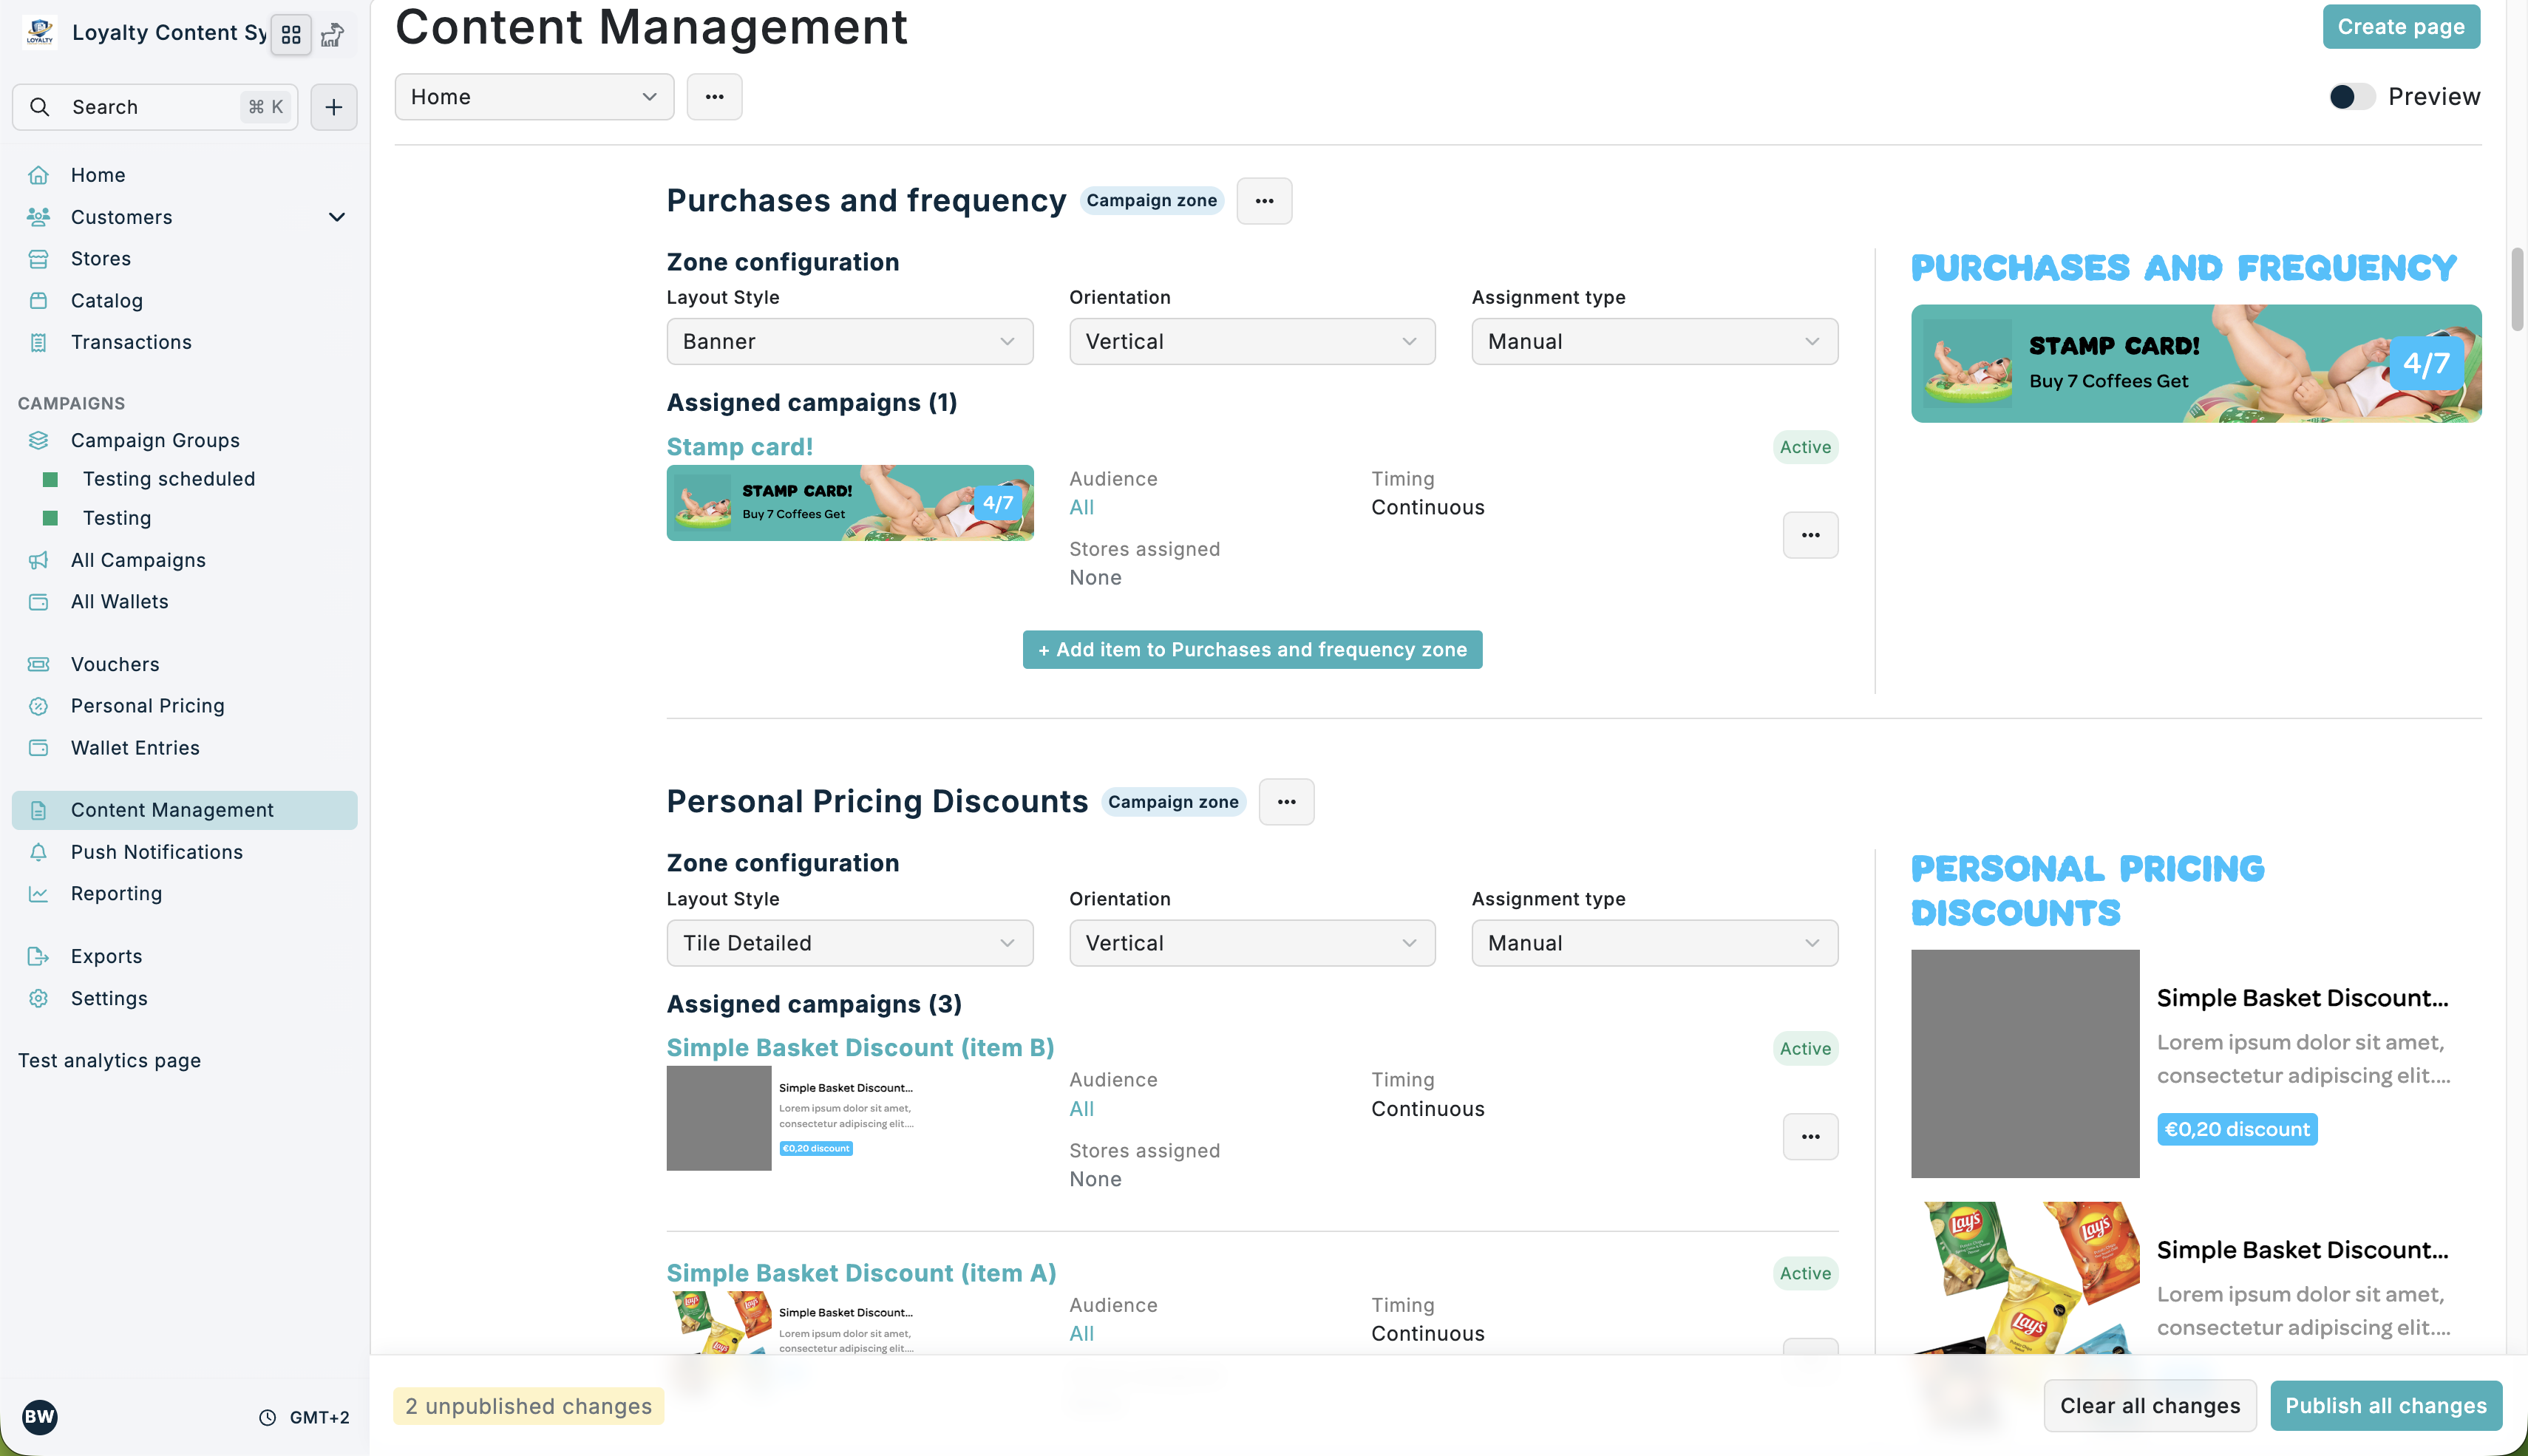
Full preview (Preview on):
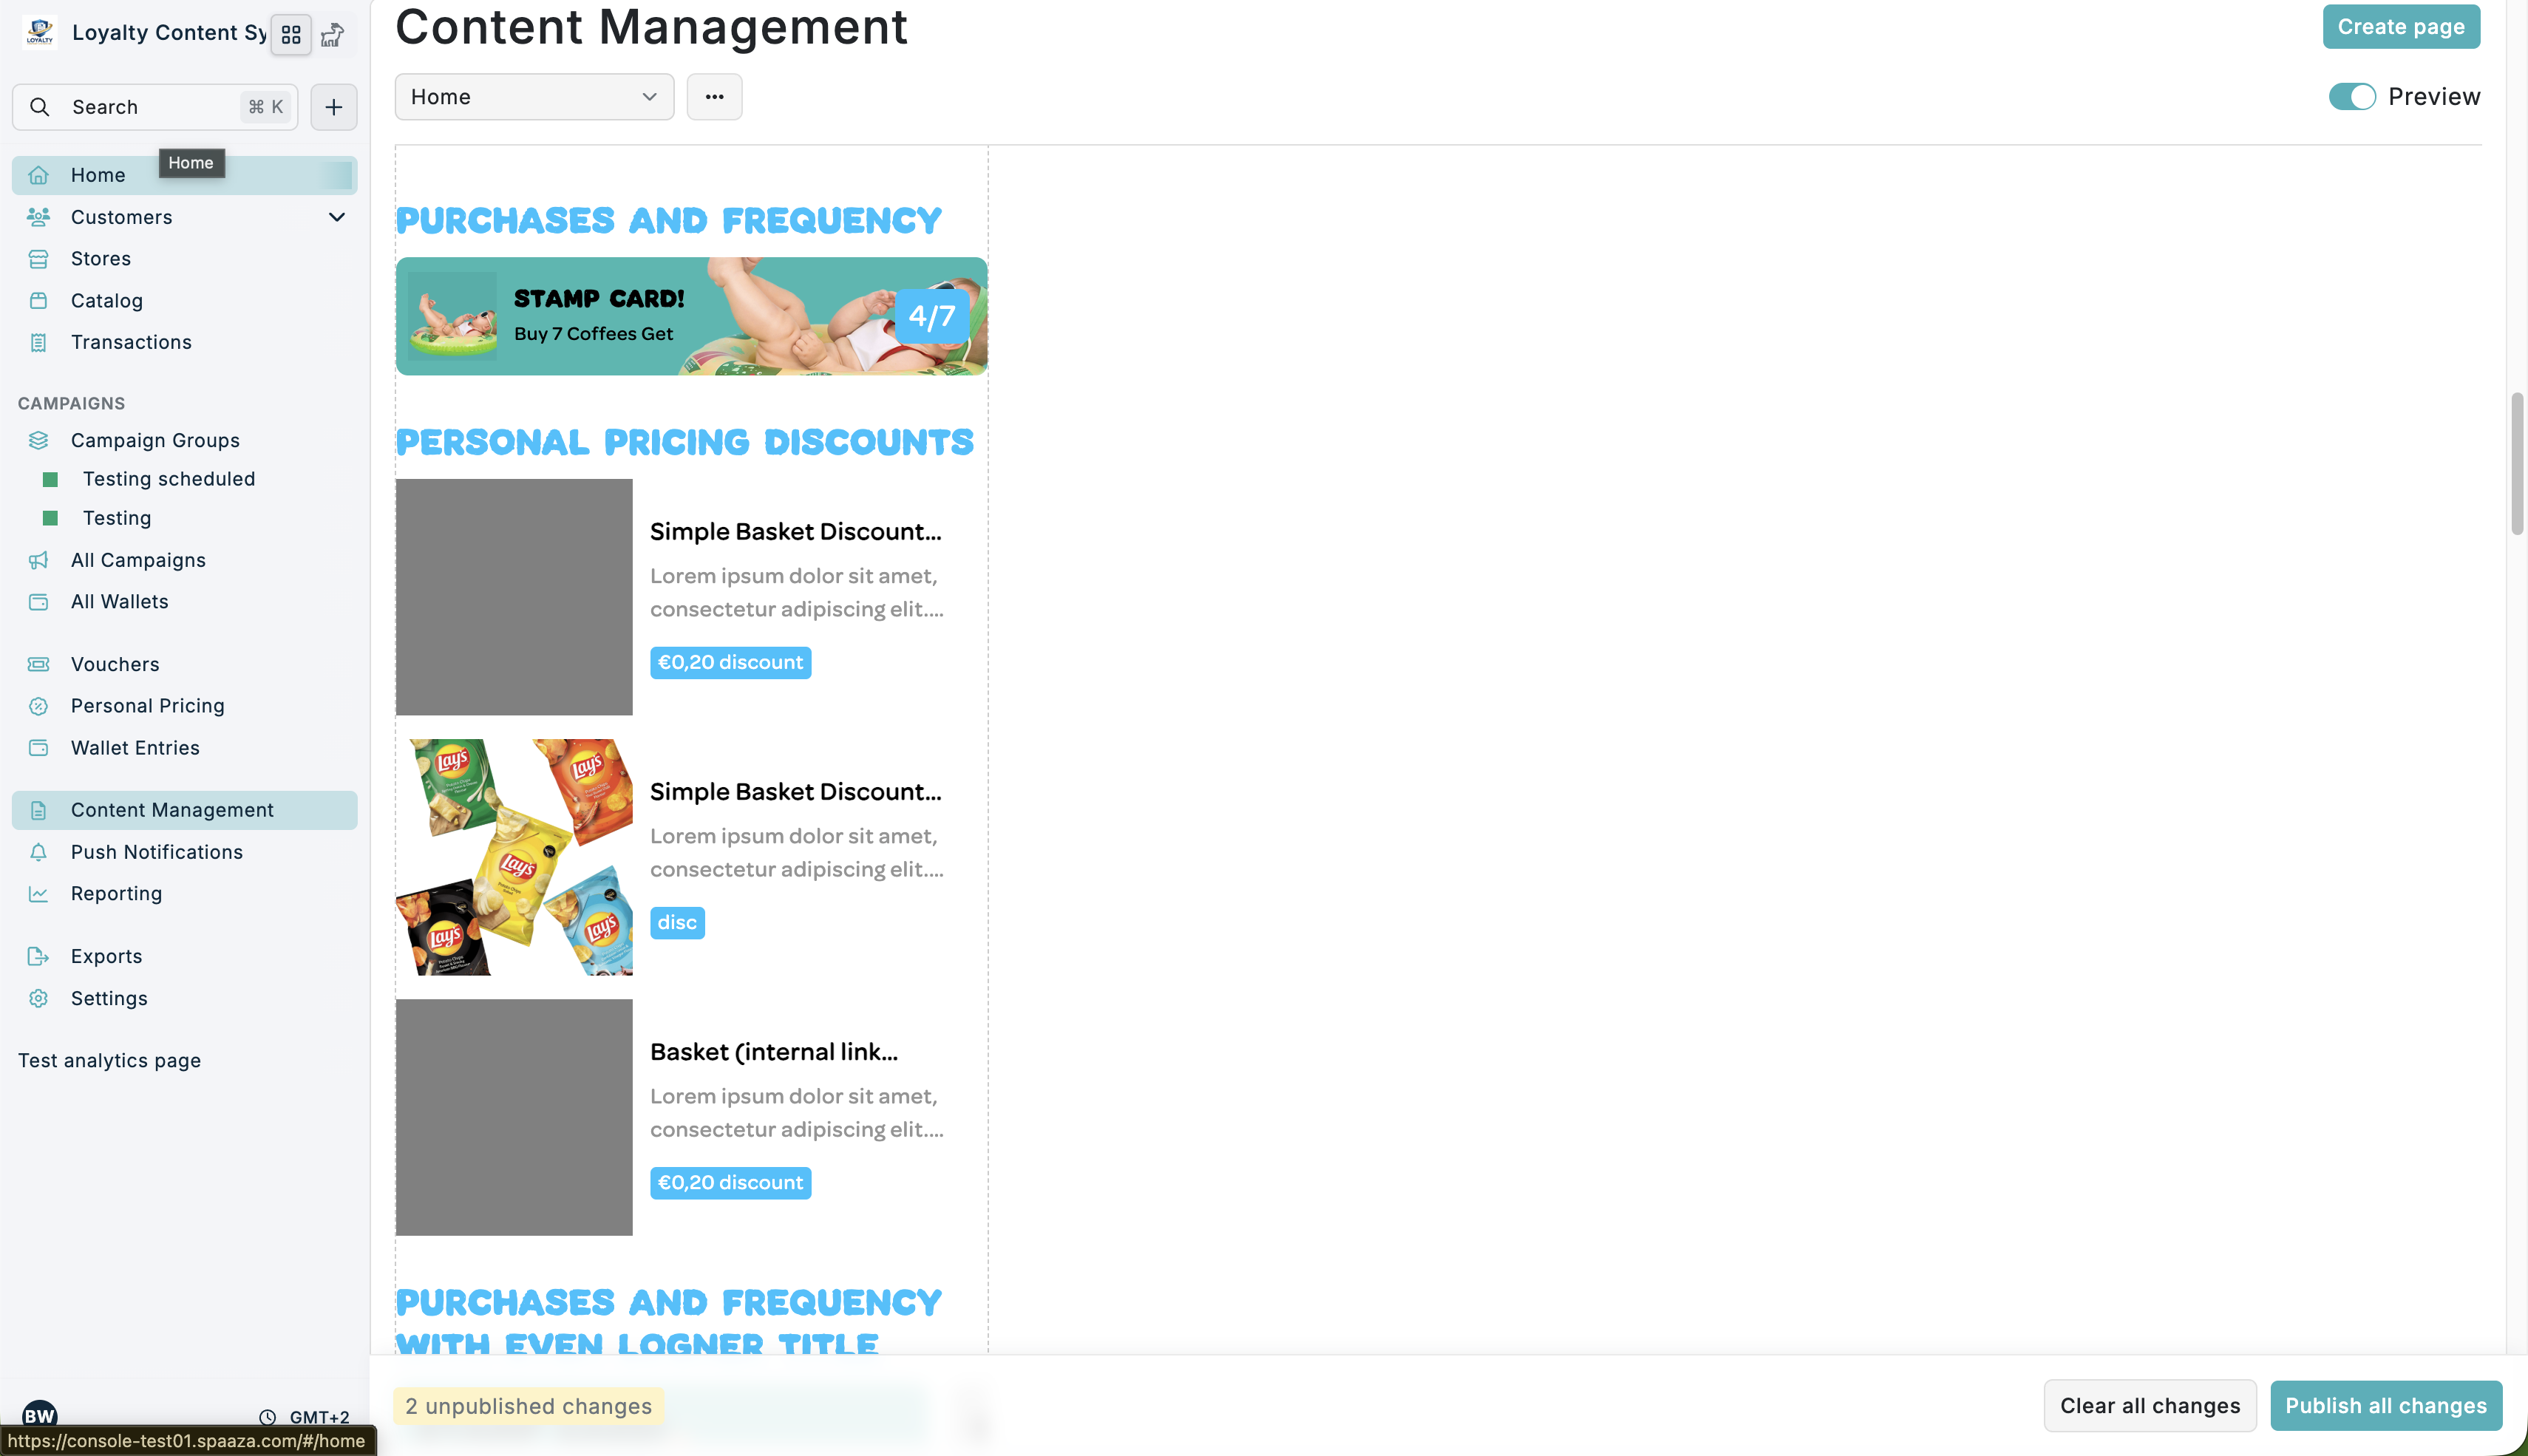
Adding Campaigns
Campaigns can be added as Content Items in the Content Management System. Start by creating and reviewing the Campaign's you have set up in Spaaza's Console. When in the Content Management section of console.
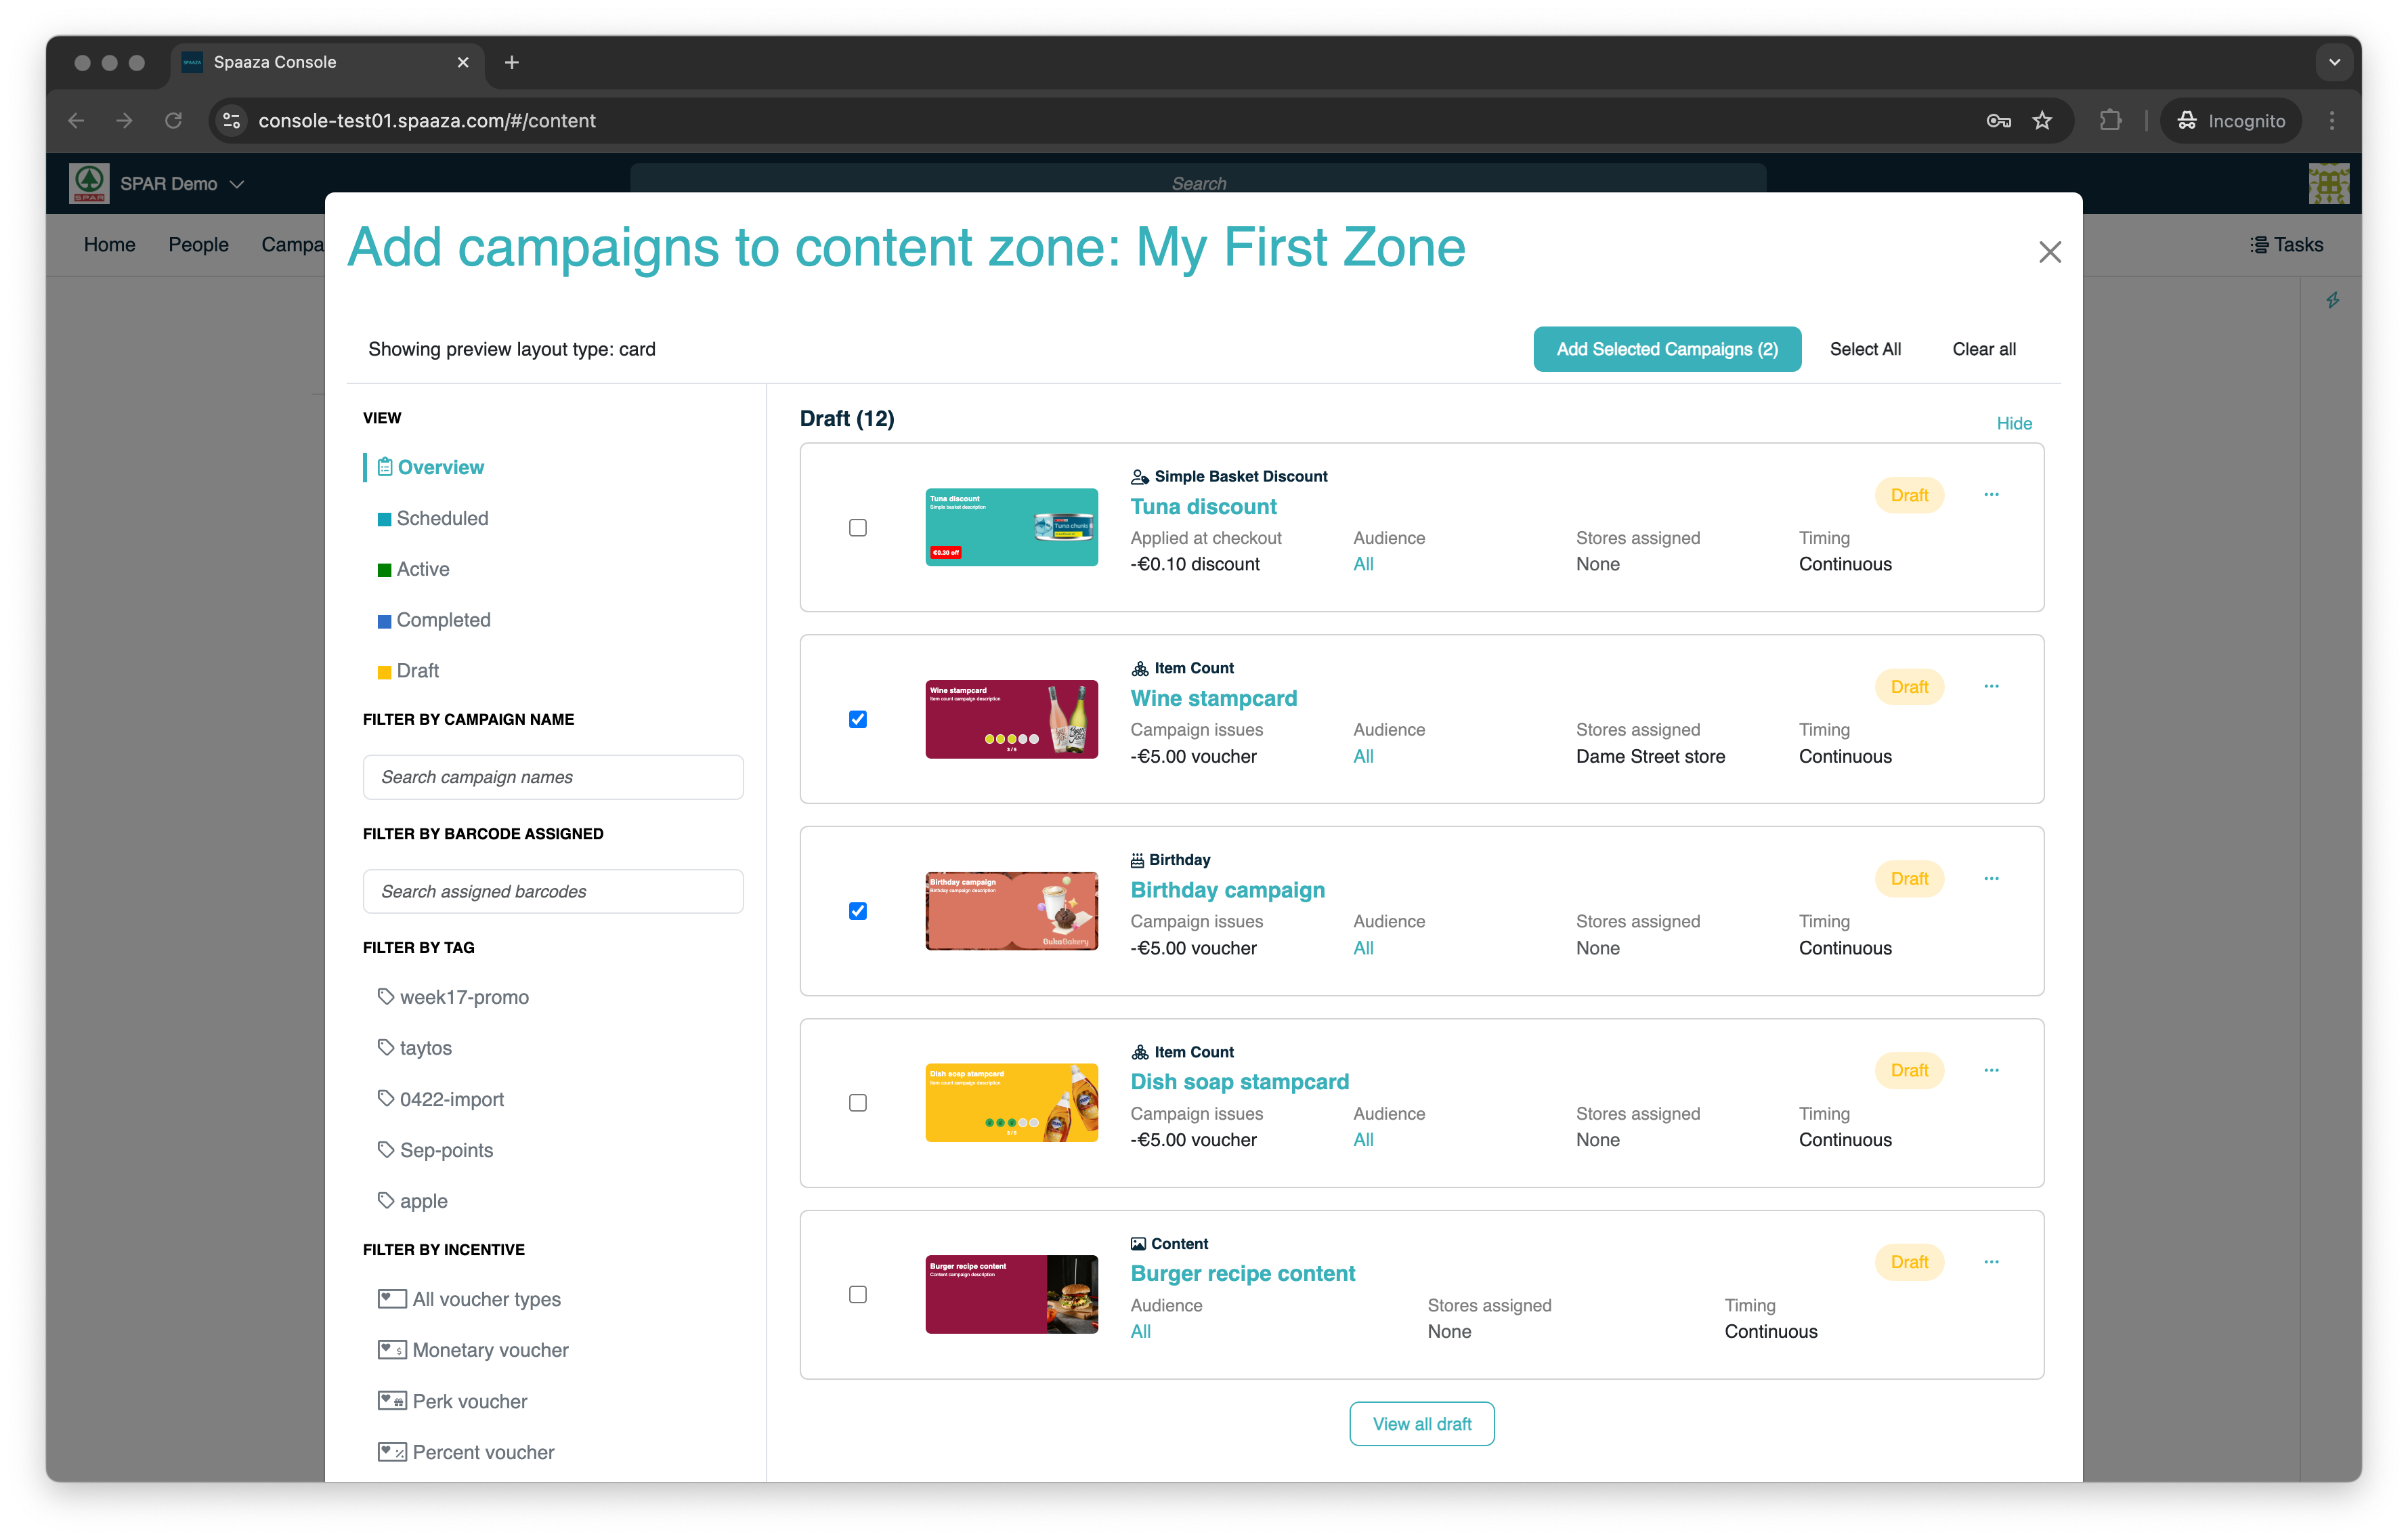
When you click the "Add Item to ZONE NAME Zone" button in the Zone content preview, you will see a similar overview that allows you to add Campaigns to a Zone.
While in this overview you can do the following:
- Filter Campaigns by Status, Name, Barcode, Tags, Reward type (campaign type), Campaign Type, or Content Type
- Add active Campaigns or add Campaigns that are scheduled to go live in the future (or are in draft)
- Add multiple Campaigns/content as Items to a Zone at once (or keep it to one only)
Altering Campaign
If you want to change something from a Campaign you set up as Content Item in the Content Management System click the three dots ("…") and "Edit campaign". A new browser tab will open with the form to edit this campaign.
Accessing Campaign overview & add Campaign content screen:
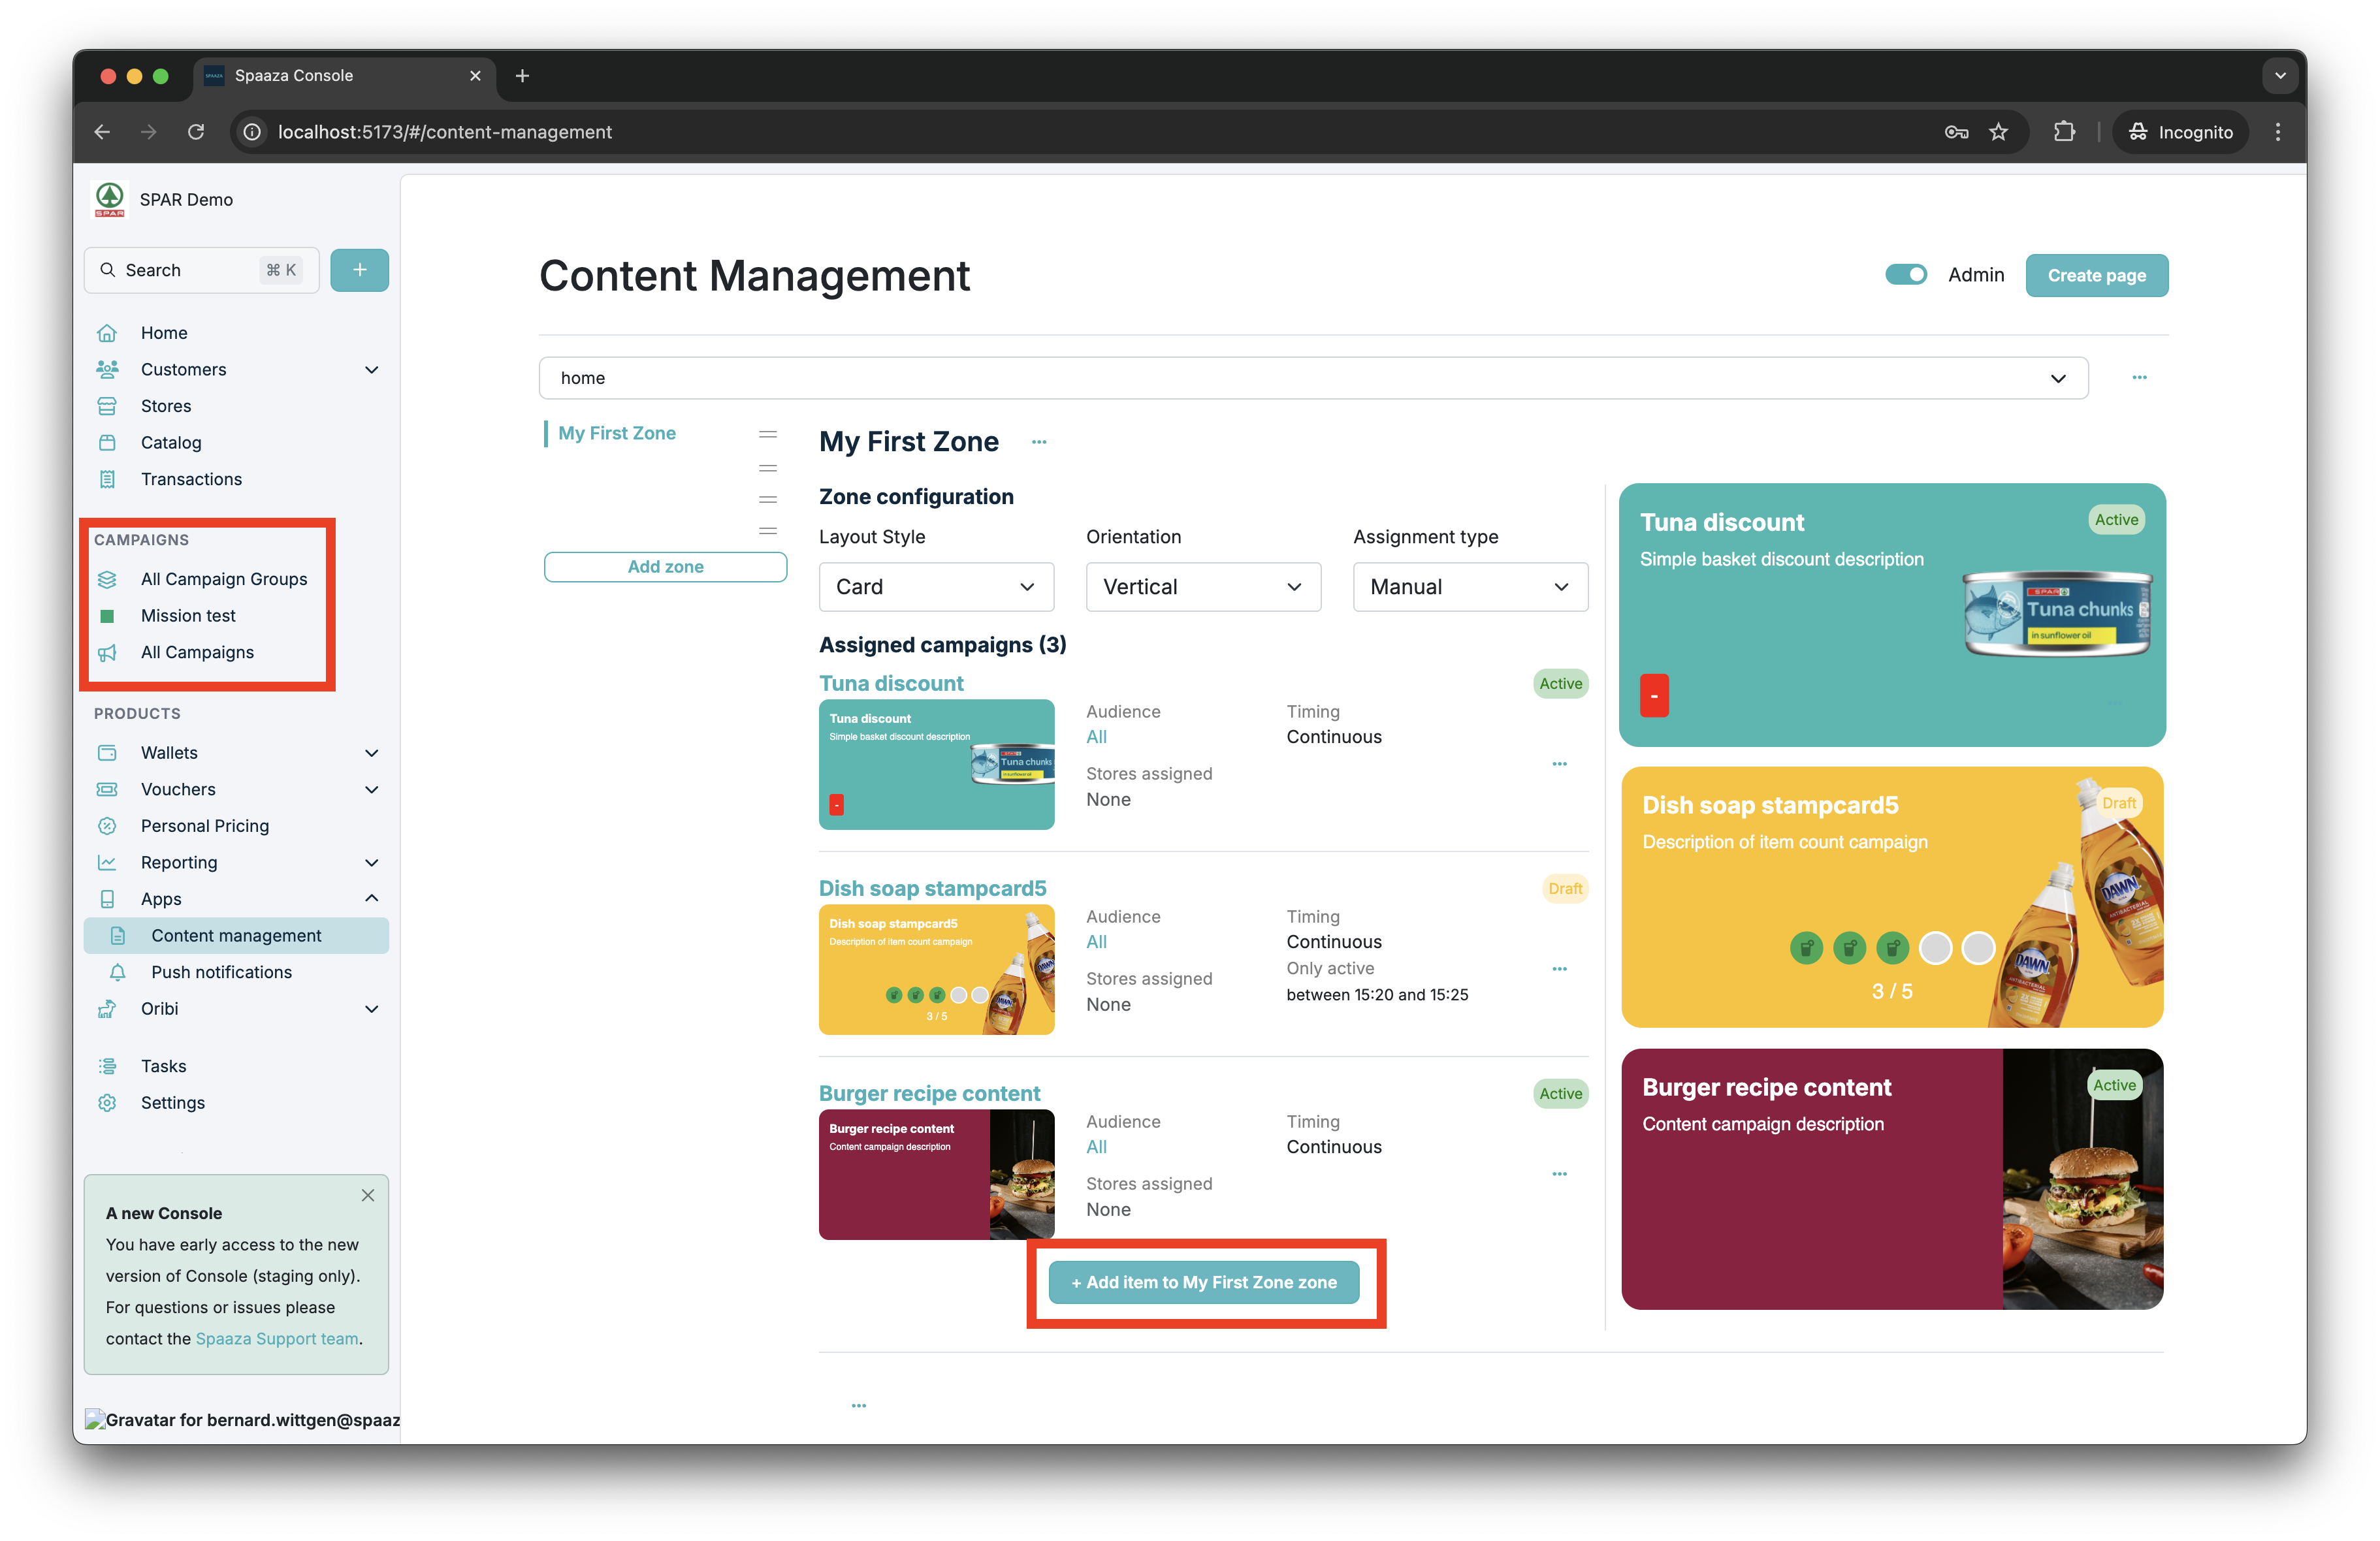
Add Campaign content screen:
Managing Pages
You are able to Create, Edit and Delete pages.
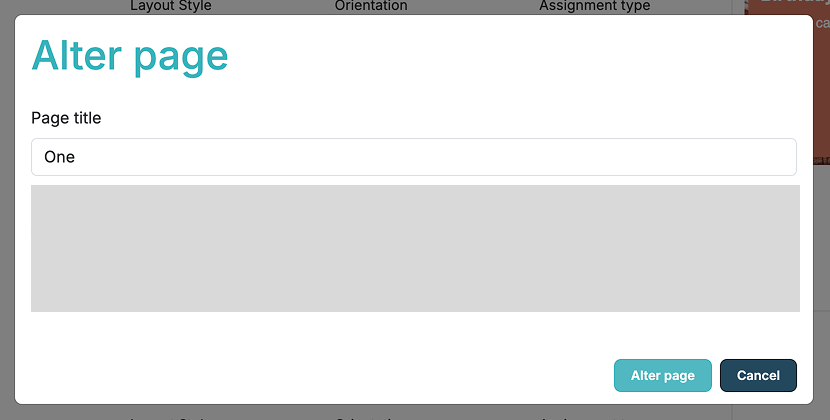
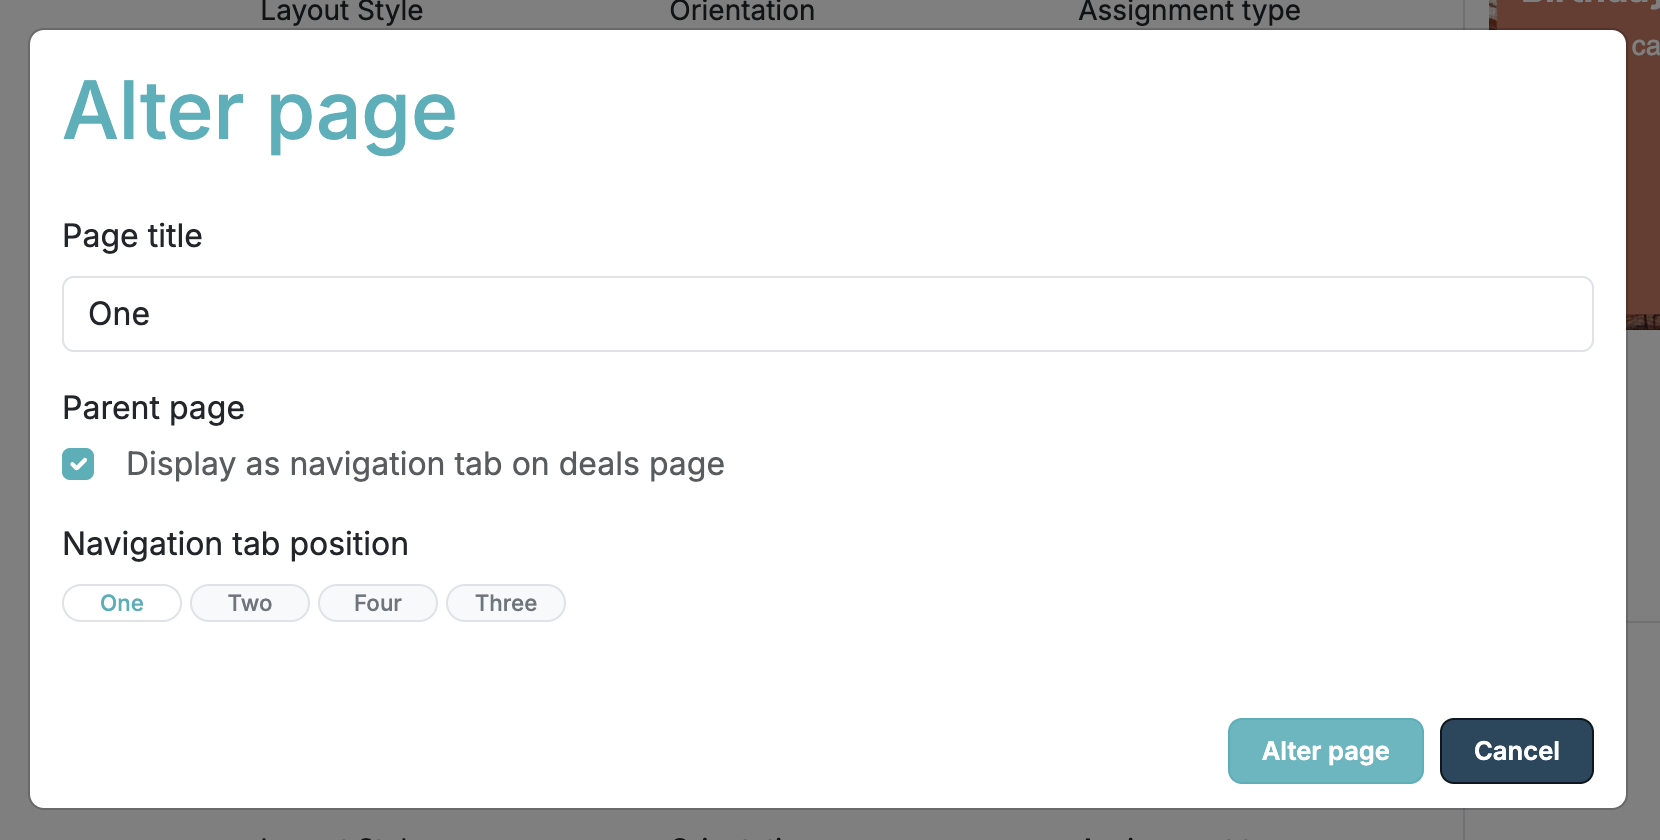
- Create page: click the "Create page" button, a modal will open in which you can configure your new page.
- Edit page: click the three dots ("…") next to the main page selector of your currently selected page.
- Delete page: click the three dots ("…") next to the page selector (with the page you want to delete selected) and click delete. You will be asked to confirm that you want to delete the page and its zones.
For a page you can configure:
- Page title: this will be the title of the Page displayed to end users.
Mobile App
The mobile app comes with three standard pages: "Home", "Rewards", and "Deals". These are restricted pages whose titles can only be changed by Spaaza on initial configuration. They cannot be deleted because they are used in the mobile app.
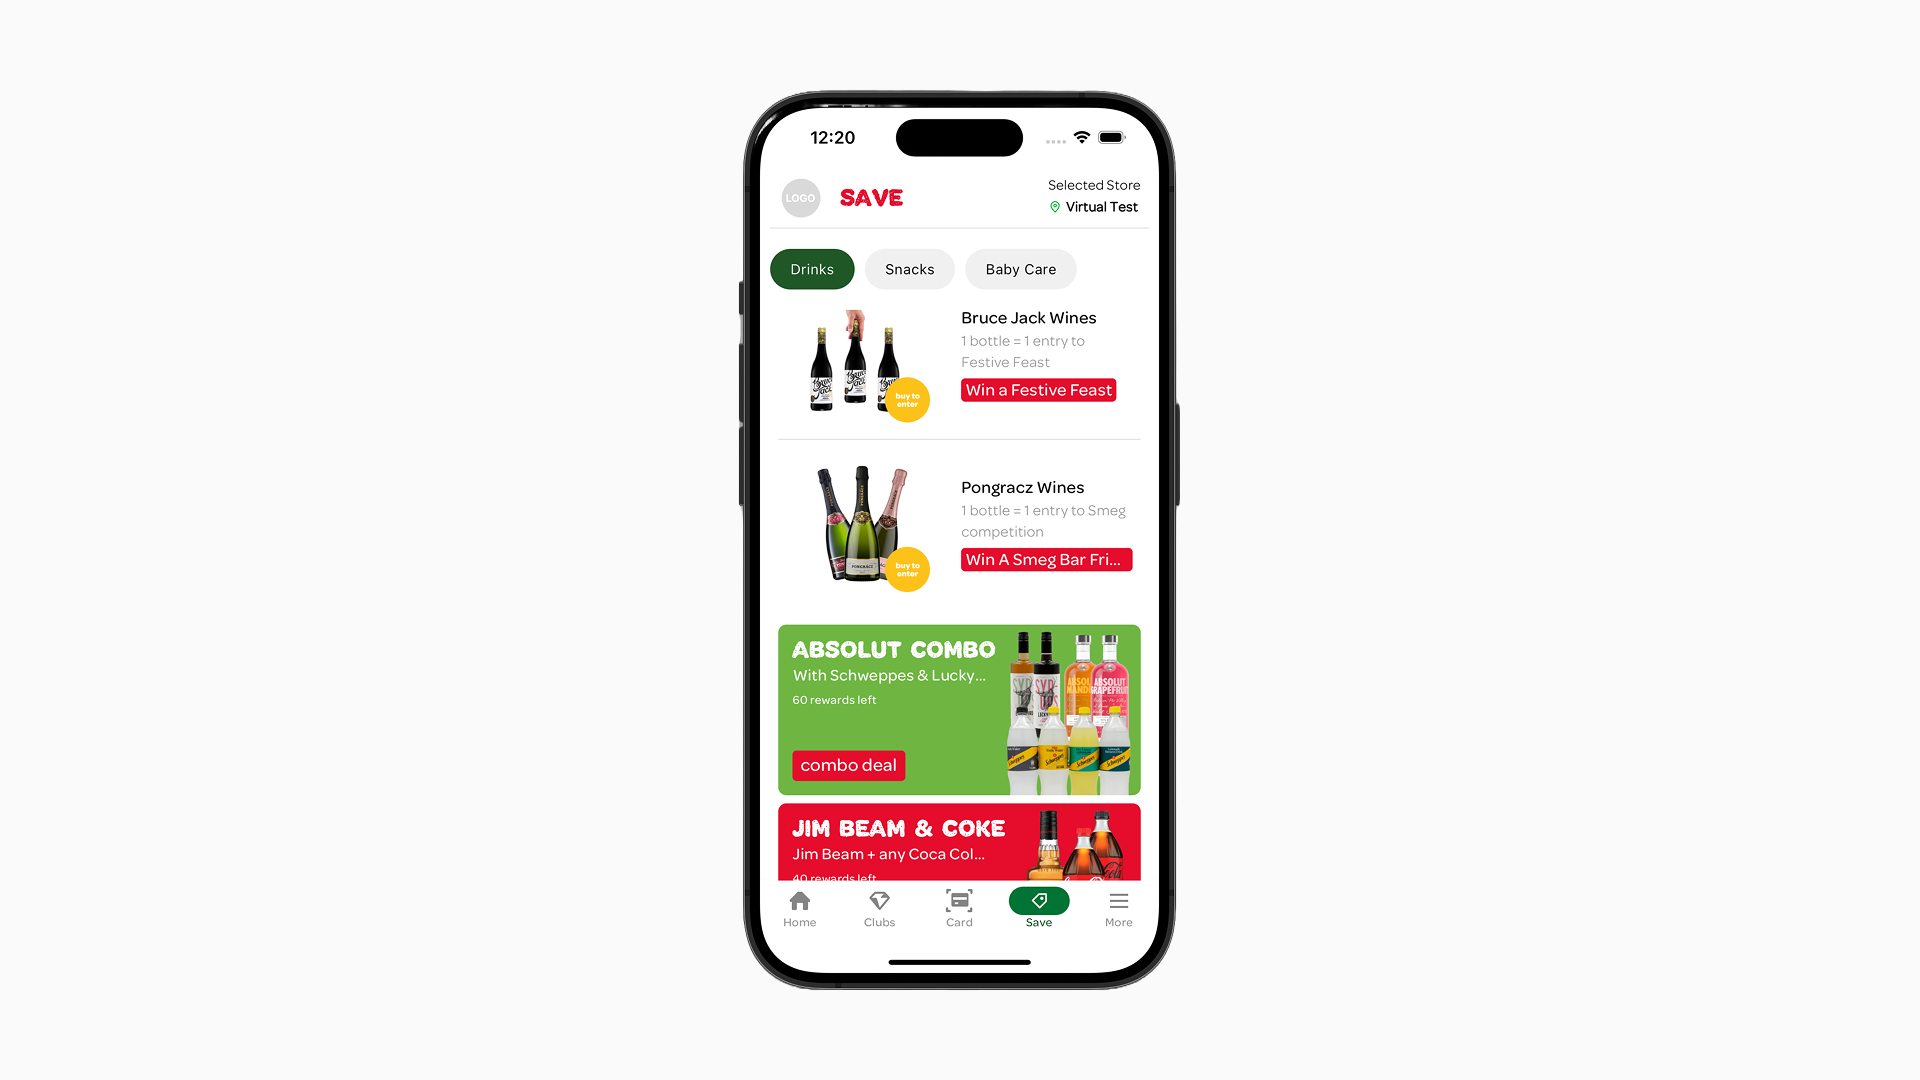
Pages can be accessed by the user through the main navigation menu, navigation tabs on the "Deals" page, or by tapping on an Item that has been configured to point to a page (see Item Actions).
On initial creation of a page, a page ID is set. This Page ID is not shown to end users but is important as a reference for debugging. The ID can be found when you click the three dots ("…") alongside the Page Selector.
Page selection
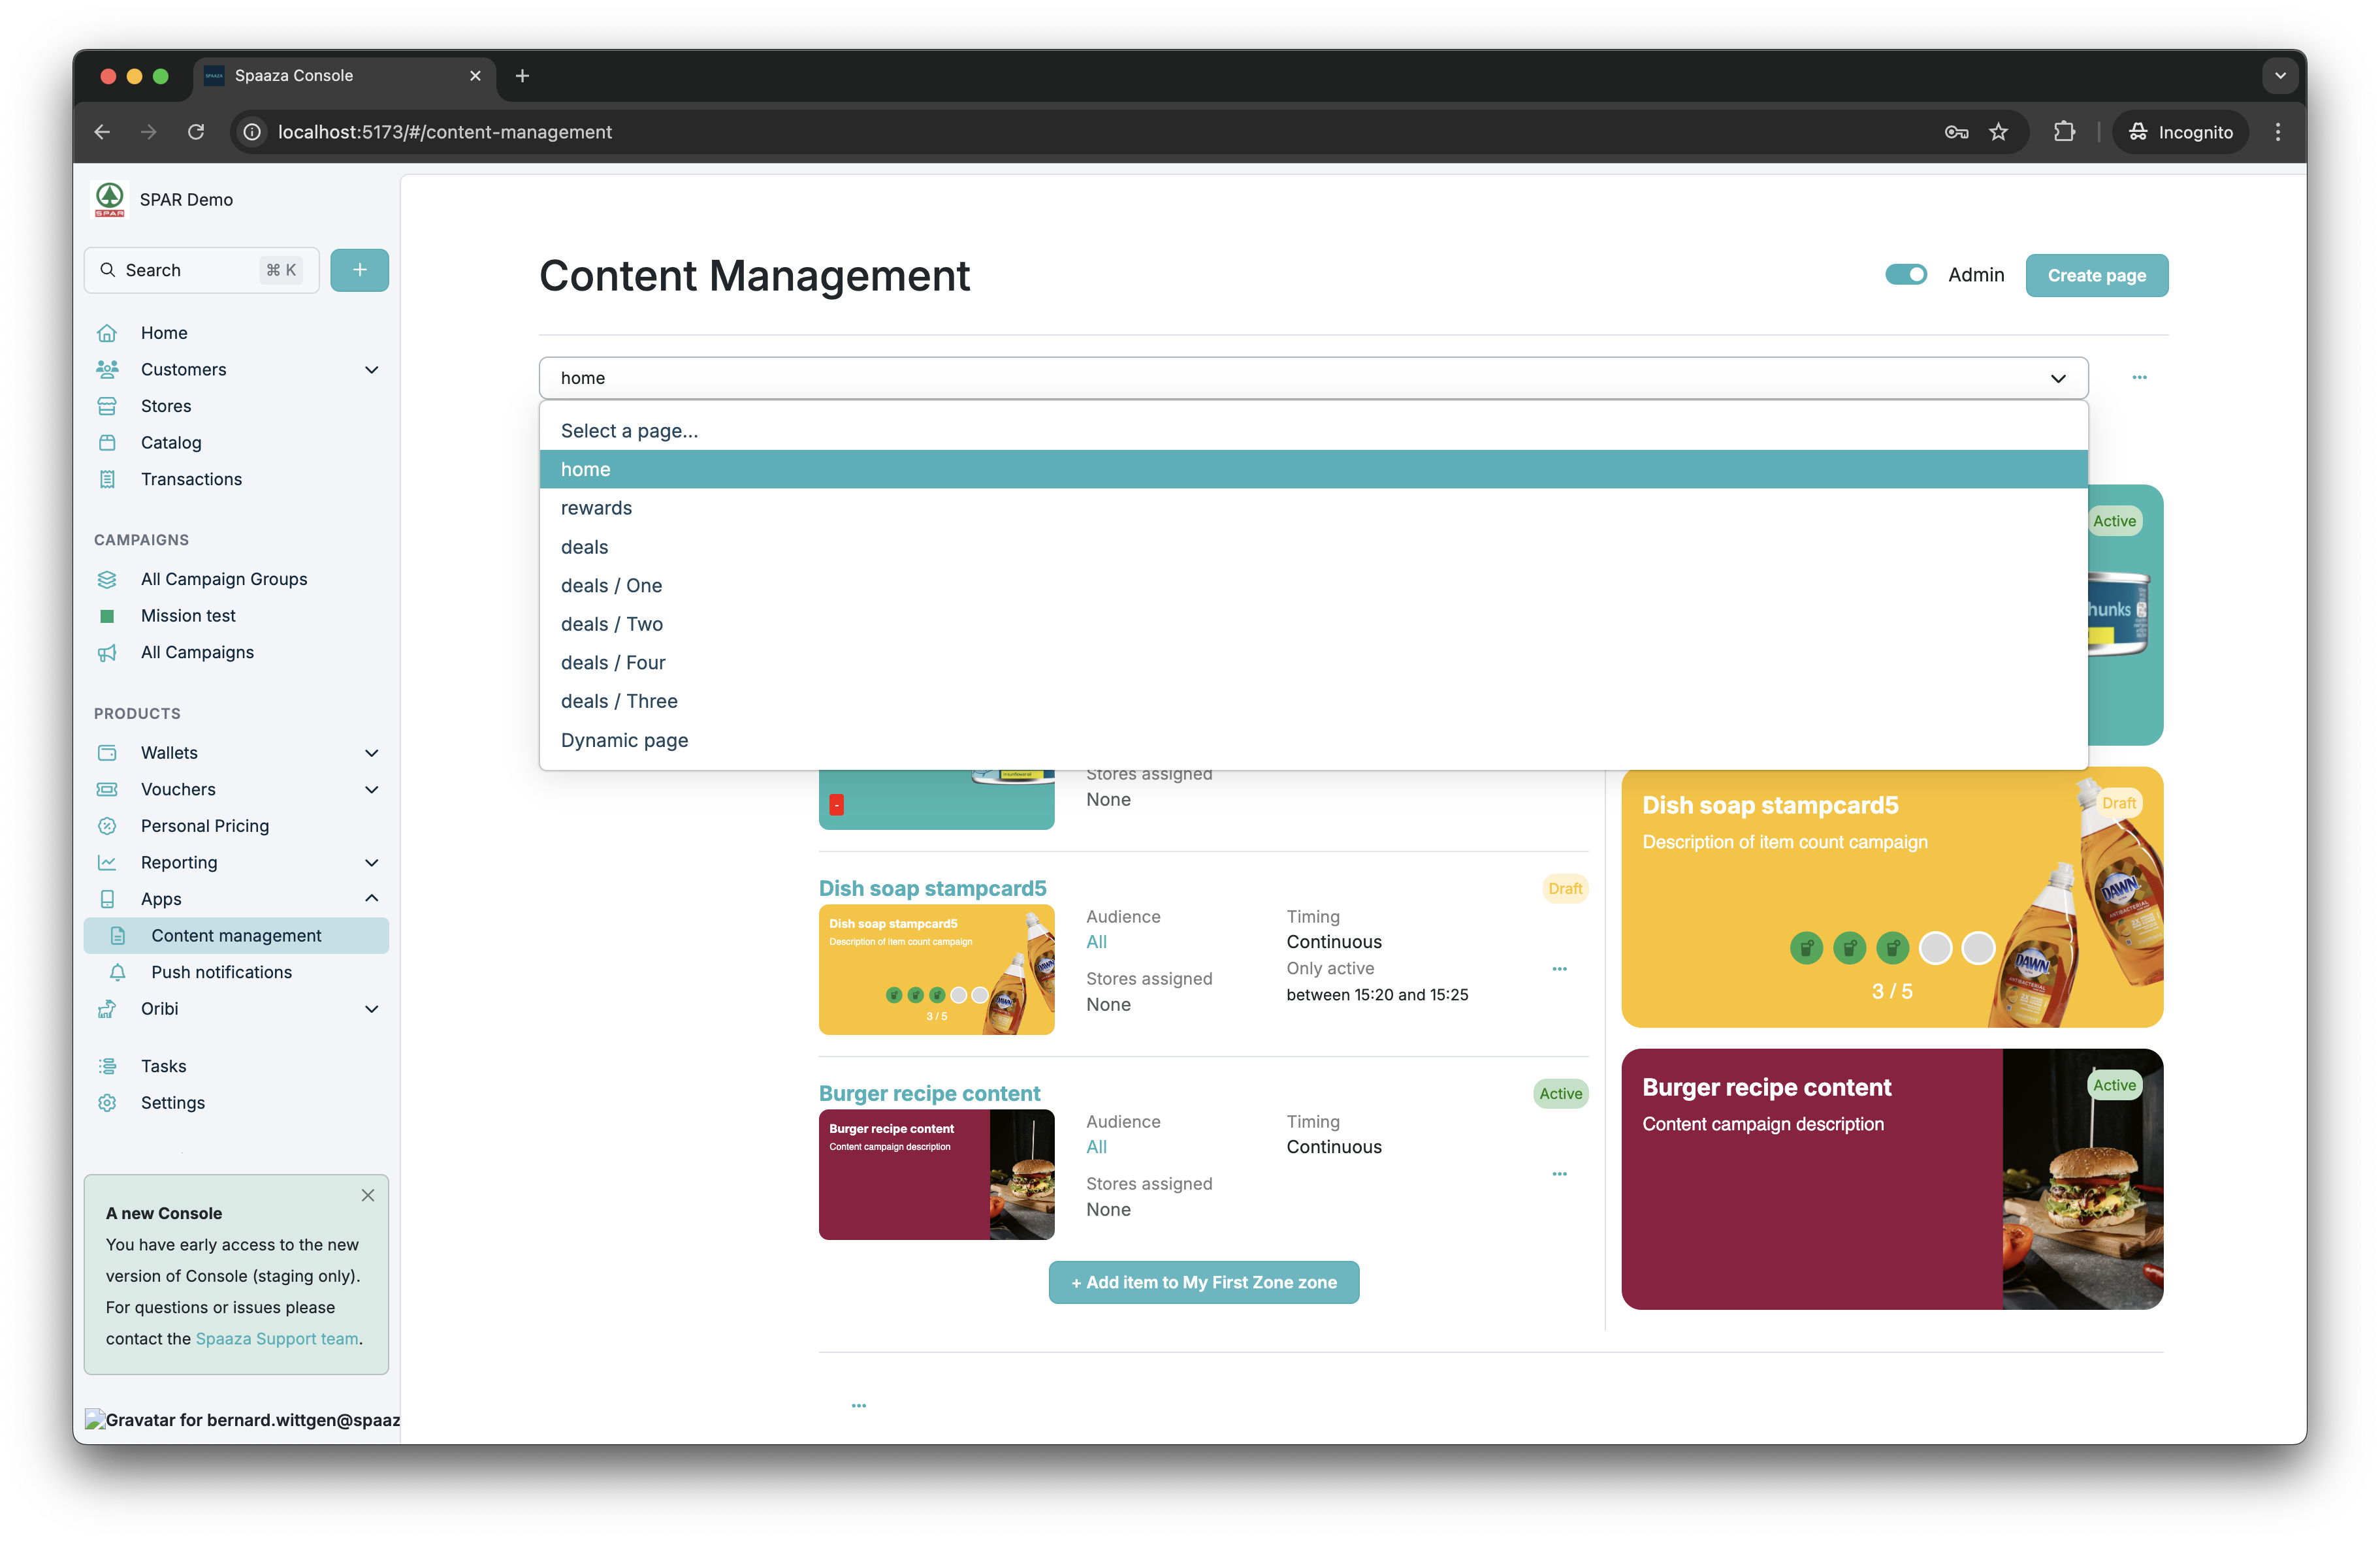
Alter / create page modal
Creating Categories
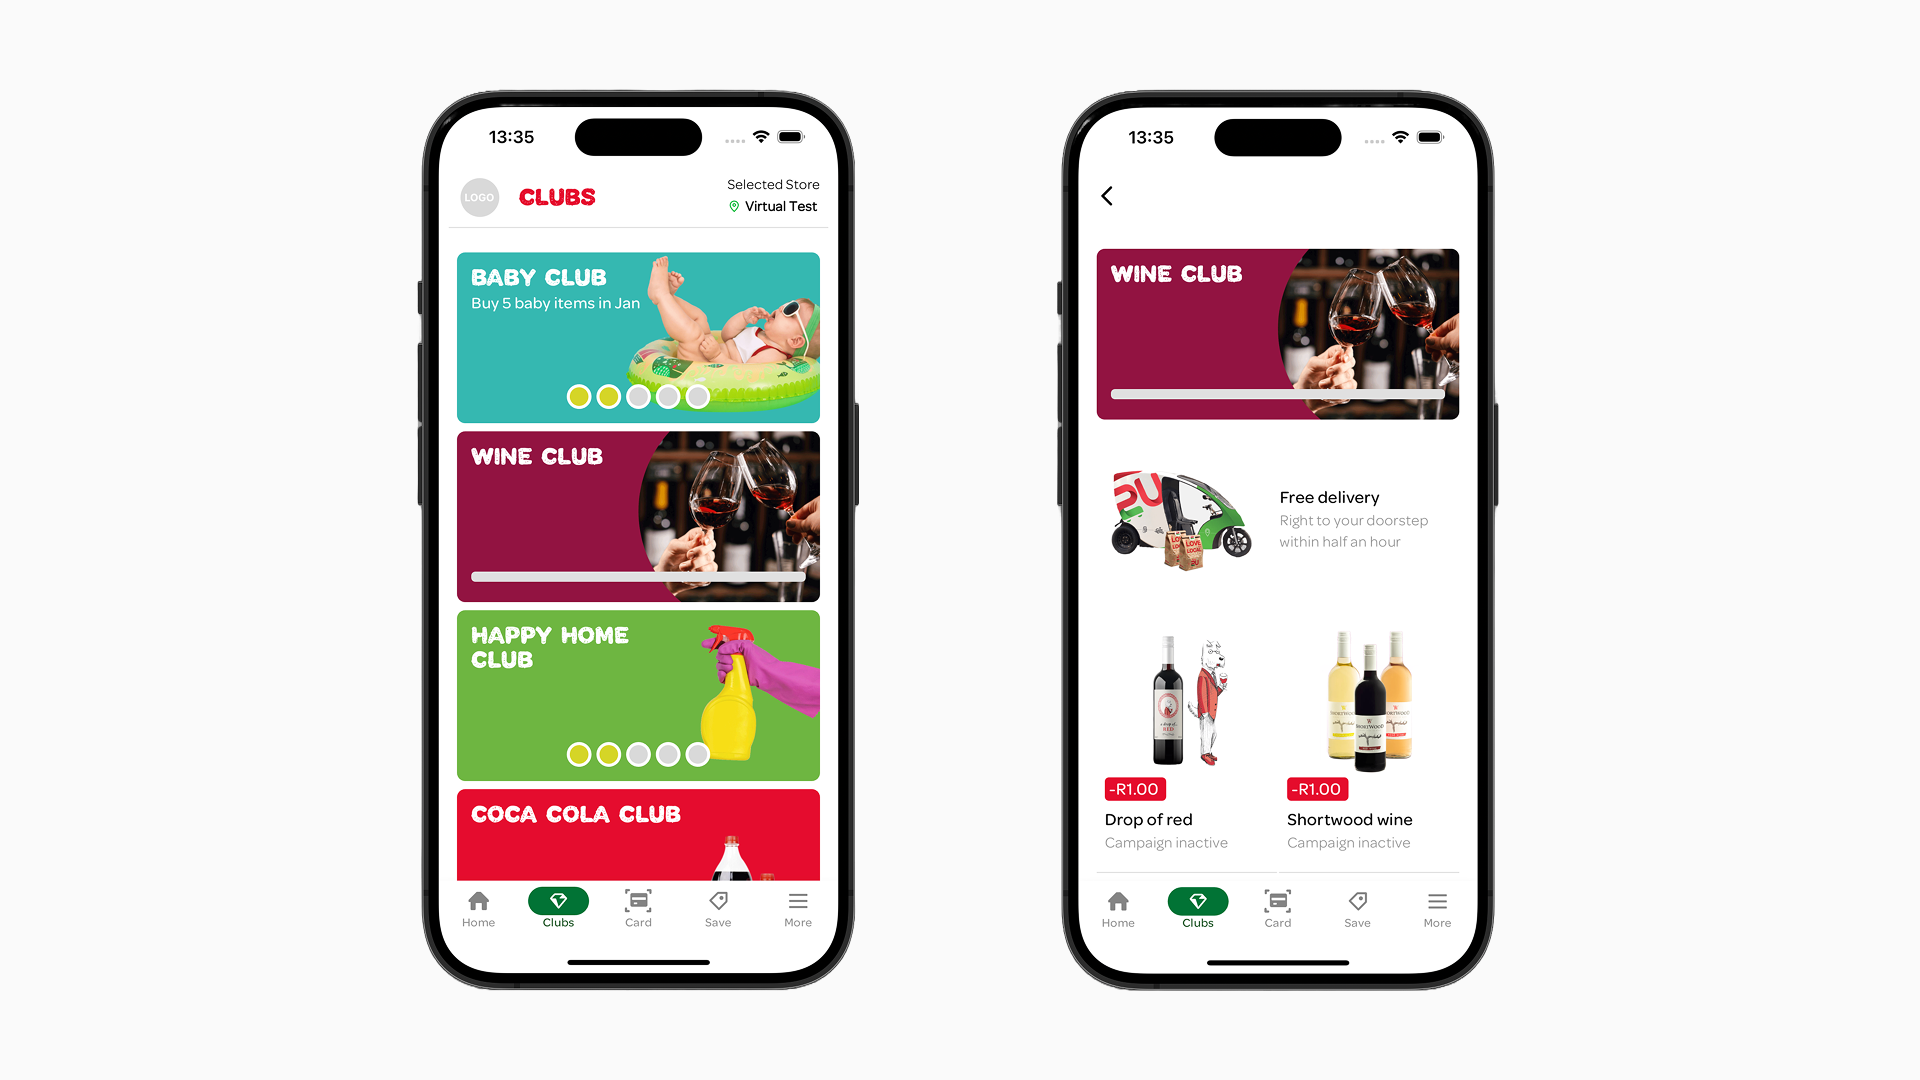
Pages can be used to group campaigns and content into categories. For example: seasonal promotions, partner offers, or themed campaigns. Within Spaaza these are referred to as "Clubs".
Items on other pages can be configured to link to these category pages, allowing users to browse grouped content. See Item Actions for how to set up these links.
It is also possible to set up "Missions", where multiple individual Campaigns contribute to bigger rewards. Contact Spaaza for more information about this.
Navigation Tabs
Mobile App
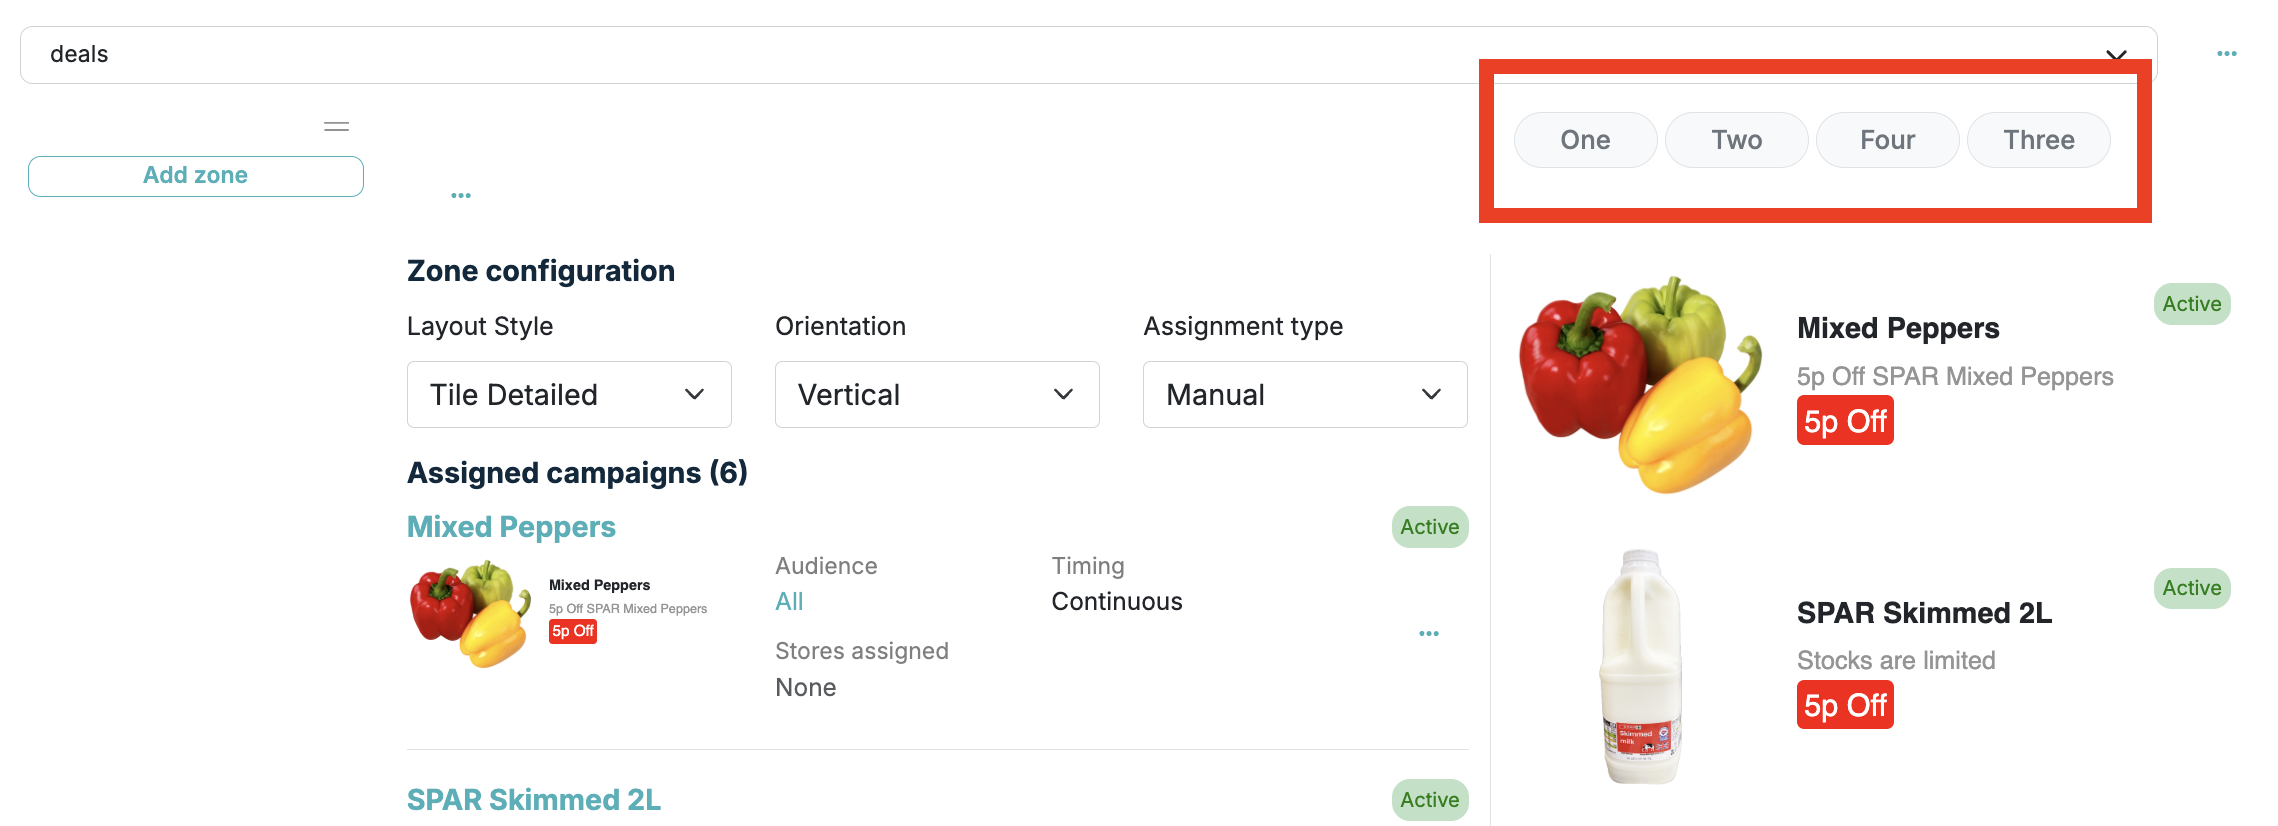
When a page has a parent, it appears as a navigation tab on the parent page. This allows you to create a tabbed structure where users can switch between related content sections. Currently, navigation tabs are only supported on the "Deals" page. When you assign the "Deals" page as parent of another page, that child page will show up as a navigation tab at the top of the "Deals" screen.
deals / beverages
- If there is no content found within a child page, its navigation tab will not be visible.
- You can only edit the position of a child page while inside the page edit modal, by dragging the active tab in the "Navigation tab position" preview.
Alter / create page modal
Deals page preview example
Deals page example
Zone content setup
The content management system is available through the main menu "Apps" > "Content Management". Below is a step-by-step walkthrough on how to display content.
After completing this walkthrough, we recommend experimenting with different combinations of layout styles and orientations of the Items within the Zones.
Mobile App
Use the "pull-to-refresh" feature inside the app after you have made your changes to see how they are reflected.
Example of setting up content zones
1. Select the page you want to configure content for from the main page selector dropdown.
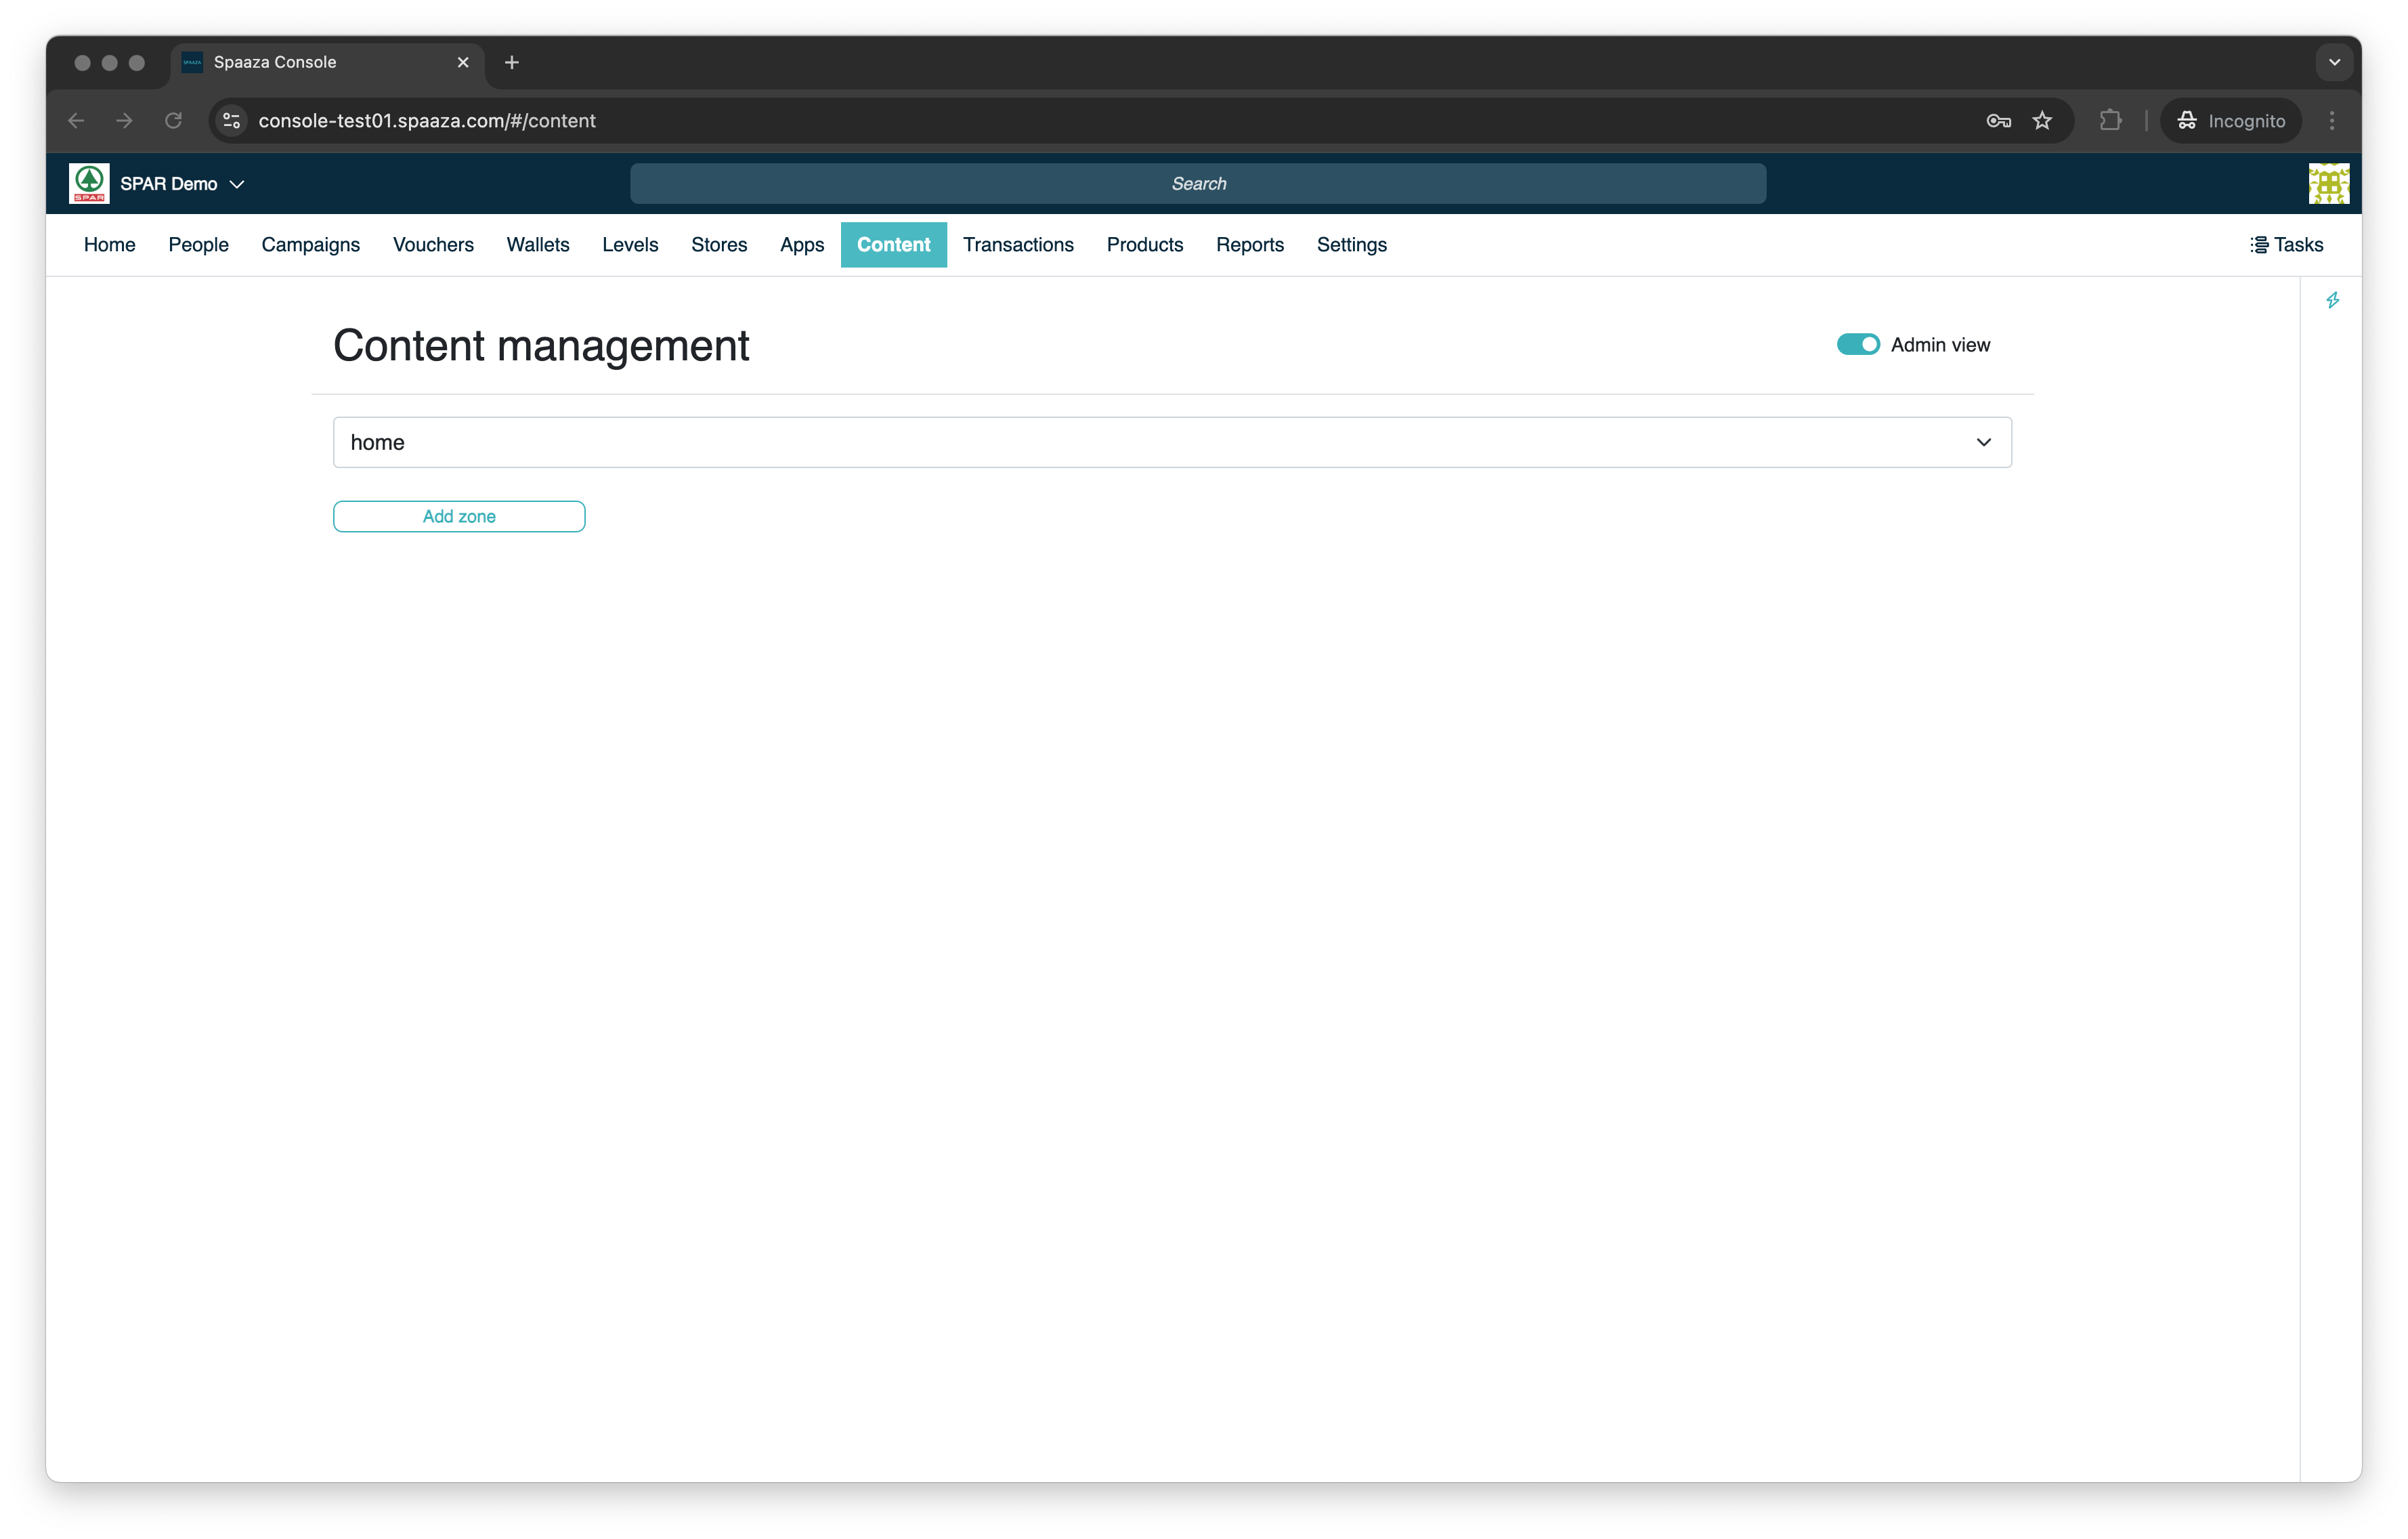
2. Click the "Add Zone" button to add a Zone to the selected page & name the Zone using the "Name" input field (or leave it blank if you do not want a zone title to display).
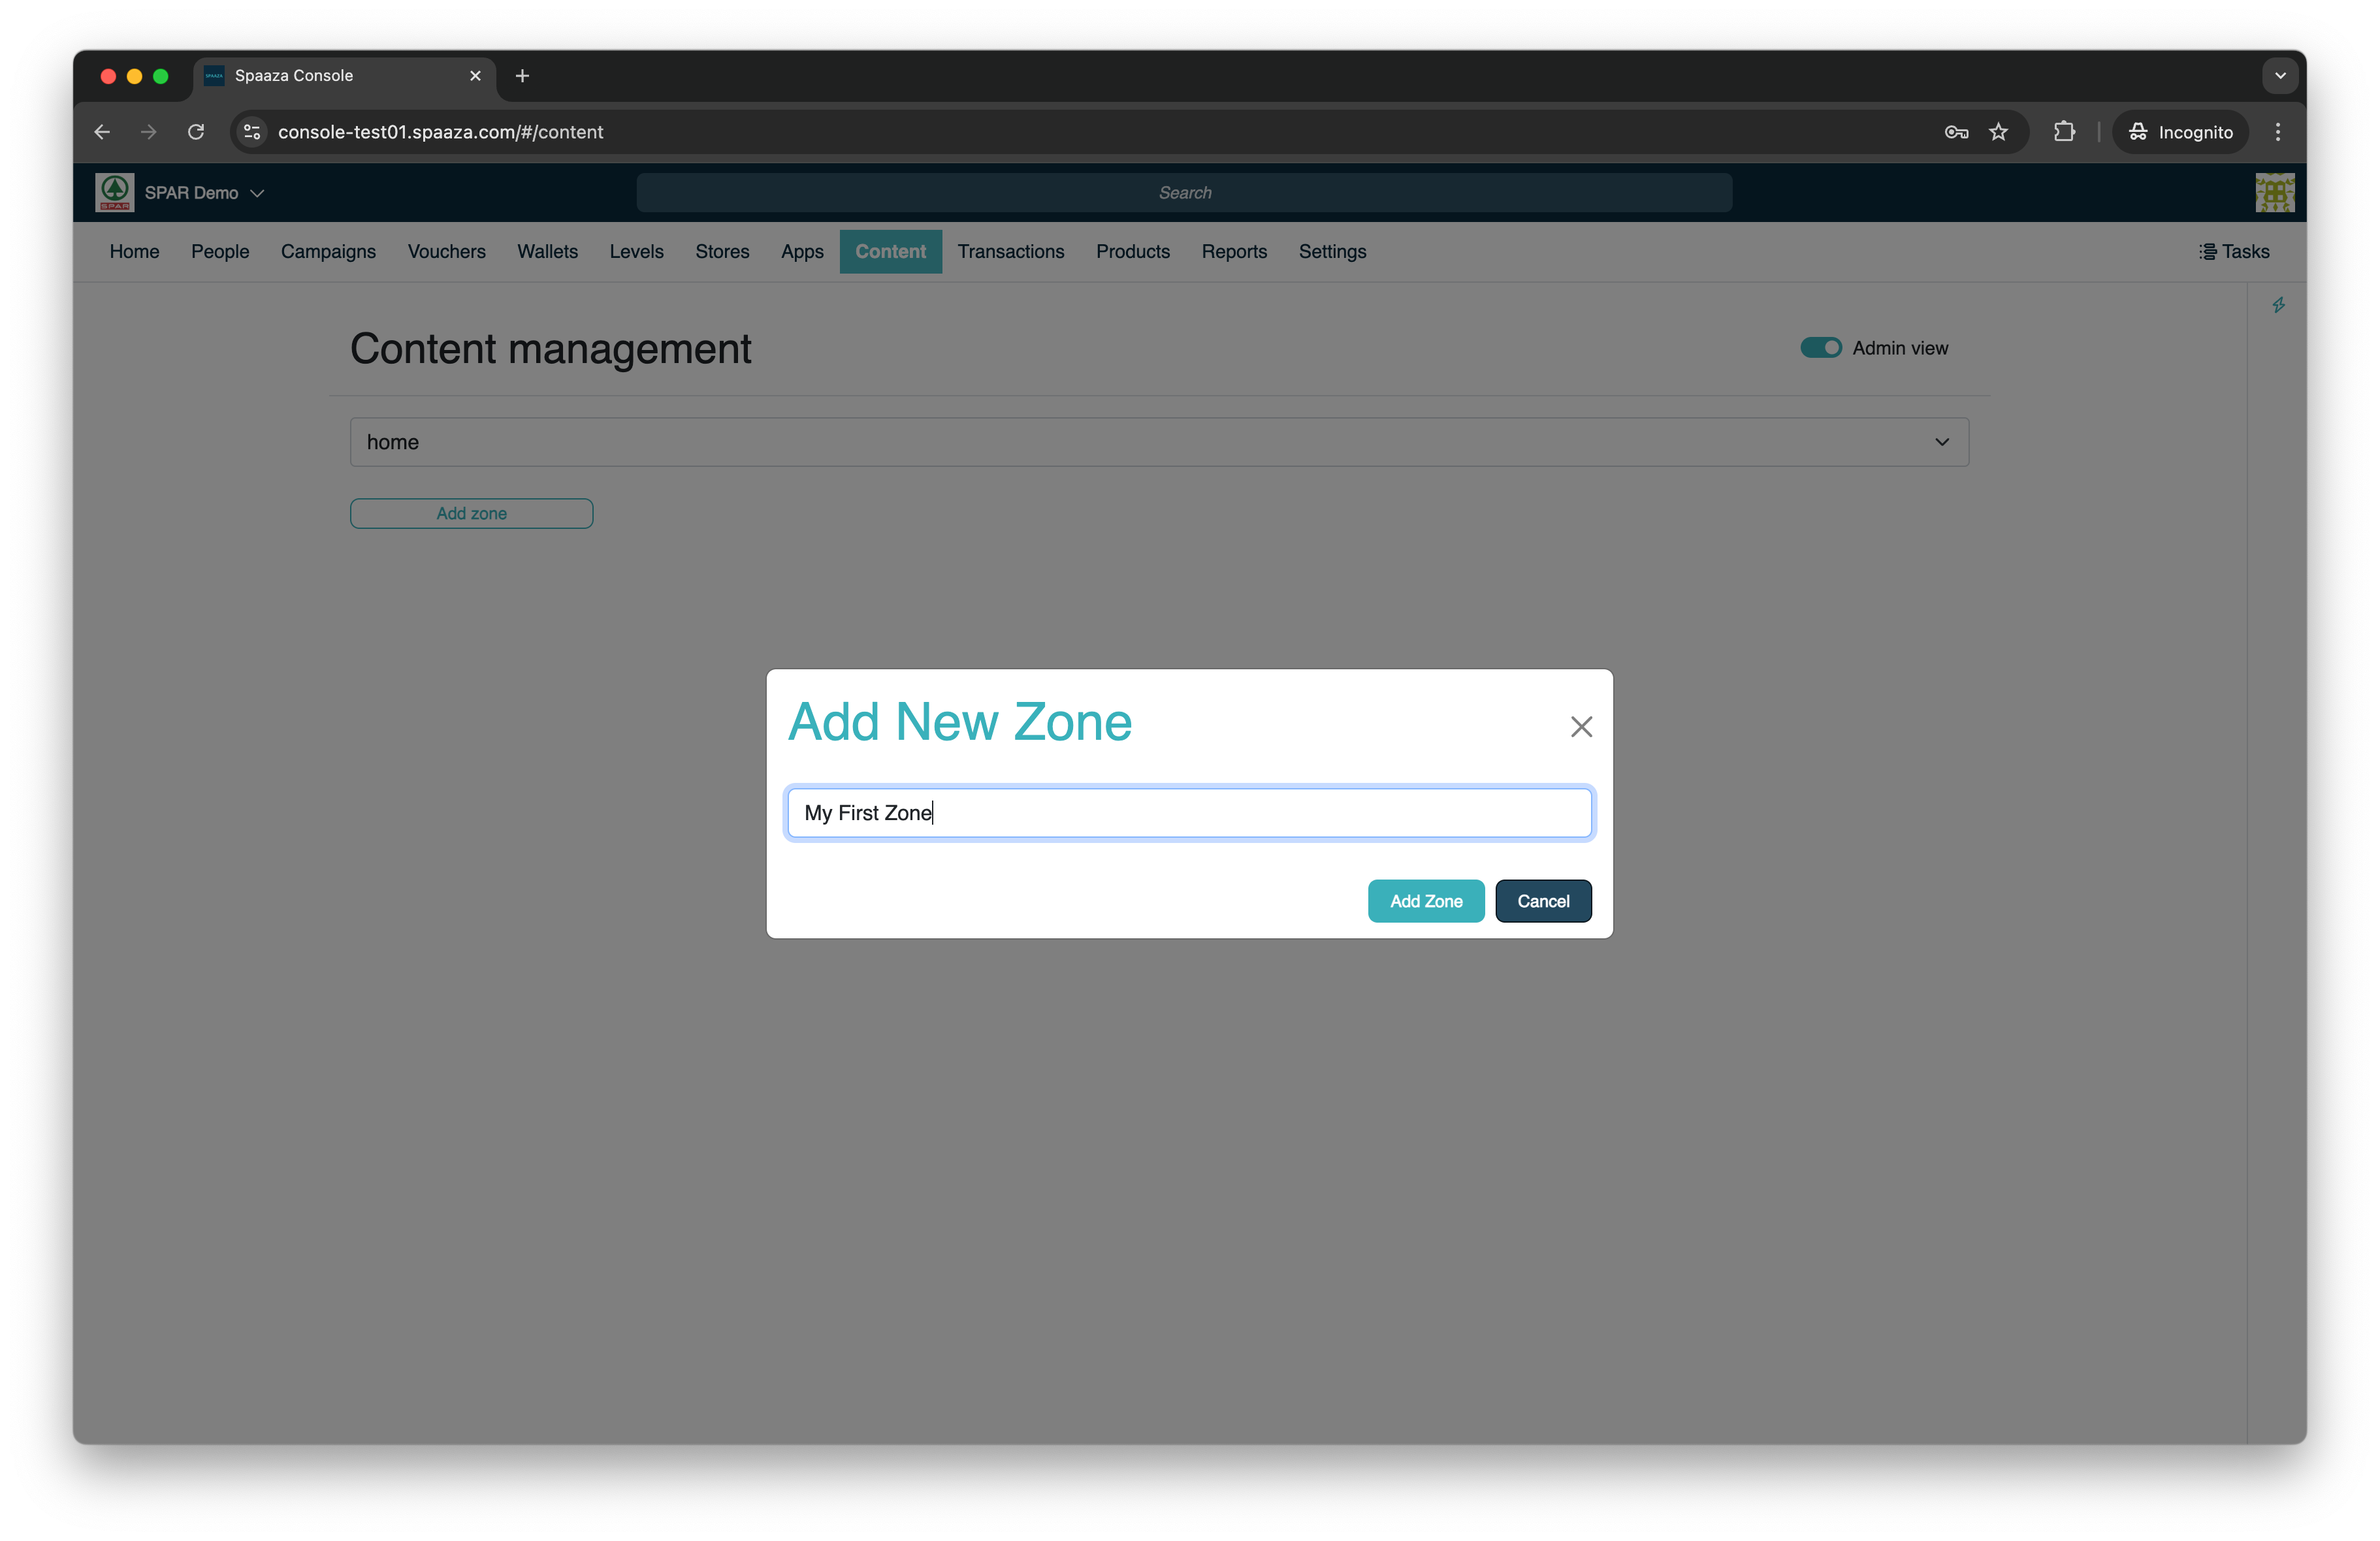
3. Click the "+ Add Item to Zone" button.
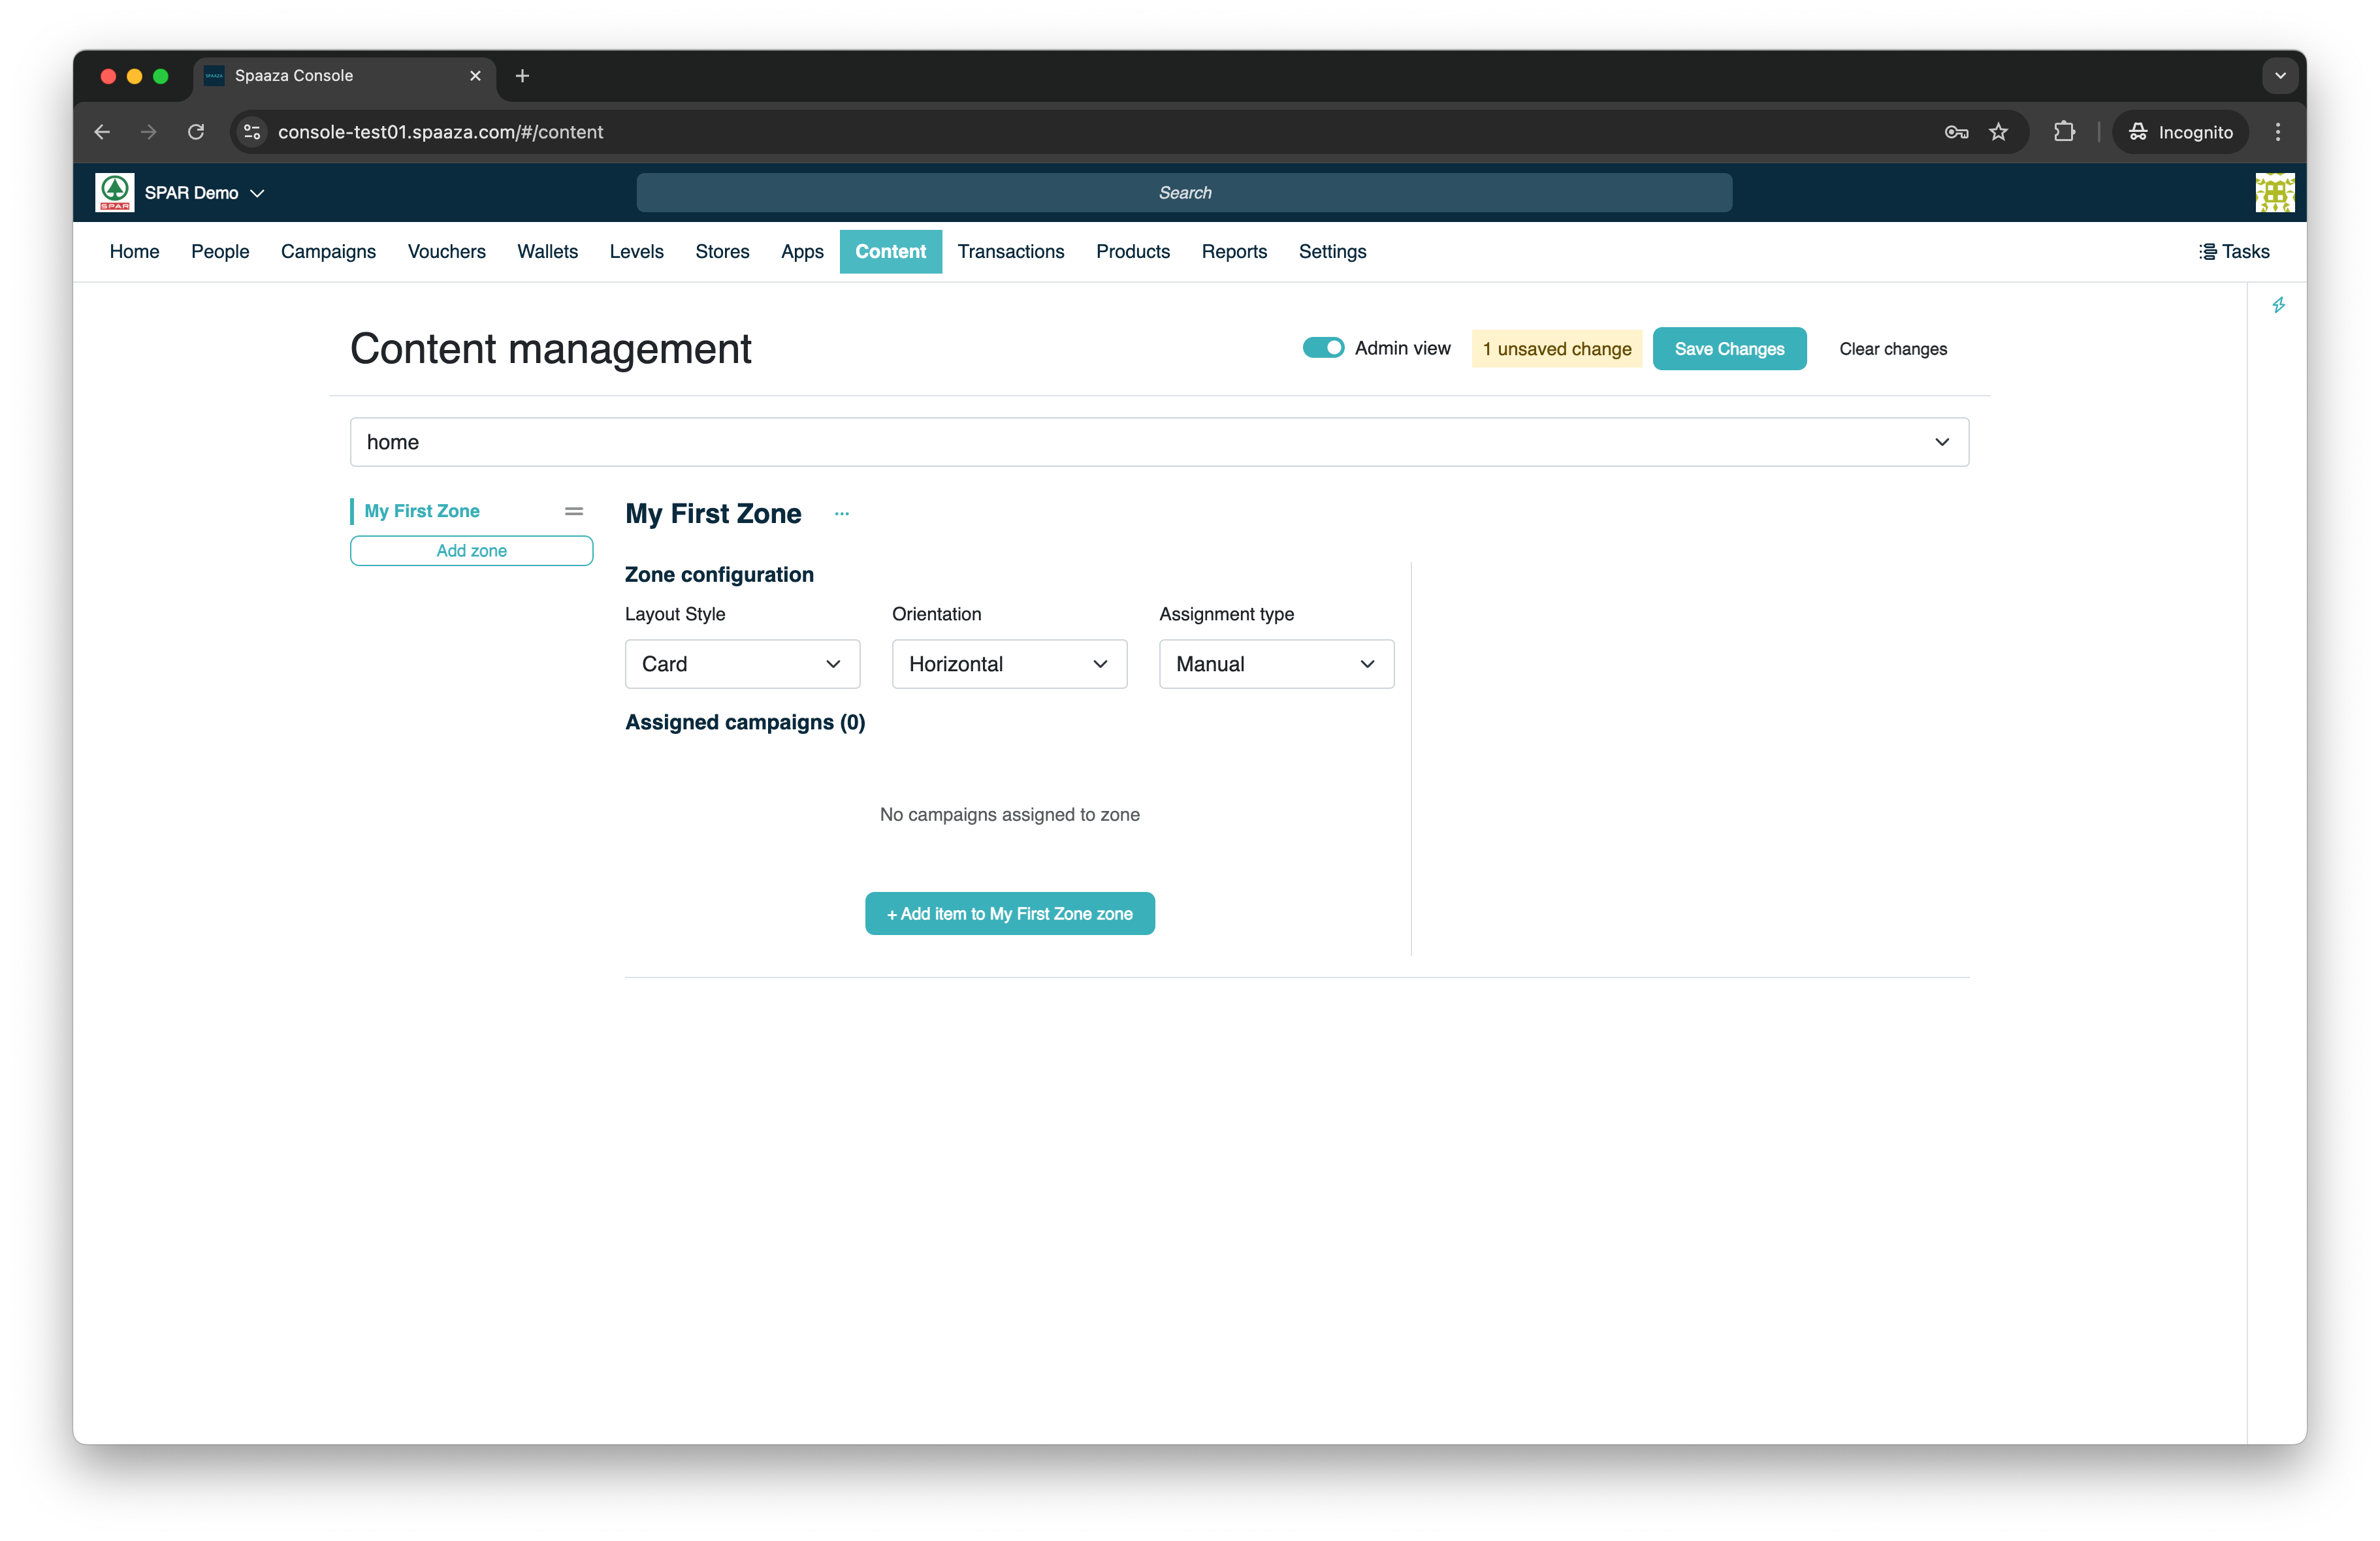
4. Now the Campaign overview will open, select three Campaigns you wish to add as Items to the Zone using the checkboxes.
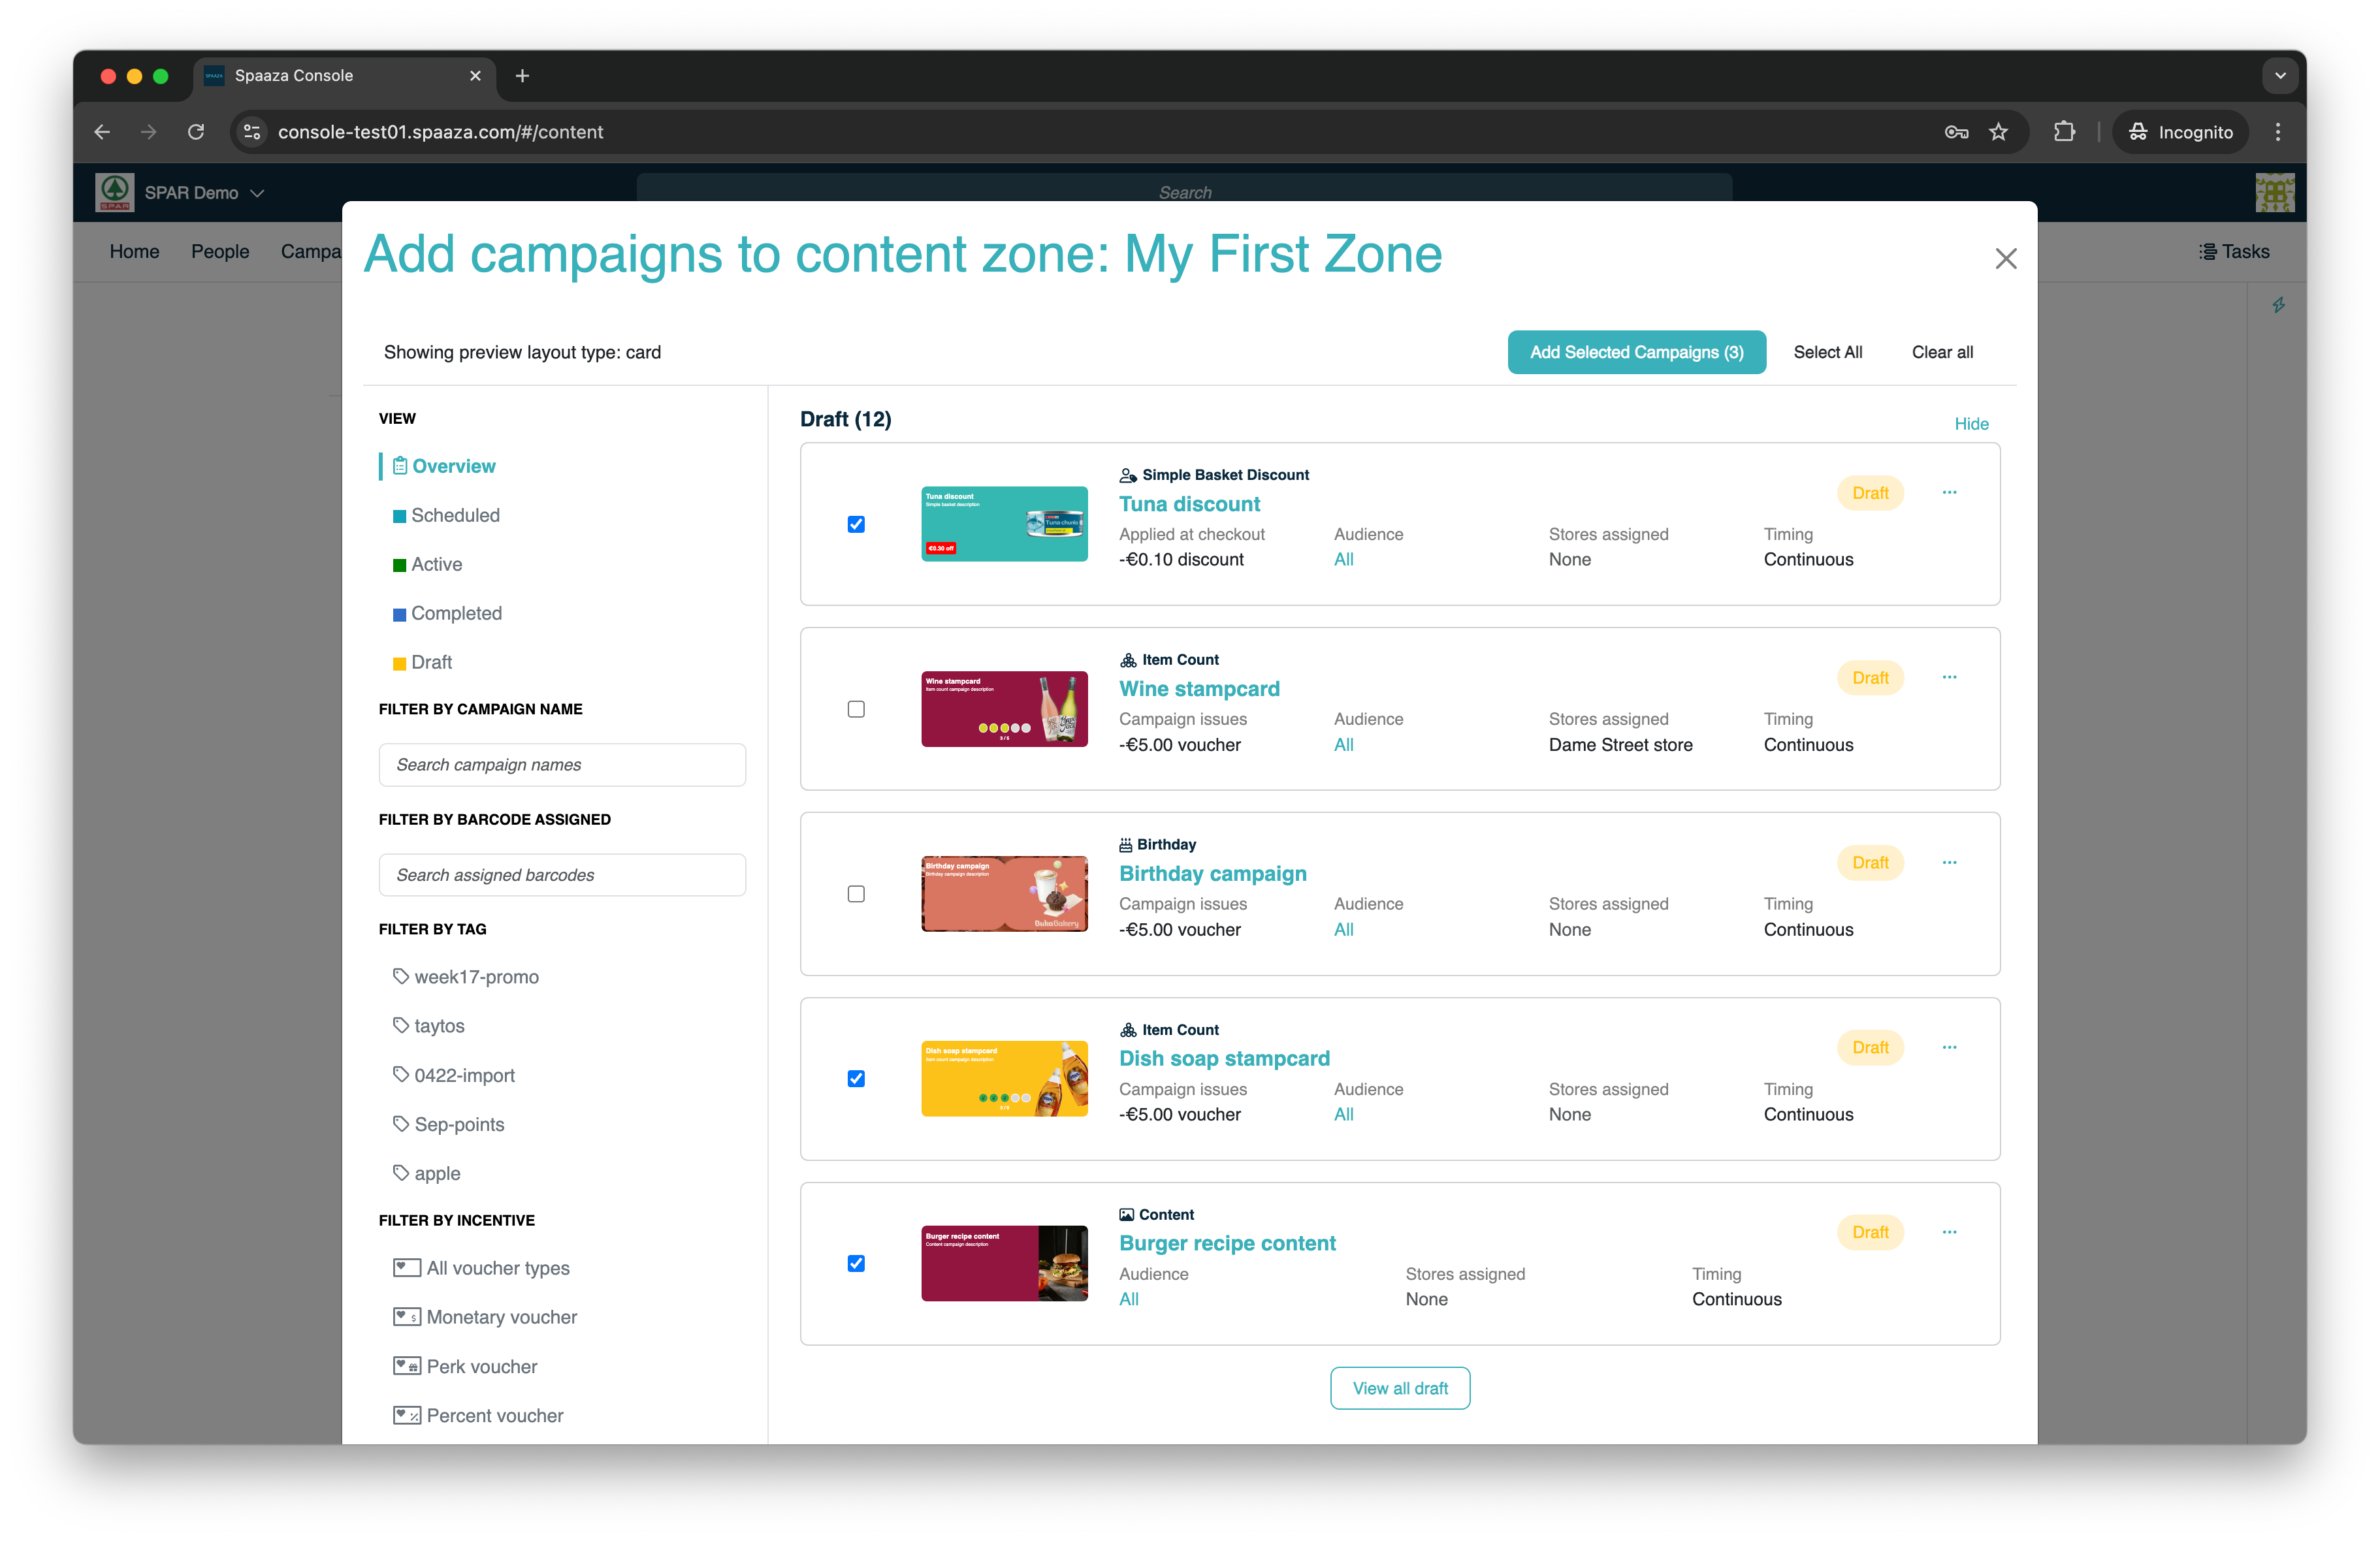
5. Click the "Add selected Campaigns" button.
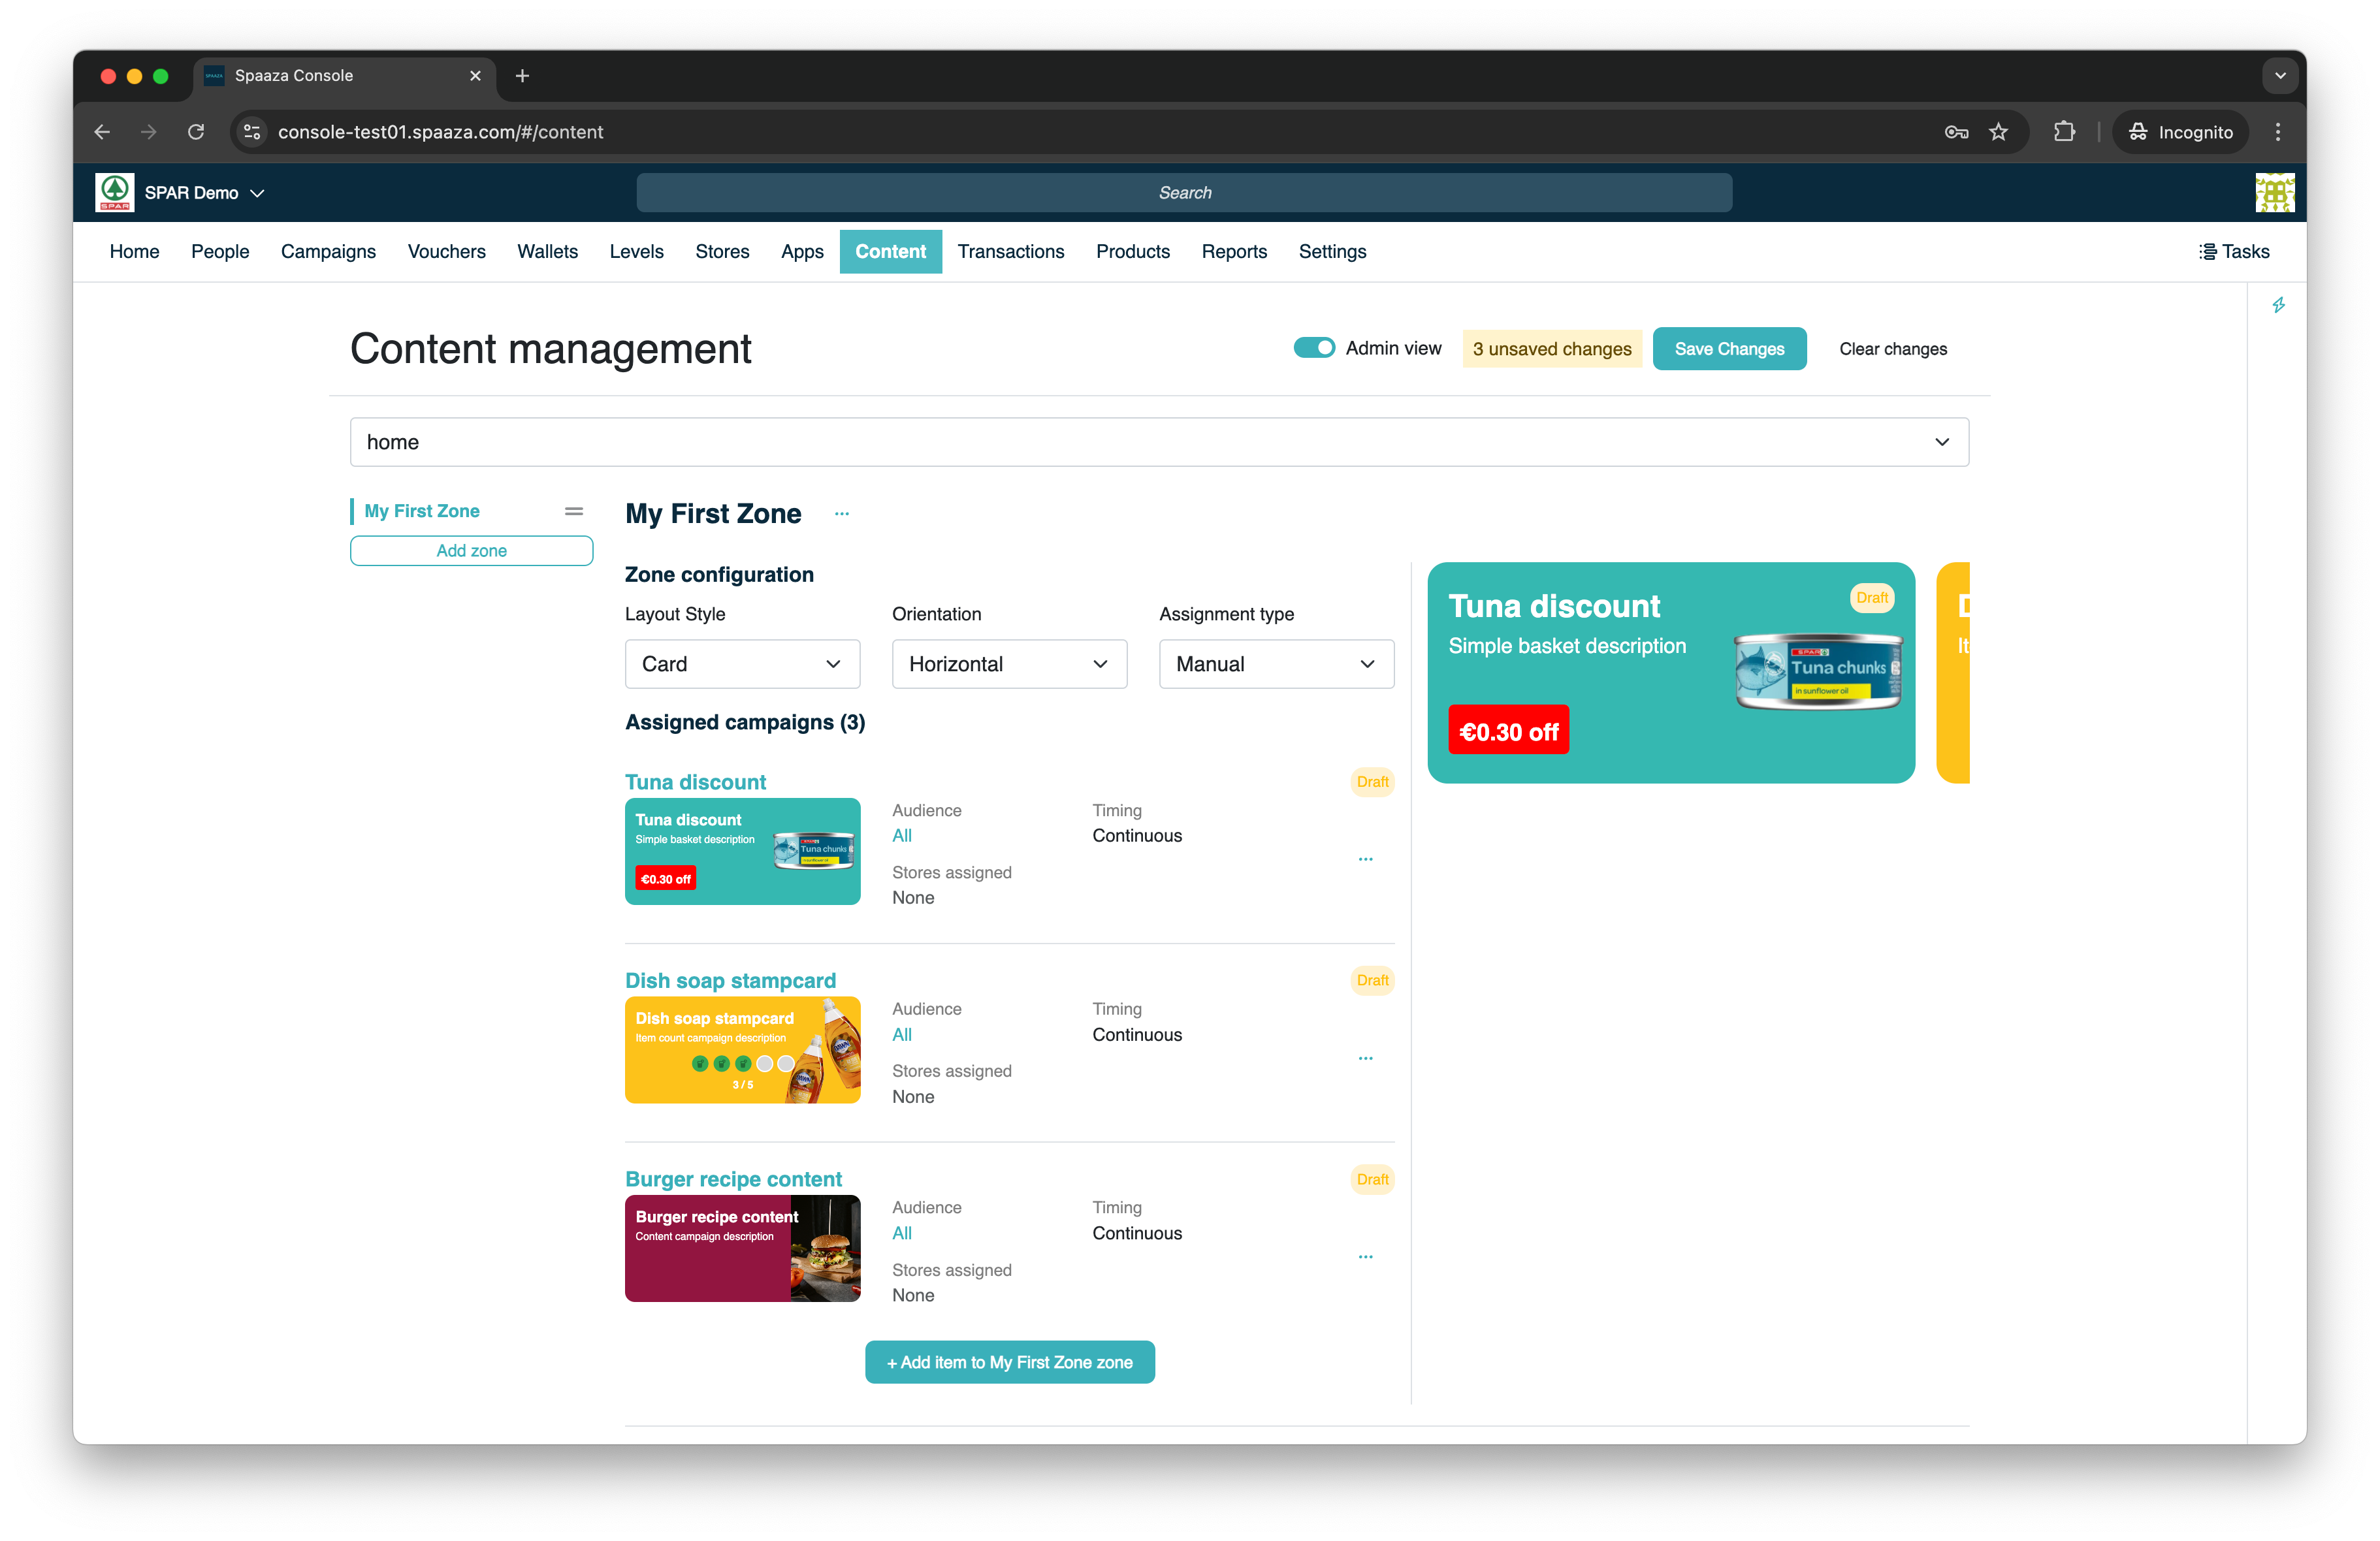
6. Leave the Layout Style on "Card", set the Orientation to "Vertical" and leave the Assignment type on "Manual"
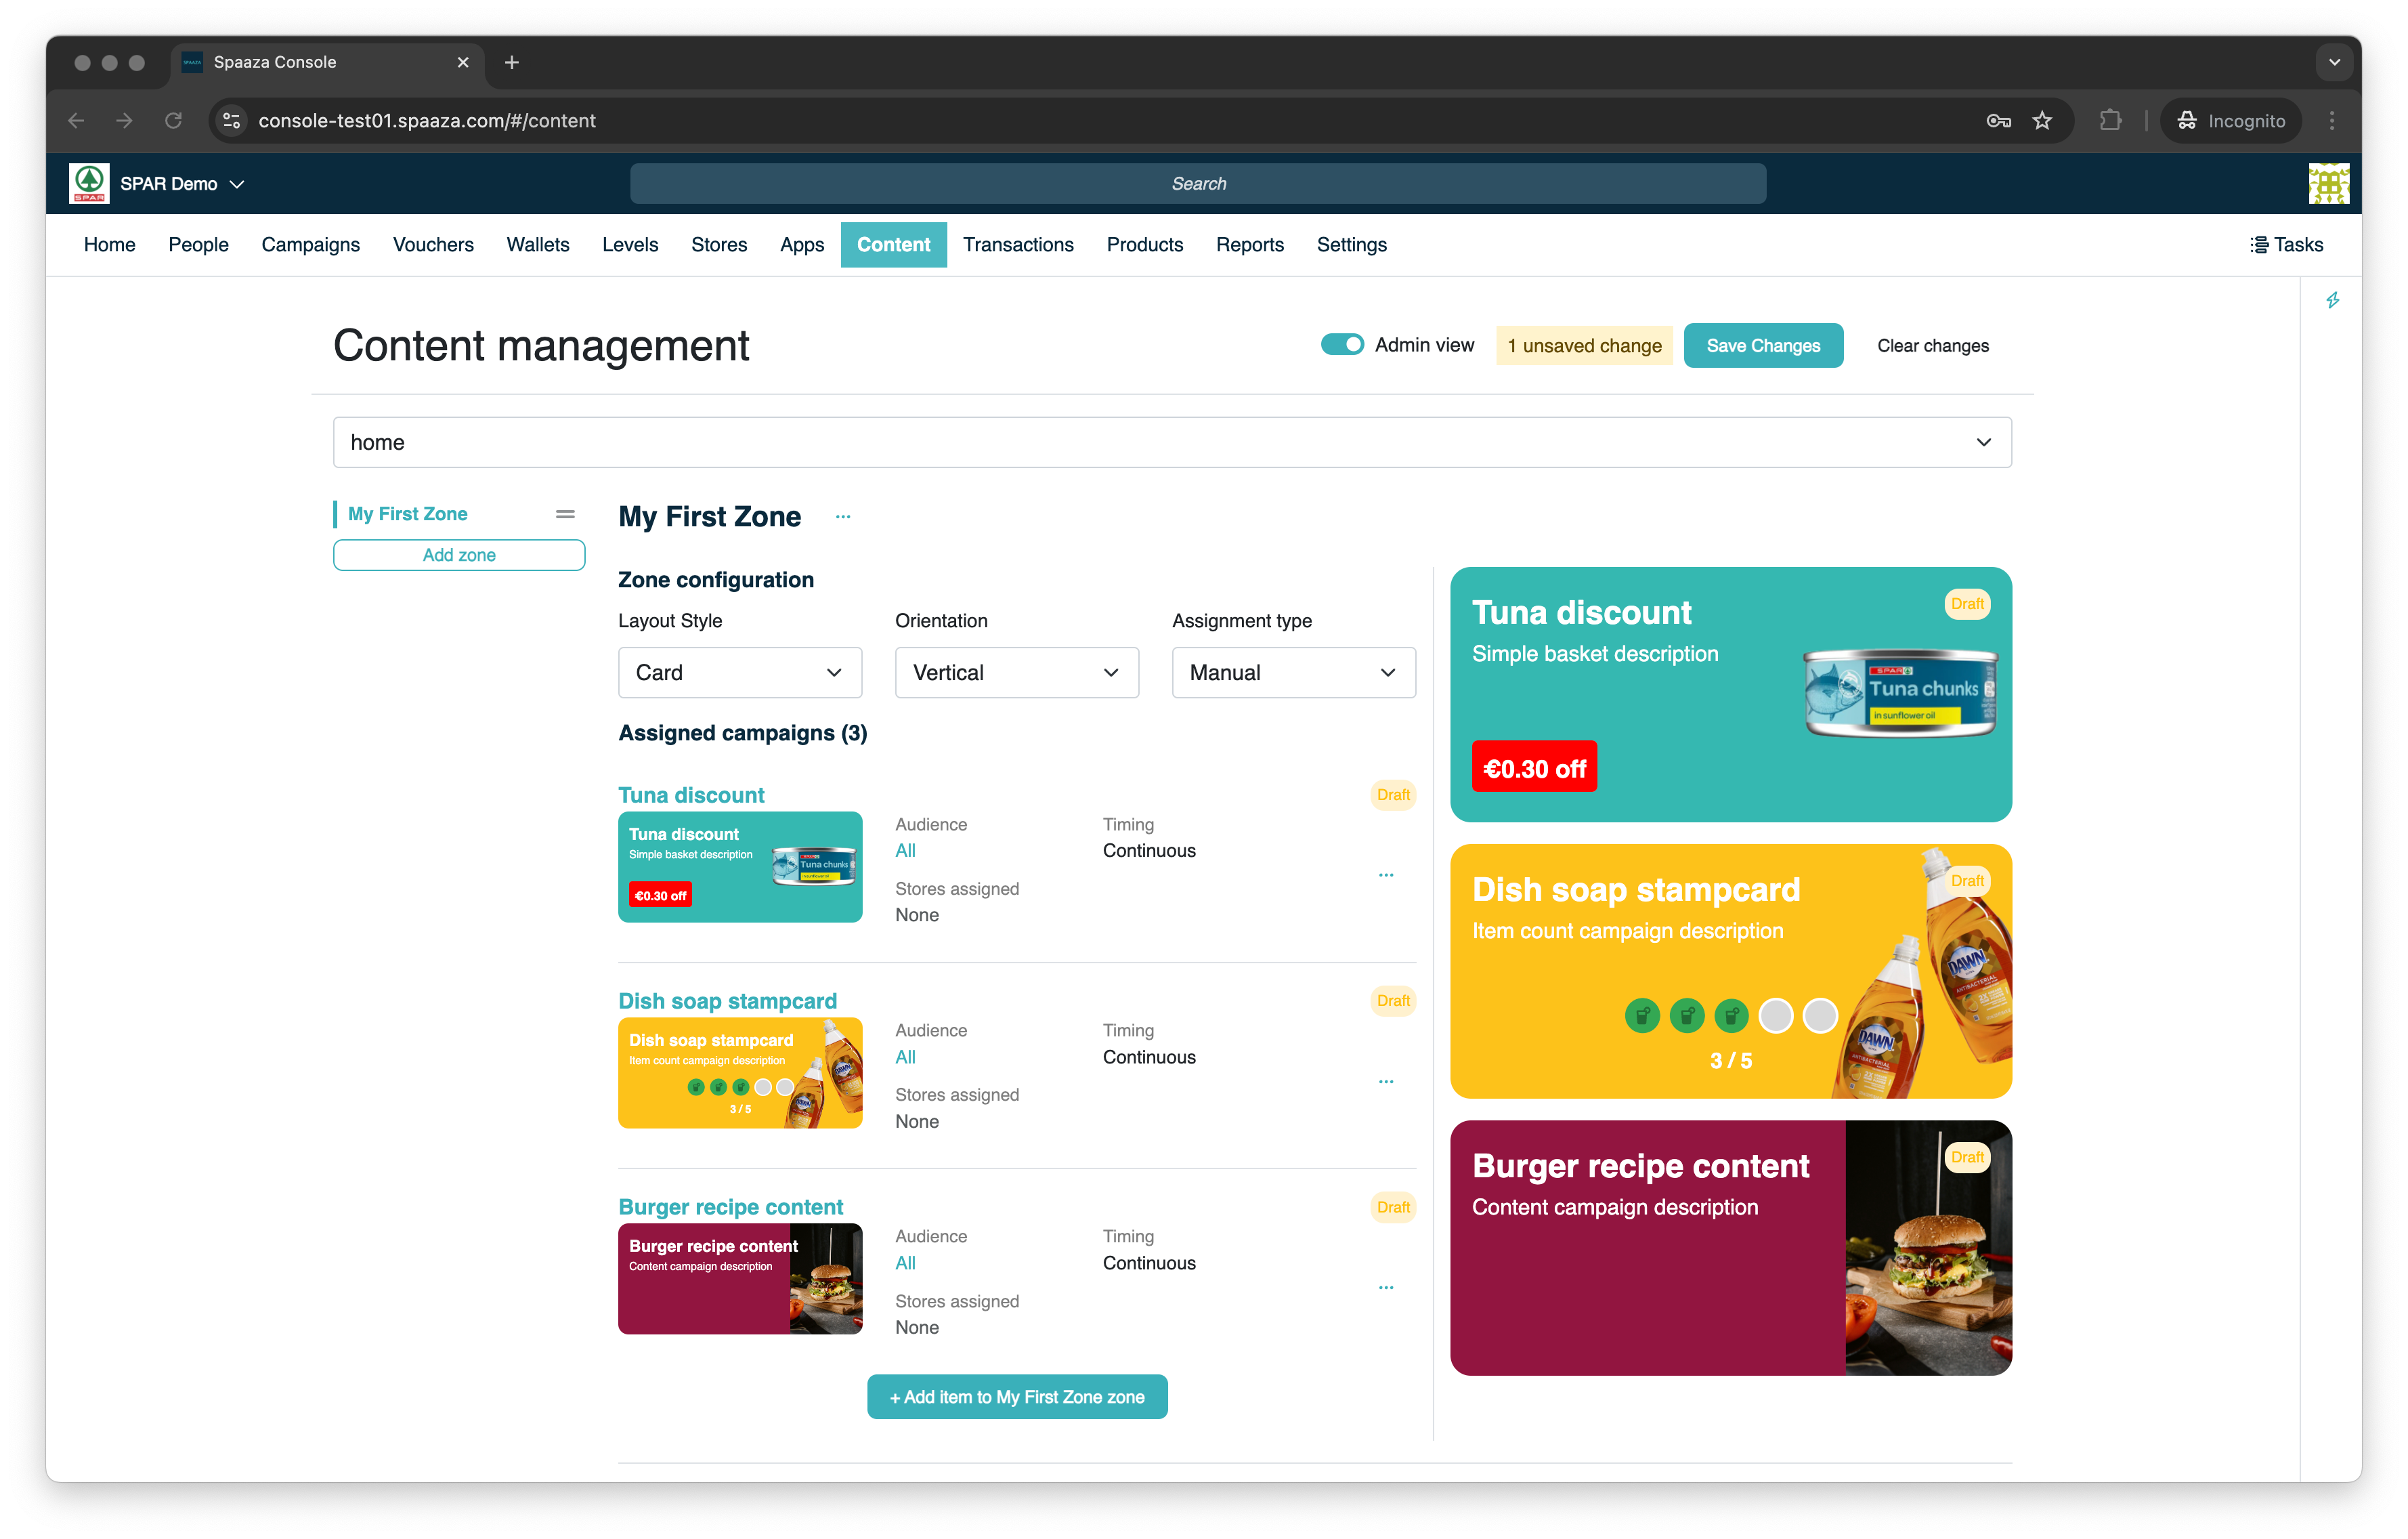
7. Click the "Publish all changes" button. Now your changes are published.
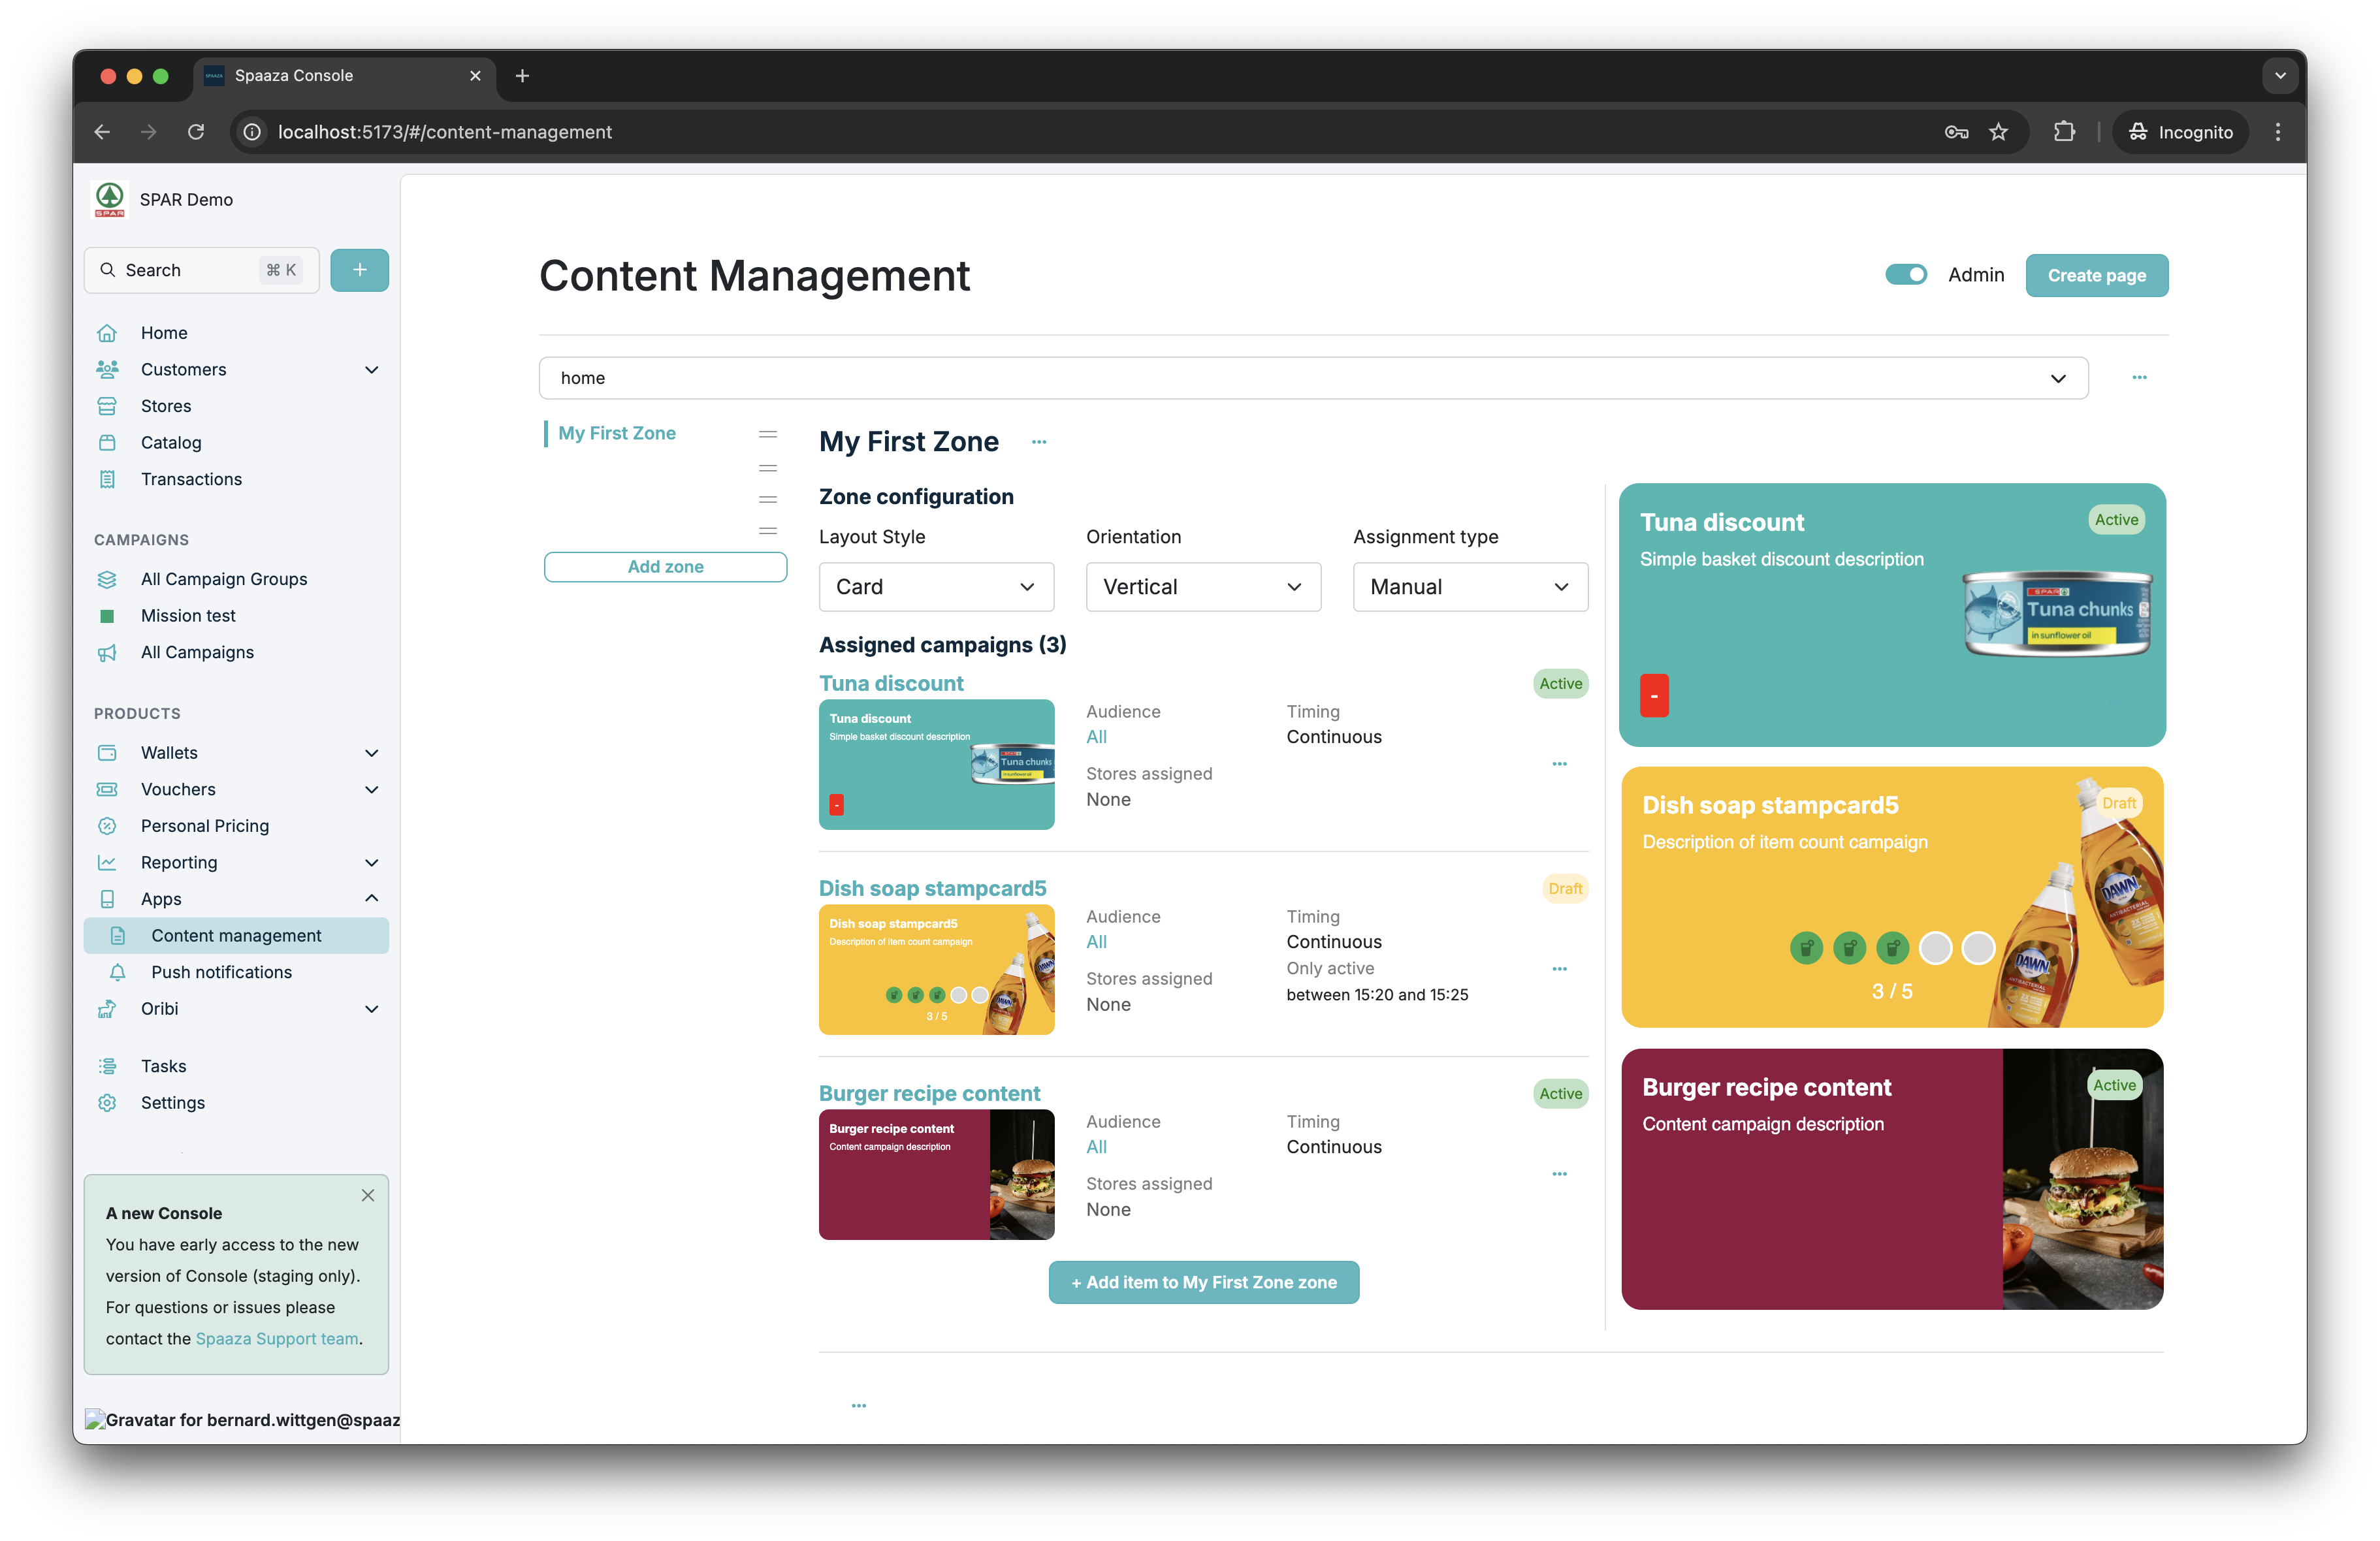
8. Refresh the corresponding screen to see the changes.
Mobile App
Use "pull down" to refresh the corresponding screen inside the app.
Embed Elements
Reload the page or call the controller's refresh method.
Setting up a voucher zone
A voucher zone shows each user their own vouchers, instead of campaigns you pick by hand. Set one up like this:
1. Click "Add Zone", and in the zone-type selector choose Voucher (instead of Campaign). Name the zone (or leave it blank).
2. In the zone configuration, pick a Filter type:
- None: shows all of the user's available (non-redeemed) vouchers.
- Redeemed: shows the user's redeemed vouchers (these display the redeemed date instead of an expiry).
- Issued by campaign: shows only vouchers issued by one campaign. Click Select campaign, pick a campaign in the modal, and confirm. Only campaigns that issue vouchers can be selected.
3. The right-hand preview shows example vouchers for the chosen filter (a voucher zone is personalized, so Console cannot show a real user's vouchers). The layout is fixed to Card.
4. Click "Publish all changes". Each user then sees their own matching vouchers in that zone.
Managing Unpublished Changes
When you add or modify Zones, Zone layout and Items, "x unpublished change(s)" will appear next to the "Publish all changes" button. This indicates the amount of unpublished changes you have open across all pages.
When saving your changes these will be published and end users will be able to see the one's that are targeted at them and are active.
Besides saving all changes you can also: "Clear all changes" across all pages. When you access the three dots ("...") when you have a certain page active you can click "Clear unpublished in x page", which will clear all change within that one specific page you have.
When you have open changes you can safely navigate other pages within Spaaza's website and return to those later on without being wary of loosing them. You are even able to retrieve them after you close the browser tab.
However, it is advised to save/publish your changes regularly. Unsaved changes to content of your pages is saved in local storage of the browser.
Styling Configuration
Styling is first determined by what is configured on the individual Campaign Edit Form (see Campaign fields). The settings below serve as fallback defaults when no styling has been set on the Campaign. A Campaign that uses a fallback colour shows the caption "Default ... colour active" in its form.
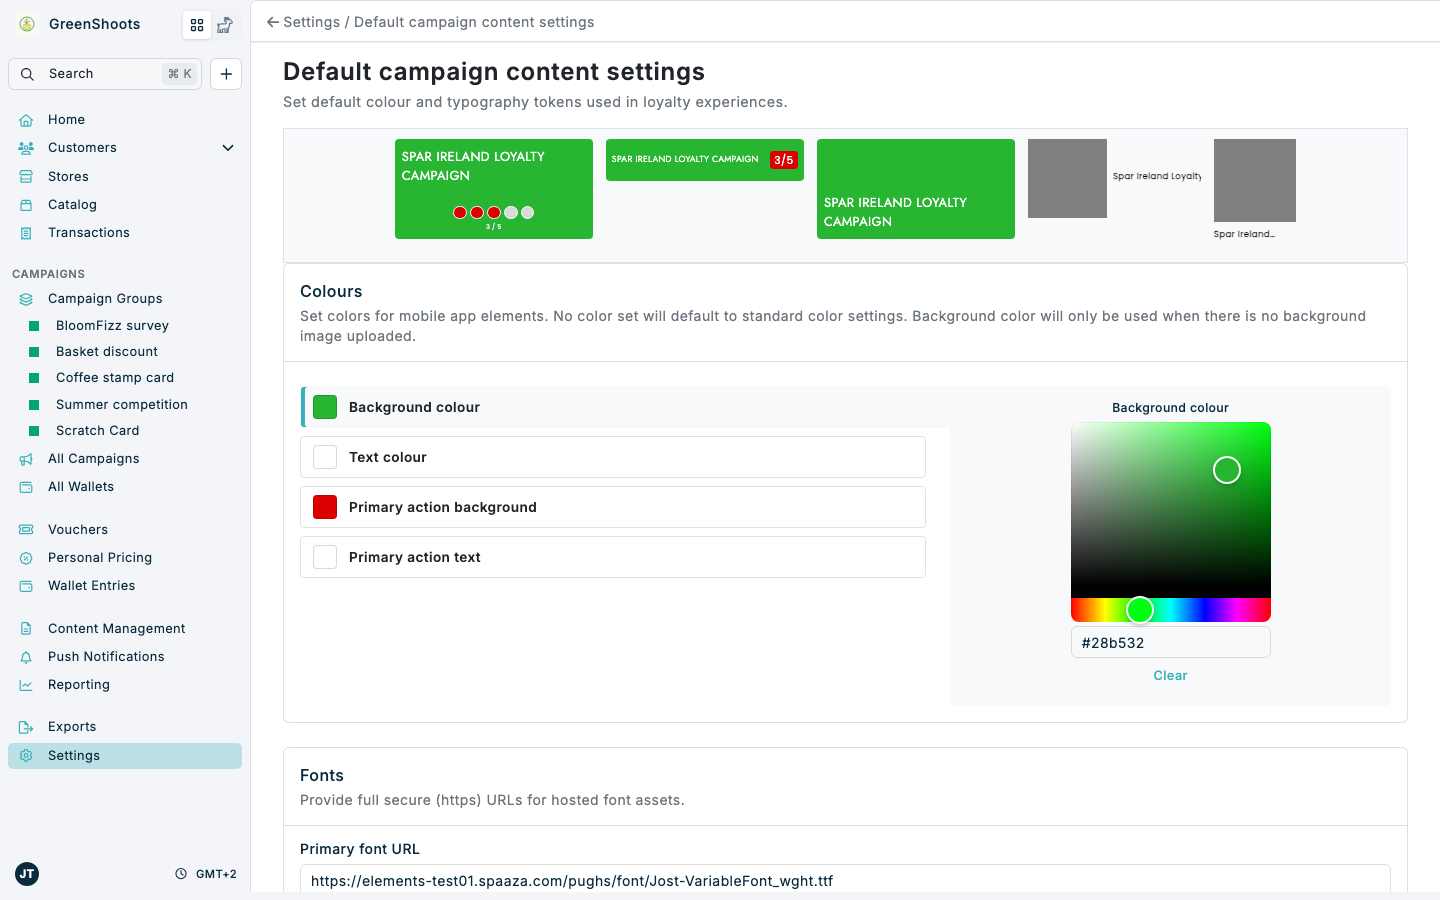
In the Spaaza Console's "Settings" tab in the main navigation, under "Configuration" and "Default campaign content settings", you can configure the default styling properties. The preview at the top of that page shows the current defaults on every Layout Type and updates as you edit.
The following default colours can be configured:
- Background colour: This is the colour that will be used as the background for any "Card" or "Card Small" Layout Type Item if no image and/or background image has been set in the Campaign/Voucher edit form. Voucher Cards use the same colour.
- Text colour: when set, this will change the text colour of title and description that appears on "Card", "Card Small", and "Banner" Layout Type Item's. The colour selection will evaluate to either black or white.
- Primary action background: This is the colour of the button or the label that some Content Items have (depending on the Campaign Type).
- Primary action text: when set, this will change the text colour of the button or the labels.
Default fonts can be configured through Primary font URL and Secondary font URL. Both need to be full secure (https) URLs to hosted font files. The primary font is used for titles, the secondary font for all other text.
Mobile App
Fonts need to be delivered as font files during the initial setup of the app. The font URL settings only change the preview in Console. See the Mobile App Onboarding section.
Embed Elements
Custom fonts need a one-time setup by your developers before they are shown on your website. They can find the details under Fonts in the Embed Elements developer documentation.
The "Member card images" card holds the "Image" and "Background image" of the member card.
Embed Elements
Member card images are only used by Embed Elements.
See Change default campaign content settings for the step-by-step instructions.
Default campaign content settings:
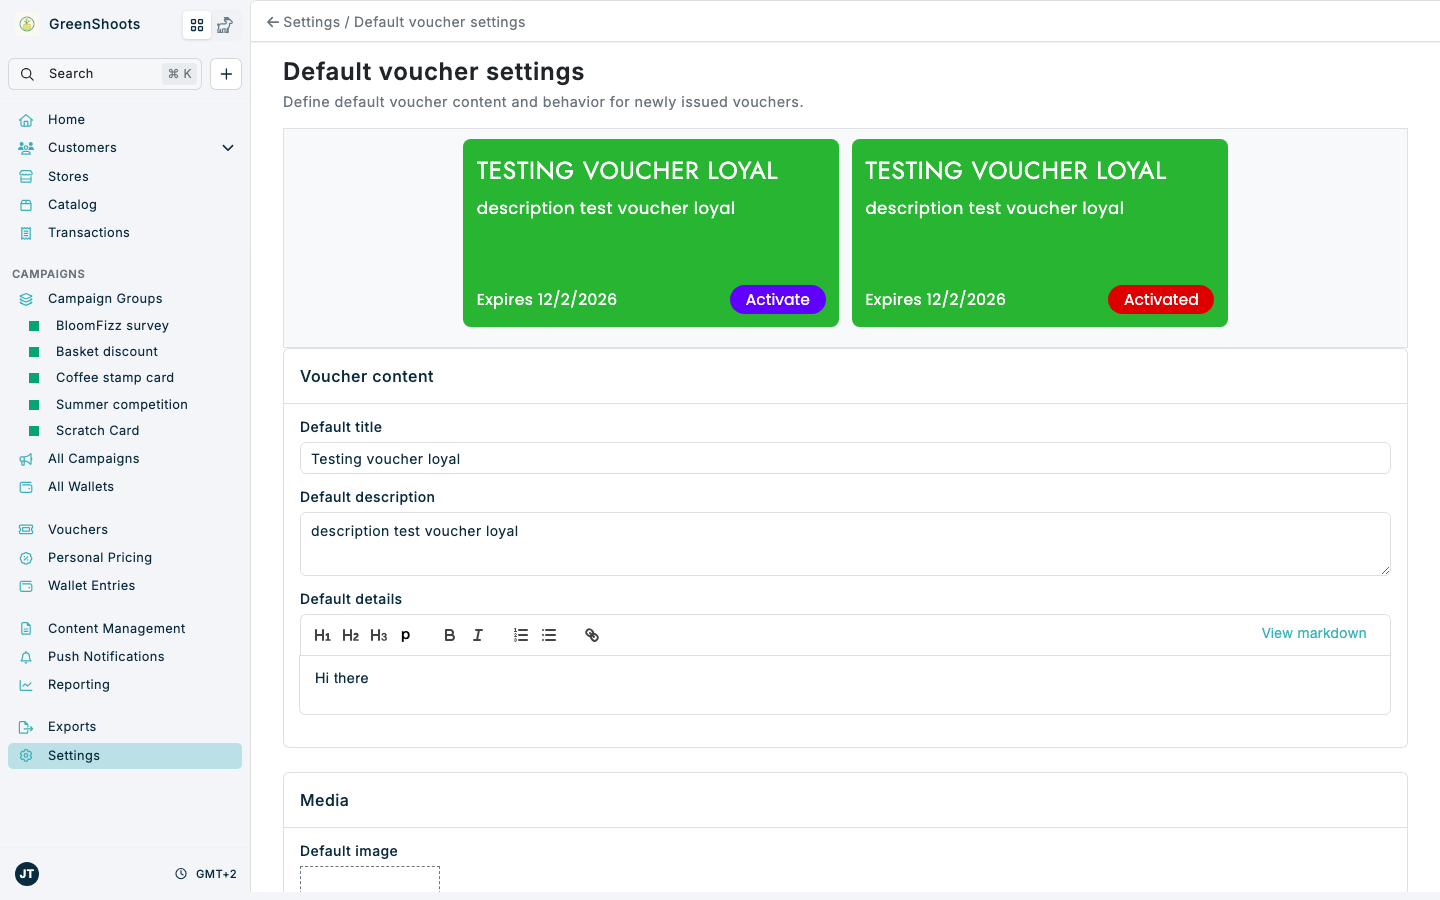
Under "Configuration" and "Default voucher settings" you will find the default styling of Voucher Cards. The preview at the top of that page shows the Voucher Card in its "Activate" and "Activated" states.
- Default image: You are able to configure the background image of vouchers per campaign. If you want to use one image for all your vouchers then you can set it here. Take note, a voucher background image set on a specific campaign will override this default voucher image fallback.
- Button colours: "Primary action background" and "Secondary action background" colour the "Activated" and "Activate" buttons of the Voucher Card. "Primary action background" is the same default as in "Default campaign content settings".
- Background colour: Read-only here. The Voucher background follows the campaign Background colour, so change it in "Default campaign content settings".
See Change default voucher settings for the step-by-step instructions.
Default voucher settings:
Mobile App
There is also styling that needs to be configured manually by a developer during the initial setup of the mobile app. See the Mobile App Onboarding section.
Embed Elements
Additional styling can be done via CSS custom properties. See the Embed Elements documentation.