Create and edit campaigns
Campaigns define targeting, qualification rules, rewards, and promotional content for your loyalty and incentive mechanics.
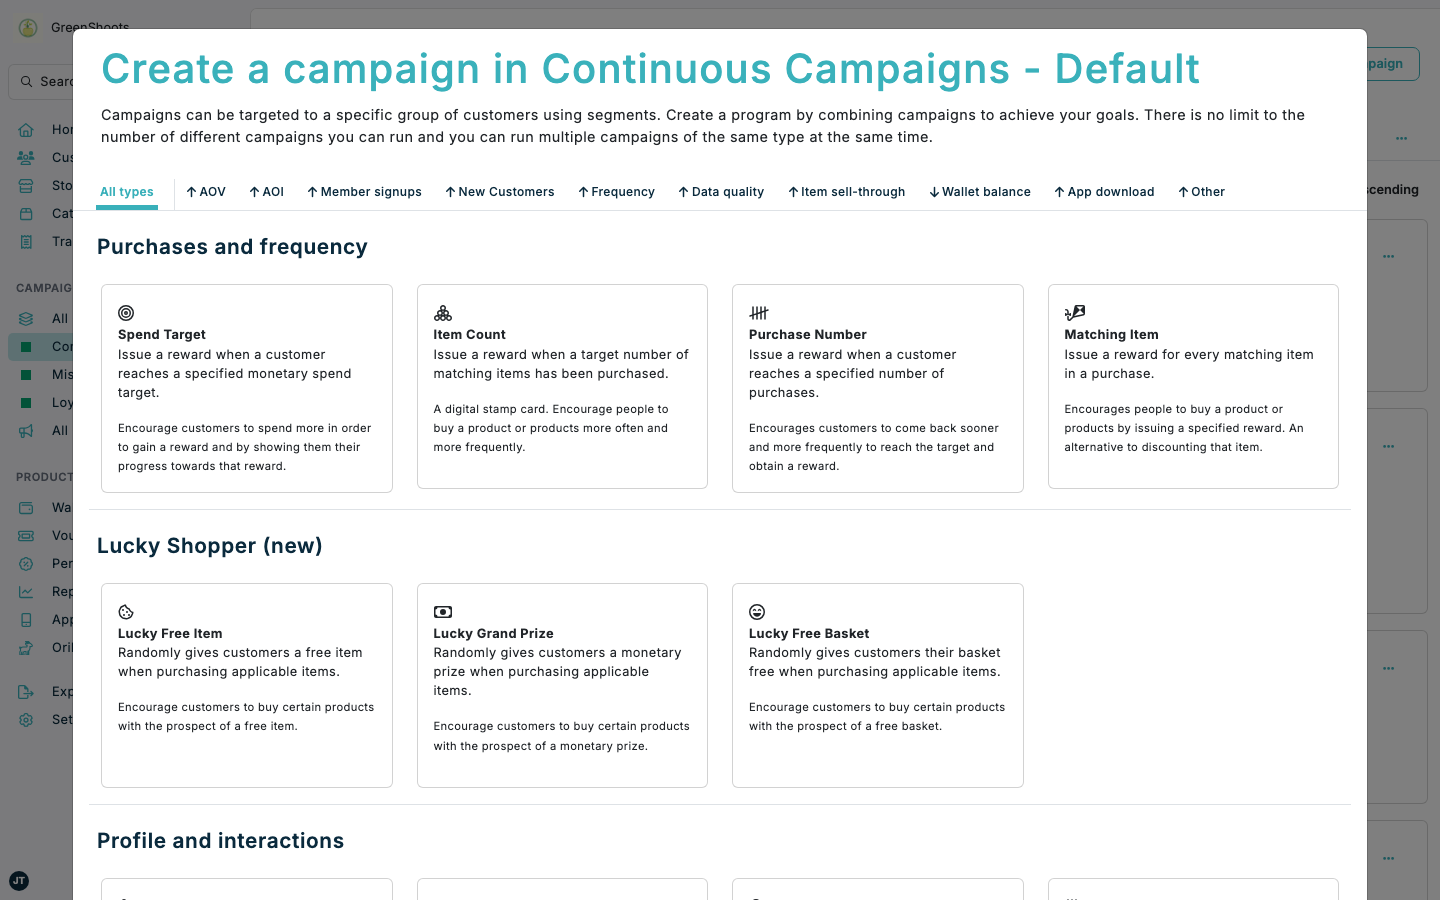
This guide covers the standard Reward campaign flow from a campaign group: choosing a type in Create a campaign, completing the campaign form, and reviewing the finished campaign in Overview.
Wallet-like mechanics use the separate Wallet flow. This includes Spend Target Wallet, which retains the qualification, target, recurrence, and reward settings of the former Spend Target campaign.
Expected result
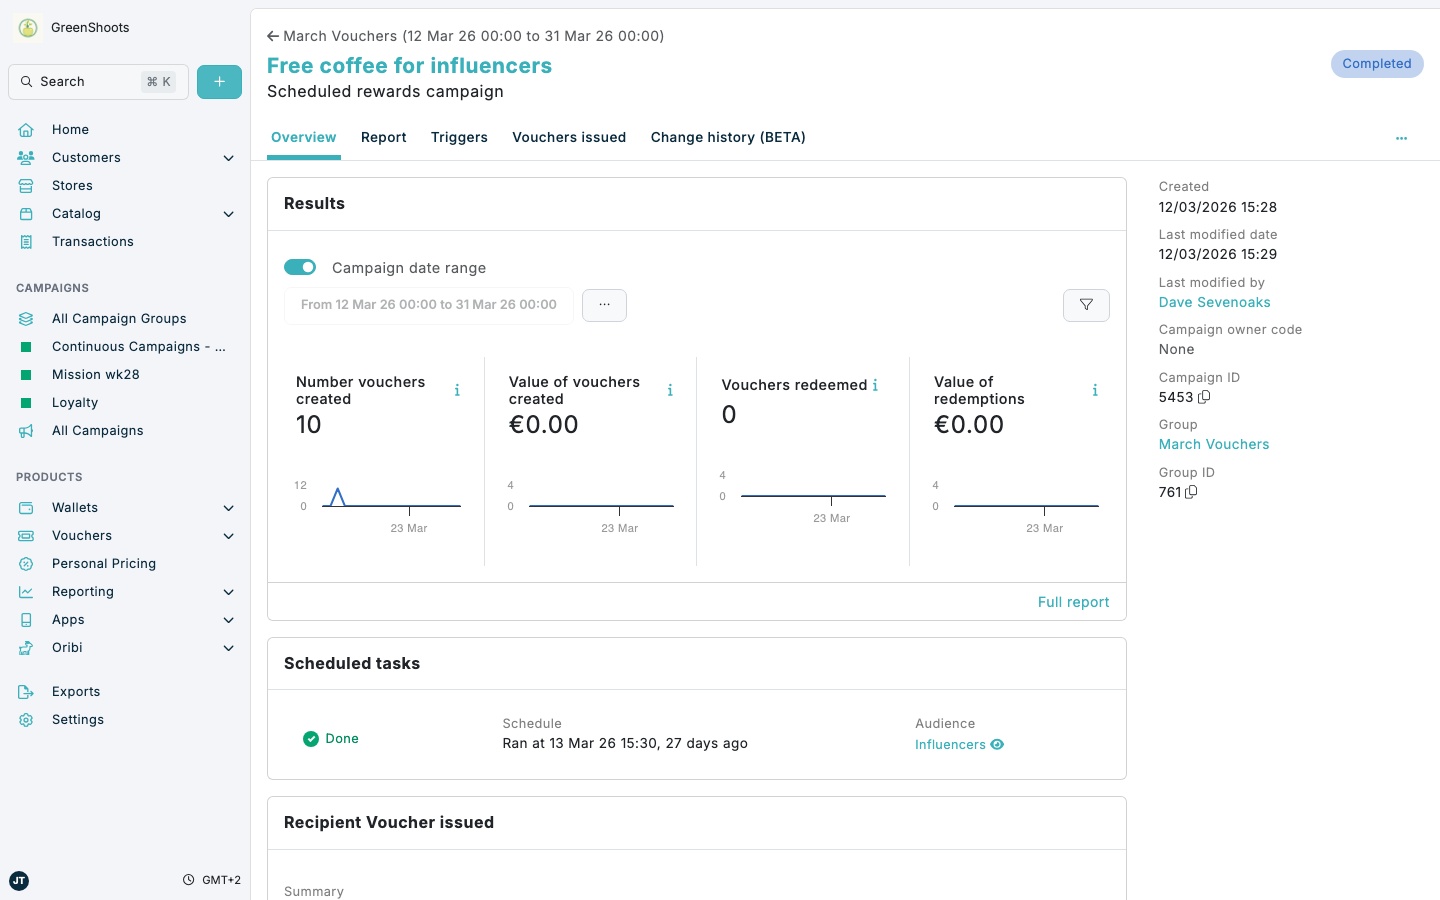
- The campaign opens with Overview visible in the campaign navigation.
- The Overview page shows campaign status, configuration, audience, and timing. Composable campaigns also show linked summaries for questions and reward methods, including the selected Rewards handling mode.
- The Overview page repeats the customer-facing content in a Promotional content card, with the same live previews you saw in the form. Campaigns that issue a voucher also show the voucher preview beside the reward fields in the Voucher issued card.
- Survey campaign cards use the Survey label and icon while retaining their composable campaign setup and reward methods.
- You can return to the campaign later, click Edit, and update the same configuration areas.
- You can leave the form with Cancel. Console asks for confirmation before discarding the form changes.
- You can use the campaign's Report page for campaign-specific performance, or open Reporting for broader loyalty programme reports.
Create a campaign in Console
- Open Campaign groups and open the group where you want the campaign to live.
- Click Add campaign.
- Select Reward.
- In Create a campaign, choose the campaign type you want to create.
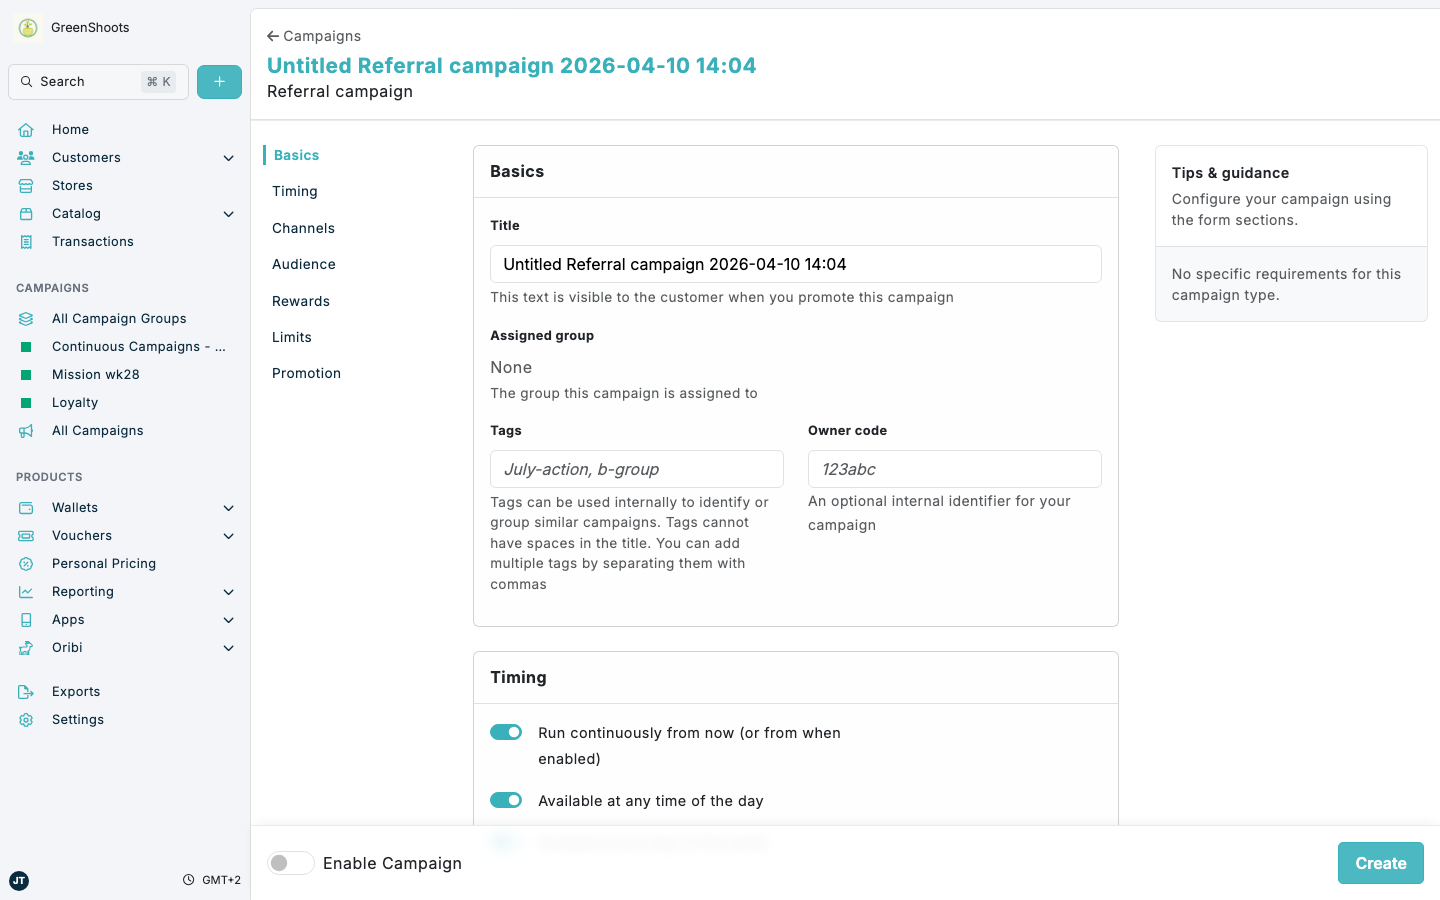
- Complete the form sections that apply to that type, such as Basics, Timing, Channels, Audience, Rewards, Limits, and Promotion.
- Turn on Enable Campaign when the configuration is ready to go live.
- Click Create.
Create a survey campaign
Survey campaigns are created from the same Create a campaign flow and use composable reward methods.
- Open the campaign group where the survey should live.
- Click Add campaign.
- Select Reward.
- In Create a campaign, choose Survey.
- In Survey, add the questions, answer types, and options customers should see. When there is more than one question, use the Questions (n) summary on Campaign to open the searchable question workspace and live preview. On desktop, scroll inside the phone-height sidebar preview to inspect longer surveys. You can also import survey questions from CSV.
- In Reward methods, add the reward issued after a customer completes the survey. Configure Rewards handling in the same section. When there is more than one reward, use the Reward methods (n) summary on Campaign to open the reward workspace.
- Turn on Enable Campaign when the survey and reward setup are ready.
- Click Create Campaign.
Issue wallet entries
Campaigns that issue wallet entries show a wallet selector in Rewards. Search by wallet title, filter by wallet type or status, and move through the result pages to choose the recipient.
The available recipient types depend on the reward:
- Wallet contribution can issue points, entries, or stamps.
- Credit contribution can issue monetary wallet credit.
An Item Count wallet records its entries as stamps. Stamp amounts can include decimals. Spend Target Wallet tracks monetary progress, but it is not available as a campaign recipient or usage-cost wallet yet; add or remove its entries from a customer's Wallet Entries page instead. For the complete setup flow and the current Composable Campaign limitations, see Issue wallet entries through campaigns.
Limit percentage discounts per basket
Some percentage-based rewards can be capped so a single basket cannot receive more than a fixed discount amount.
In Rewards issued, percentage vouchers use a Percentage discount greater than 0 and no more than 100. Enter 20 for 20%. See Issue vouchers through campaigns for the voucher settings.
- Create or edit a campaign that uses Percentage discount in Discount applied, or Percentage voucher in Rewards issued.
- Turn off No maximum discount amount.
- Enter the Maximum basket discount amount.
- Click Create or Save.
Leave No maximum discount amount turned on when the percentage discount should be uncapped.
Edit a campaign in Console
- Open the campaign you want to change.
- In campaign actions, click Edit.
- Update the relevant sections in the form.
- Click Save.
- Return to Overview to validate status, timing, and configuration. For composable campaigns, use View questions or View reward methods in the summary cards to inspect the full configuration in its campaign tab.
Cancel without saving
- Click Cancel beside Create, Save, Create Campaign, or Save Changes.
- Review the Cancel campaign changes? warning.
- Click Yes to discard the form changes and leave the form, or No to keep editing.
Choose how a composable reward calculates value
In a composable campaign, Value calculation determines whether Value is based on matched items, the whole basket, or a repeated fixed award. This choice can materially change the amount awarded.
- Create or edit a composable campaign and add or select a reward method.
- Enter the amount or rate in Value.
- Under Value calculation, select the option that matches the campaign intent.
- Check the result against realistic basket quantities before enabling the campaign.
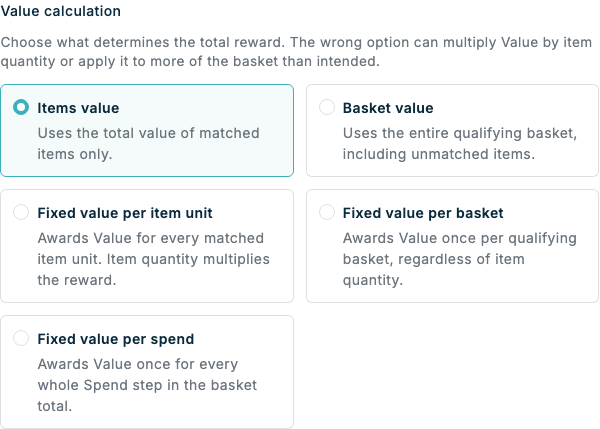
For wallet contributions, the fixed-value choices behave differently:
- Fixed value per item unit awards Value for every matched unit. A quantity of 21 awards 21 times Value.
- Fixed value per basket awards Value once for the qualifying basket, regardless of quantity.
- Fixed value per spend awards Value once for each whole Spend step in the basket total.
Use Items value when only matched item value should count, or Basket value when the whole qualifying basket should count. See Value calculation rules for formulas and examples.
Preview and edit promotional content
Promotional content holds the text, colours, images, and tap action customers see when the campaign is shown to them. A live Content preview shows the result of every change as you type. This section is only relevant when you use the Mobile App or Embed Elements to show campaigns to customers.
- Create or edit a campaign and open Promotion in the section list on the left.
- Review the Content preview. On a desktop screen it appears as a card on the right side of the form. On smaller screens it stays pinned below the campaign header while you scroll through the section. Click Hide or Show to collapse or expand the card.
- Under Campaign, enter a Description and, when needed, Detail page text. Label is only available for basket discount campaigns.
- Under Colours, click a colour role such as Background colour, Text colour, Primary action background, or Primary action text, then choose a colour in the picker beside the list. Click Clear to return a role to the default colour.
- Under Images, upload a Background image, an Image, and, for stamp campaigns, a Stamp image. The background colour is only used when no background image is uploaded.
- Under Action, choose what happens when a customer taps the item: Open detail page of campaign, Open website or hosted PDF, or Open internal page followed by the page name. See Item actions for the details per channel.
- If the campaign issues a voucher, scroll down to Vouchers and enter the Voucher description and Voucher detail page text, and upload a voucher Background image when the default voucher image should not be used.
- Click Create or Save.
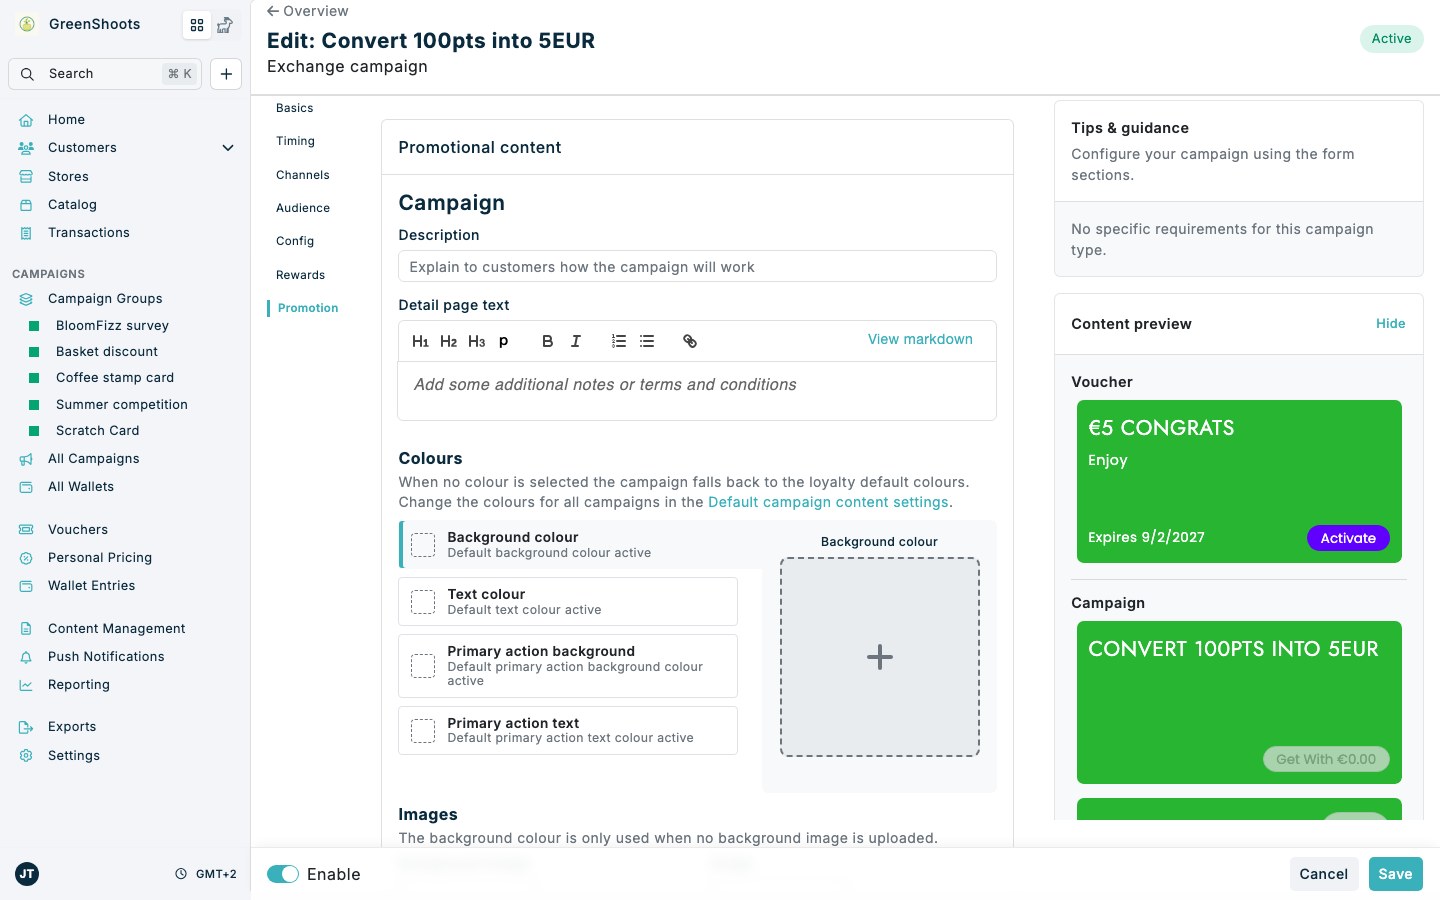
A few rules help you read the section:
- A caption such as Default background colour active means the role has no campaign-specific colour and uses the value from Default campaign content settings. Overridden by background image means the colour is not shown because an image covers it.
- The Content preview shows every layout type customers can see. Campaigns that issue a voucher show the voucher card first, followed by the campaign layouts. Hover over a preview to see its layout name.
- The voucher title is entered in Rewards. For monetary vouchers the value is placed in front of the title automatically, so a title of
Birthday treatwith a value of 5 is shown as €5 Birthday treat. Do not type the value into the title yourself. - Composable campaigns configure customer-facing voucher content per reward method, so Promotional content has no Vouchers part for them. Referral campaigns keep the voucher content for each side in Rewards.
- The Vouchers background colour follows the campaign Background colour. Change the fallback image for all vouchers in Default voucher settings.
More information about how campaigns are displayed as Content Items, such as Layout Types, the Item Detail Page and the Campaign fields, is found in the Content management section of this documentation.
If something looks different
- If you do not see Create a campaign, make sure you opened Add campaign and selected Reward. Other options such as Schedule rewards, Wallet, and Content open their own flows.
- If the footer button says Create Campaign or Save Changes, you are working with a composable campaign rather than the standard reward form.
- If you do not see Survey under Filter by Type, select Composable to include survey campaigns alongside other composable campaigns.
- If you are creating a Survey campaign, complete the required question text and choice options before saving.
- If Create or Save is unavailable, review the activation hints on the right side of the form and complete any required sections before enabling the campaign.
- If you do not see a Vouchers part in Promotional content, the campaign does not issue a voucher, or it is a composable or referral campaign that configures voucher content in Rewards.
- If a colour role shows Default ... colour active, the campaign uses the account default. Pick a colour in the picker to override it for this campaign only.